How to Use Hatteker Beard Trimmer?

To use the Hatteker Beard Trimmer, first, adjust the desired cutting length using the trimmer’s adjustable guide comb. Then, turn on the trimmer and run it gently along your beard, moving against the direction of hair growth for an even trim.
Having a well-groomed beard enhances your overall appearance and boosts your confidence. If you’re looking for a versatile and user-friendly beard trimmer, the Hatteker Beard Trimmer is a great option. With its adjustable guide comb and sharp blades, you can easily achieve your desired length and style.
Its cordless design allows for maximum flexibility and convenience during use. Whether you’re a seasoned beard enthusiast or just starting your grooming journey, the Hatteker Beard Trimmer is a reliable tool that will keep your facial hair looking neat and stylish.
Factors To Consider When Selecting A Hatteker Beard Trimmer
Factors to Consider when Selecting a Hatteker Beard Trimmer
Choosing the right beard trimmer can make a world of difference when it comes to maintaining your grooming routine. With the Hatteker brand known for its quality and durability, their range of beard trimmers is a popular choice among men. If you’re in the market for a Hatteker Beard Trimmer, it’s important to consider a few key factors to ensure you make the right choice that suits your needs. Let’s explore the factors that you should consider when selecting a Hatteker Beard Trimmer:
Price Range
When it comes to purchasing a beard trimmer, your budget plays a significant role. Hatteker offers a range of models that cater to different price points. Whether you’re on a tight budget or willing to invest in a higher-end trimmer, Hatteker has options to suit all needs. It’s important to consider the features and capabilities you require and find a model that fits within your price range.
Blade Quality
The quality of the blades is an important factor to consider when selecting a Hatteker Beard Trimmer. The blades should be sharp and made from high-quality materials to ensure a precise and smooth trimming experience. Hatteker Beard Trimmers are known for their durable stainless steel blades that deliver sharp and efficient performance. Quality blades not only provide a comfortable trimming experience but also ensure longevity and that you get the desired results every time you use the trimmer.
Corded or Cordless
Deciding between a corded or cordless trimmer depends on your personal preference and usage requirements. Corded trimmers provide constant power and are suitable for those who prefer uninterrupted trimming sessions. On the other hand, cordless trimmers offer more flexibility and freedom of movement. Hatteker offers both corded and cordless options, allowing you to choose the one that best suits your needs and lifestyle.
Battery Life
If you opt for a cordless Hatteker Beard Trimmer, considering the battery life is essential. Nobody wants their trimmer to die in the midst of a grooming session. Hatteker Beard Trimmers are equipped with long-lasting lithium-ion batteries that provide extended usage time on a single charge. Depending on your trimming needs and frequency, choose a model that offers sufficient battery life to ensure convenience and uninterrupted trimming sessions.
Adjustable Settings
Having adjustable settings on your beard trimmer gives you the flexibility to customize your grooming experience. Hatteker Beard Trimmers come with various adjustable settings such as length settings, comb attachments, and precision trimming options. These features allow you to achieve your desired beard length and style with ease. Whether you prefer a clean shave or a well-groomed beard, adjustable settings ensure that your Hatteker Beard Trimmer caters to your specific trimming requirements.
Washing And Drying Your Beard
Properly washing and drying your beard is essential for maintaining its health and appearance. In this section, we will discuss the steps to choose the right beard shampoo, properly rinse your beard, and thoroughly dry it.
Choosing the Right Beard Shampoo
To start off, it’s crucial to select a beard shampoo that suits your needs. Regular shampoos may contain harsh chemicals that can strip away the natural oils from your beard, leading to dryness and brittleness. Look for shampoos specifically formulated for beards, as they are designed to cleanse without causing any harm.
When choosing a beard shampoo, consider factors such as your skin type, beard length, and any specific concerns you may have, such as dandruff or itchiness. Opt for natural and organic ingredients whenever possible, as they are gentle on your beard and skin.
Properly Rinsing Your Beard
After applying the beard shampoo, it’s essential to rinse your beard thoroughly to remove any residue. Leaving shampoo residue on your beard can lead to buildup and irritation. Follow these steps to ensure proper rinsing:
- Thoroughly wet your beard with lukewarm water.
- Apply a generous amount of water to your beard shampoo, working it into a lather.
- Massage the lather into your beard, ensuring it reaches the roots.
- Rinse your beard thoroughly under running water, making sure there is no shampoo left.
Drying Your Beard Thoroughly
Once you have rinsed your beard, it’s important to dry it thoroughly. Leaving your beard damp can contribute to bacterial growth and unpleasant odors. Follow these steps to ensure proper drying:
- Gently pat your beard with a clean towel to remove excess water. Avoid rubbing vigorously, as it can lead to frizz and breakage.
- If you have a longer beard, consider using a beard comb or brush to help remove any tangles and facilitate drying.
- Avoid using a hairdryer on high heat, as it can cause damage to your beard. Instead, opt for low heat or air-drying.
- Allow your beard to air-dry completely before applying any products or styling.
By following these steps to wash and dry your beard properly, you can maintain its cleanliness, health, and overall appearance. Remember to choose the right beard shampoo, rinse thoroughly, and dry diligently to achieve a well-groomed beard.
Combing And Detangling Your Beard
Combing and detangling your beard is an essential step in maintaining a neat and orderly look. It helps remove any knots and tangles that may have formed, leaving your beard looking smooth and well-groomed. In this section, we will explore two important techniques to ensure your beard is always in top shape: using a wide-toothed comb and removing knots and tangles gently.
Using a wide-toothed comb
When it comes to combing your beard, using the right tool is key. A wide-toothed comb is ideal as it allows you to detangle your beard without causing any damage or discomfort. The wide gaps between the teeth prevent hair breakage and minimize pulling, making it a gentle option for your beard.
To effectively use a wide-toothed comb, follow these steps:
- Start by combing your beard in the direction it naturally grows. This helps prevent unnecessary strain on the hair follicles and reduces the risk of breakage.
- Hold the comb with a firm grip and begin combing from the roots to the ends in smooth, even strokes. Be sure to cover all areas of your beard.
- Repeat these combing motions until your beard is free from any knots or tangles. Take your time and be patient, as rushing through this process may lead to more snags and discomfort.
Removing knots and tangles gently
When you encounter knots or tangles in your beard, it’s important to handle them with care to avoid any unnecessary pulling or hair breakage. Here’s how you can remove knots and tangles gently:
- Start by identifying the areas with knots or tangles in your beard. It may help to use a mirror or run your fingers through your beard to locate them.
- Take a small amount of beard oil or conditioner and apply it to the tangled area. This will help soften the hair and make it easier to detangle.
- Gently work through the knot or tangle using your fingers or a wide-toothed comb. Start at the ends and slowly work your way up, delicately separating the hair strands.
- If you encounter a particularly stubborn knot, resist the urge to pull or yank it out forcefully. Instead, continue to work through it patiently until it loosens or dissolves.
Remember, it’s crucial to be gentle when dealing with knots and tangles in your beard. Rushing or being too harsh can lead to hair breakage and discomfort. Take your time, use the right tools, and practice patience to keep your beard looking its best.

Credit: www.amazon.com
Trimming Your Beard Length
Trimming your beard length is an essential skill to master when it comes to maintaining your facial hair. Whether you prefer a shorter, well-groomed beard or a longer, more rugged look, the Hatteker Beard Trimmer is designed to help you achieve the perfect length every time. In this article, we will guide you through the process of adjusting the trimming length and trimming your beard evenly with this versatile grooming tool.
Adjusting the trimming length
One of the first steps to trimming your beard length is selecting the right trimming setting on your Hatteker Beard Trimmer. This allows you to achieve your desired length without having to worry about cutting your beard too short. The trimmer is equipped with an adjustable dial or comb attachments that can be easily adjusted to varying lengths.
To adjust the trimming length, turn the adjustable dial or attach the comb guide to the trimmer. The dial usually has numbers or length indications, indicating the millimeters of the cutting length, while the comb guides are usually color-coded to represent different lengths. Choose the setting that suits your desired beard length and lock it in place.
For a shorter beard, use a lower setting on the dial or attach the comb guide with a smaller length indication. Conversely, for a longer beard, select a higher setting or a comb guide with a larger length indication. Remember, it’s always better to start with a longer setting and gradually trim more if needed, rather than trimming too much off at once.
Trimming the beard evenly
Once you have adjusted the trimming length, it’s time to start trimming your beard evenly. Start by combing through your beard to remove any tangles or knots and ensure that the hair is evenly distributed. This will make it easier to trim and achieve a more even appearance.
Hold the Hatteker Beard Trimmer at a slight angle against your face and move it in the direction of your hair growth. Trim small sections at a time, working your way around your face and neck. Be sure to use steady, controlled movements to avoid any accidental slips or uneven cuts.
If you are going for a specific beard style, such as a goatee or sideburns, use a precision trimmer or the trimmer’s detail attachment to clean up the edges. This will help you achieve sharp, well-defined lines.
After each trimming session, comb through your beard again to check for any uneven patches or longer hairs that may need additional trimming. Taking the time to do a thorough inspection ensures a more polished final result.
Remember, practice makes perfect when it comes to trimming your beard length. Take your time and experiment with different settings and techniques until you find what works best for you. With the Hatteker Beard Trimmer as your trusty grooming companion, you’ll have all the tools you need to maintain your beard at the perfect length.
Shaping Your Beard And Neckline
Shaping your beard and neckline is an essential step in achieving a well-groomed and polished look. A well-defined neckline can make all the difference in enhancing the overall appearance of your beard. In this section, we will guide you on how to use the Hatteker Beard Trimmer to shape your beard and refine your neckline to perfection.
Defining the neckline
Defining your neckline is the first step towards creating a sharp and clean beard line. A properly defined neckline not only adds structure to your beard but also gives the illusion of a more chiseled jawline. To define your neckline with the Hatteker Beard Trimmer, follow these simple steps:
- Find the natural neckline: Locate your natural neckline by placing two fingers above your Adam’s apple. This will serve as the starting point for shaping your beard.
- Trim below the line: Using the trimmer’s adjustable guard or precision dial, trim the hair below the natural neckline. Ensure that you move the trimmer in an upward motion, following the direction of your hair growth.
Creating a neat and symmetrical neckline will instantly elevate the overall look of your beard. Remember to check both sides of your neck in the mirror to ensure that the neckline is uniform.
Using the trimmer to shape your beard
Once you have defined your neckline, it’s time to move on to shaping your beard. The Hatteker Beard Trimmer offers various cutting lengths and attachments that allow for precise shaping. Follow these steps to shape your beard effectively:
- Select the appropriate cutting length: Depending on the desired length of your beard, attach the corresponding comb guide or adjust the trimmer’s length settings accordingly.
- Trim the beard evenly: Begin trimming your beard starting from your sideburns and working downwards in the direction of your hair growth. Use slow and deliberate strokes, allowing the trimmer to do the work for you. Always go against the grain for a more consistent and even trim.
- Define the cheek line: To achieve a well-defined cheek line, gently angle the trimmer at the desired height and trim any stray or overgrown hairs above the cheek line. A straight-edged comb can be useful as a guide to ensure a straight and symmetrical line.
Remember to take your time and make small adjustments as necessary to achieve the desired shape. Regularly check your progress in the mirror and make sure both sides of your beard are symmetrical.
By following these simple steps and utilizing the capabilities of your Hatteker Beard Trimmer, you can effortlessly shape your beard and neckline like a professional barber. Take pride in your well-groomed appearance and rock that stylish beard with confidence!
Detailing Your Mustache And Sideburns
One of the key aspects of a well-groomed beard is the attention to detail given to the mustache and sideburns. Properly trimming and shaping these areas can define your overall look and add a touch of sophistication to your style. In this section, we will guide you on how to use the Hatteker Beard Trimmer to detail your mustache and sideburns with precision.
Trimming the mustache
When it comes to trimming your mustache, it’s important to find the right balance. You don’t want it to be too long that it covers your lips, but you also don’t want it to be too short that it looks unnatural. Follow these steps to trim your mustache effectively:
- Brush your mustache to ensure that all the hairs are in place.
- Decide on the desired length and adjust the attachment or guide comb on your Hatteker Beard Trimmer accordingly.
- Hold the trimmer at a slight angle and start trimming from the center of your mustache, moving outward toward the corners of your mouth.
- Use short, controlled strokes to achieve an even trim.
- Regularly check your progress in the mirror to ensure you are achieving the desired length.
Shaping the sideburns
Your sideburns can greatly enhance your facial features and complement your hairstyle. Follow these steps to shape your sideburns neatly:
- Decide on the desired length and adjust the attachment or guide comb on your Hatteker Beard Trimmer accordingly.
- Start by trimming the top portion of your sideburns, where they meet your hairline, to create a clean and defined shape.
- Next, move downward, trimming the rest of your sideburns while ensuring that both sides are symmetrical.
- If you prefer a fade or tapered look, adjust the trimmer to a shorter length as you approach the bottom of your sideburns.
- Regularly check your progress in the mirror to achieve an even and well-groomed appearance.
By following these steps and using the Hatteker Beard Trimmer, you can effortlessly detail your mustache and sideburns to achieve a polished and refined look. Remember to practice patience and precision, and always take your time to achieve the best results. Now, let’s move on to the next section to explore more styling possibilities.
Removing And Cleaning The Blades
One of the essential maintenance tasks for your Hatteker beard trimmer is removing and cleaning the blades. Regularly cleaning the blades not only helps to keep them sharp and efficient but also helps to prevent any build-up of dirt, hair, or oil that can affect the performance of your trimmer. In this section, we will guide you through the process of detaching the blades and properly cleaning them, ensuring your Hatteker beard trimmer remains in top-notch condition.
Detaching the blades
To begin the cleaning process, you will first need to detach the blades from your Hatteker trimmer. Follow these simple steps to remove the blades:
- Ensure that the trimmer is turned off and unplugged from the power source.
- Hold the trimmer firmly in one hand and locate the release button or switch near the blades.
- Press the release button or switch and carefully lift off the blade assembly from the trimmer body.
- Place the detached blades on a clean and dry surface, ready for cleaning.
Properly cleaning the blades
Now that you have successfully detached the blades, it’s time to clean them thoroughly. Follow these steps to ensure proper cleaning:
- Gently brush away any loose hairs or debris from the blades using a cleaning brush or a soft cloth.
- Next, rinse the blades under warm running water to remove any remaining hair or residue.
- If there is any stubborn residue or buildup, you can use a mild detergent or cleaning solution specifically designed for trimmer blades. Apply it to the blades and carefully scrub with a soft brush.
- Once the blades are clean, rinse them again under running water to remove any cleaning residue.
- After rinsing, dry the blades thoroughly with a clean, lint-free cloth or allow them to air dry completely.
- Once the blades are completely dry, reattach them to your Hatteker trimmer by aligning the blade assembly with the trimmer body and firmly pressing it into place until you hear a click.
Remember, it’s important to regularly clean and maintain your Hatteker beard trimmer to ensure optimal performance and longevity. By following these simple steps to remove and clean the blades, you can keep your trimmer in top-notch condition, ready to deliver precise and effective grooming results.
Lubricating The Blades
Lubricating the blades of your Hatteker Beard Trimmer is an important step in maintaining its performance and ensuring a smooth trimming experience. Over time, the blades can become dry and start to rust, which can affect their cutting ability. Properly lubricating the blades not only helps to prevent rust but also extends the lifespan of your trimmer.
Applying lubricant to the blades
To keep your Hatteker Beard Trimmer running smoothly, it’s essential to apply lubricant to the blades. Follow these simple steps to ensure a well-lubricated trimmer:
- Clean the blades: Before applying any lubricant, make sure the blades are clean and free from any debris or hair clippings. This ensures that the lubricant can penetrate and protect the blades effectively.
- Apply a few drops of lubricating oil: Take a high-quality lubricating oil that is specifically formulated for trimmers and apply a few drops directly onto the blades. Make sure to distribute the oil evenly across the entire length of the cutting blades.
- Turn on the trimmer: After applying the lubricating oil, turn on the trimmer for a few seconds to distribute the oil further into the blades.
- Wipe off the excess oil: Use a soft cloth or tissue to wipe off any excess oil from the blades. Leaving too much oil on the blades can attract dust and debris, which may affect the cutting performance.
By following these steps, you can ensure that your Hatteker Beard Trimmer is properly lubricated, which helps to reduce friction between the blades and maintain their sharpness for a longer period.
Preventing rust and maintaining performance
Lubricating the blades plays a crucial role in preventing rust and maintaining the performance of your Hatteker Beard Trimmer. The lubricating oil creates a protective barrier on the blades, preventing moisture from causing rust and corrosion.
Regularly lubricating your trimmer will not only protect the blades but also ensure smooth and efficient trimming. The lubricant reduces friction between the blades, allowing them to glide effortlessly through your facial hair, delivering precise and even results.
In addition to lubricating the blades, it’s important to clean the trimmer after each use and store it in a dry place. This further helps to prevent rust and extends the life of your trimmer.
Remember, a well-maintained Hatteker Beard Trimmer will not only provide superior performance but also keep your facial hair game on point. So, don’t forget to include lubricating the blades as part of your regular grooming routine!
Storing Your Hatteker Beard Trimmer
Properly storing your Hatteker Beard Trimmer is essential to ensure its longevity and optimal performance. By following these simple guidelines, you can protect your trimmer from damage caused by dust and moisture, ensuring it stays in top condition for years to come.
Keeping the trimmer in a dry place
One of the most crucial steps in storing your Hatteker Beard Trimmer is to keep it in a dry location. Excessive exposure to moisture can lead to rusting and damage to the trimmer’s internal components. To avoid this, make sure you store your trimmer in a dry area, away from bathrooms, sinks, and any other areas prone to high humidity.
Protecting it from dust and moisture
Aside from moisture, dust and dirt can also harm your Hatteker Beard Trimmer. These particles can accumulate in the trimmer’s blades and motors, affecting its performance and lifespan. To keep your trimmer dust-free, always make sure to store it in a protective case or use the original packaging it came in. These will shield the trimmer from dust and moisture, ensuring it remains in pristine condition.
If you don’t have the original packaging or a protective case, you can consider using a clean and dry cloth to cover the trimmer when not in use. This simple step can go a long way in preventing dust and dirt from settling on the delicate parts of the trimmer.
It is important to clean your trimmer after each use to remove any accumulated beard hair or residue. Use a small brush or the cleaning tools provided to carefully remove any debris. Once clean, make sure the trimmer is thoroughly dry before storing it to prevent moisture buildup.
Trimmer Not Turning On
Having trouble with your Hatteker Beard Trimmer not turning on? It can be frustrating, especially when you’re in need of a quick trim. But don’t worry, we’re here to help you troubleshoot and get your trimmer up and running again. In this section, we’ll go over the common causes of this issue and provide step-by-step solutions to fix it.
Checking the battery or power source
1. Make sure the battery is charged: The first step to troubleshoot a Hatteker Beard Trimmer that’s not turning on is to check the battery. If you’re using a cordless trimmer, it may simply be out of power. Connect the trimmer to the charger and let it charge for a sufficient amount of time. Be sure to follow the charging instructions provided by Hatteker to ensure proper charging.
2. Ensure the power source is working properly: If the trimmer is corded, check if the power source is functioning correctly. Ensure that the power outlet you’re using is receiving electricity by plugging another device into it. If the outlet is working fine, move on to the next troubleshooting step.
Troubleshooting electrical issues
1. Check for loose connections: Inspect the trimmer for any loose connections. Make sure that both ends of the power cord or charger are securely plugged into the trimmer and the power source. If there’s any damage or loose connection, it may prevent the trimmer from turning on.
2. Clean the trimmer: Dirt, hair, and debris can accumulate over time and interfere with the trimmer’s electrical contacts. Take a clean, dry cloth or a soft brush and gently clean the trimmer’s body and blades. Be careful not to apply excessive force or use any liquid cleaners, as they may damage the trimmer.
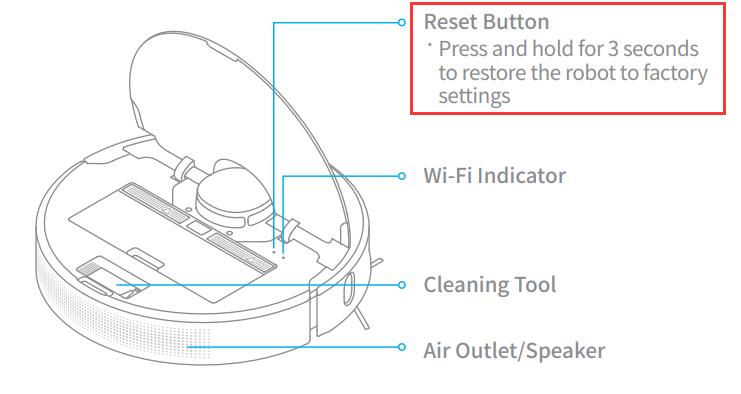
3. Reset the trimmer: Some trimmers have a reset button that can help resolve certain electrical issues. Check the user manual or the manufacturer’s website to see if your Hatteker Beard Trimmer has a reset button and how to use it. Pressing the reset button can help restore the trimmer’s functionality.
4. Contact customer support: If you’ve tried the above troubleshooting steps and your Hatteker Beard Trimmer still isn’t turning on, it’s time to reach out to Hatteker’s customer support. They have the expertise to provide further assistance and guide you through the specific issues you’re facing with your trimmer.
By following these troubleshooting steps, you should be able to get your Hatteker Beard Trimmer back to its working condition and enjoy a hassle-free trimming experience. Remember, it’s always important to refer to the user manual provided by Hatteker for specific instructions and safety precautions.
Blades Pulling Or Tugging
Cleaning and Oiling the Blades
Proper maintenance and care of your Hatteker Beard Trimmer is essential to ensure optimal performance and prevent blades from pulling or tugging. One crucial step in this maintenance routine is cleaning and oiling the blades regularly. By following these simple steps, you can keep your trimmer in top shape:
- Clean the blades: After each use, it is vital to remove any excess hair or debris that may have accumulated on the blades. Begin by detaching the blade head from the trimmer body, following the manufacturer’s instructions. Gently tap the head on a towel or brush to dislodge any loose hair. To remove stubborn dirt or residue, you can use a small brush or toothbrush.
- Wash the blades: To ensure thorough cleaning, it is recommended to wash the blade head under running water. Make sure to use warm water and mild soap. Avoid using harsh or abrasive cleaners that could damage the blades. Once washed, carefully dry the blades with a clean cloth before reattaching the head to the trimmer body.
- Apply oil: To keep the blades lubricated, it is important to apply a small amount of oil regularly. Before oiling, make sure the blades are clean and dry. Dip a cloth or cotton swab in a few drops of lubricating oil, and then gently apply it along the edges of the blades. This will help reduce friction and prevent the blades from pulling or tugging on your beard.
Replacing Worn-out Blades
Even with proper care, blades can become dull or worn out over time. When you start experiencing pulling or tugging despite regular cleaning and oiling, it may be a sign that your blades need replacement. Here are the steps to follow:
- Identify the model: Before purchasing replacement blades, make sure to identify the specific model of your Hatteker Beard Trimmer. This information can usually be found on the trimmer’s packaging or in the user manual.
- Order genuine replacement blades: To ensure optimal performance, it is crucial to purchase genuine replacement blades directly from Hatteker or authorized sellers. These blades are designed to fit perfectly and deliver the same level of quality as the original ones.
- Replace the blades: Once you have obtained the replacement blades, carefully detach the old blades from the trimmer head. Follow the manufacturer’s instructions on how to remove and install the new blades. Take your time and make sure the blades are properly aligned and securely attached.
- Test the trimmer: After replacing the blades, it is strongly recommended to test the trimmer before using it on your beard. Turn the trimmer on and let it run for a few seconds to ensure everything is working correctly. If you notice any issues, such as excessive vibration or unusual sounds, double-check that the blades are correctly installed.
By following these guidelines on cleaning, oiling, and replacing worn-out blades, you can maintain your Hatteker Beard Trimmer’s performance and prevent blades from pulling or tugging. Remember, a well-maintained trimmer will ensure a smooth and comfortable trimming experience for your beard.
Trimmer Not Cutting Efficiently
Trimmer Not Cutting Efficiently
If you’ve noticed that your Hatteker Beard Trimmer is not cutting as efficiently as it used to, there are a few things you can try to troubleshoot the issue. In this section, we’ll walk you through two common solutions: adjusting the trimming length setting and cleaning the blades to remove hair buildup.
Adjusting the Trimming Length Setting
One possible reason why your trimmer is not cutting efficiently could be that the trimming length setting is not properly adjusted. To resolve this, follow these steps:
- Make sure the trimmer is turned off and disconnected from the power source.
- Locate the trimming length adjustment dial on the side of the trimmer. It is usually marked with numbers or indicators to indicate the different length settings.
- Turn the adjustment dial to your desired trimming length. Start with a longer setting if you are unsure, as you can always trim more if needed.
- Ensure that the adjustment dial is securely locked in place to prevent any accidental changes during use.
By adjusting the trimming length setting, you can ensure that the trimmer is cutting at the desired length, allowing for a more efficient trimming experience.
Cleaning the Blades and Removing Hair Buildup
If adjusting the trimming length setting doesn’t solve the issue, it’s possible that hair buildup is affecting the performance of your trimmer. Follow these steps to clean the blades:
- Switch off and unplug the trimmer before cleaning.
- Remove the trimmer head or blade assembly according to the manufacturer’s instructions. This usually involves twisting or sliding the head off the main body of the trimmer.
- Use a small brush or toothbrush to gently remove any hair or debris that may have accumulated on the blades.
- Once the blades are clean, rinse them with warm water to remove any remaining debris.
- Dry the blades thoroughly before reassembling the trimmer.
| Important Note: | Take care when cleaning the blades to avoid injury. Make sure the trimmer is switched off and unplugged before attempting to clean the blades. |
|---|
Regular cleaning and maintenance of the blades will help to remove any hair buildup that may be causing the trimmer to cut less efficiently. Additionally, clean blades will ensure a smoother trimming experience and prolong the life of your Hatteker Beard Trimmer.
Regular Maintenance And Trimming Schedule
Establishing a routine for regular maintenance is key to keeping your beard looking its best. By consistently trimming and caring for your facial hair, you can ensure a healthy and well-groomed beard. In this article, we will guide you through the steps of using the Hatteker Beard Trimmer for regular maintenance and share tips on establishing a trimming schedule.
Establishing a routine
Creating a regular routine is vital to maintaining a well-groomed beard. By setting aside specific days or times each week for trimming and maintenance, you can ensure that your beard remains neat and tidy. A consistent schedule also allows your beard to grow evenly and promotes healthy hair growth.
Here are some guidelines to help you establish a routine:
- Decide on the ideal length for your beard and stick to it. This will depend on your personal style and preferences.
- Set a specific day or days each week for trimming your beard. Choose a time when you can dedicate enough attention to the task without feeling rushed.
- Keep your trimming tools, including the Hatteker Beard Trimmer, clean and easily accessible. This way, you’ll always be prepared for your scheduled trim.
- Consider using a beard oil or balm daily to keep your facial hair soft and manageable. This will make trimming easier and enhance the overall appearance of your beard.
Trimming for maintenance
Regular trimming is essential to maintain the shape and look of your beard. With the Hatteker Beard Trimmer, trimming becomes a breeze.
To trim your beard for maintenance:
- Start by cleaning and drying your beard. Trimming is best done on dry hair, as wet hair can appear longer and lead to uneven results.
- Use the adjustable length settings on the Hatteker Beard Trimmer to achieve your desired length. Start with a longer setting and gradually work your way down to ensure precision.
- Trim in the direction of your hair growth for a more natural and even look. Take your time and use light, gentle strokes to avoid cutting off more hair than intended.
- Pay special attention to the areas around your neckline and cheeks, as these are prone to becoming unruly. Use the trimmer’s precision attachments or adjustable head to achieve clean lines and a defined look.
- After trimming, clean the trimmer blades thoroughly to remove any hair or debris. This will ensure optimal performance for your next session.
By following these trimming techniques and maintaining a regular schedule, you can confidently keep your beard in top shape. Remember to always take your time and be patient, as grooming your beard is a process that requires precision and care.
Using Beard Products For Optimal Results
When it comes to achieving a well-groomed and stylish beard, using the right beard products is essential. Beard products not only help keep your facial hair healthy and conditioned but also aid in shaping and styling your beard. One of the most popular and versatile beard grooming tools on the market is the Hatteker Beard Trimmer. This powerful and reliable trimmer is a favorite among bearded men worldwide. In this article, we will explore how to use the Hatteker Beard Trimmer in conjunction with various beard products to achieve optimal results.
Beard Oils and Balms
Beard oils and balms are must-have products for any bearded man seeking a well-nourished and lustrous beard. These products provide essential moisture to your facial hair and skin, preventing dryness and itchiness. Additionally, beard oils and balms help to soften your beard, making it more manageable for trimming and styling.
When using the Hatteker Beard Trimmer in conjunction with beard oils and balms, follow these simple steps:
- Start by thoroughly washing your beard and patting it dry with a clean towel.
- Apply a few drops of your favorite beard oil onto your palms. Rub your hands together to distribute the oil evenly.
- Gently massage the oil into your beard, making sure to reach the roots and the skin beneath.
- Allow the oil to absorb for a few minutes, then use the Hatteker Beard Trimmer to shape and trim your beard according to your desired style.
- To finish, apply a small amount of beard balm. Rub it between your palms and distribute it evenly throughout your beard, focusing on the ends for extra nourishment.
Styling Agents for Shaping and Control
In addition to beard oils and balms, using styling agents can help you achieve the perfect shape and control for your beard. These products are particularly useful if you’re aiming for a specific look or need to tame unruly hairs.
When using the Hatteker Beard Trimmer with styling agents, follow these easy steps:
- Start by applying a small amount of styling agent, such as beard wax or beard cream, onto your fingertips.
- Work the product into your beard, focusing on the areas that require extra hold or shaping.
- Allow the product to set for a minute or two.
- Use the Hatteker Beard Trimmer to trim and shape your beard, making sure to follow the natural contours of your face.
- For a sleek look, use a small comb or brush to distribute the product evenly throughout your beard, ensuring every hair is in place.
By incorporating beard oils, balms, and styling agents into your grooming routine, you can enhance your beard growth and maintain a polished look. With the Hatteker Beard Trimmer as your trusted tool, achieving optimal beard results has never been easier.
Frequently Asked Questions Of How To Use Hatteker Beard Trimmer
How Do You Trim A Beard With A Hatteker?
To trim a beard with a Hatteker, start by combing it to remove tangles. Use the trimmer with the desired guard size and trim in the direction of hair growth. Repeat until you achieve the desired length, then shape the beard and trim any stray hairs for a clean look.
Is Hatteker Beard Trimmer Good?
Yes, Hatteker beard trimmer is good. It is a reliable and efficient trimming tool that provides precise and even results. It is designed to be user-friendly and offers various features for professional grooming at home.
How Do You Use A Beard Trimmer For The First Time?
To use a beard trimmer for the first time, make sure it’s charged and clean. Start with the longest guard setting, trim in the direction of hair growth, and go slowly. Use shorter guard settings for more precision. Clean the trimmer after use for optimal performance.
How Do You Use Beard Trimmer Attachments?
To use beard trimmer attachments, simply select the desired attachment, align it with the trimmer head, and securely snap it into place. Adjust the length settings as needed, then start trimming by moving the trimmer against the direction of hair growth.
Conclusion
Shaving your beard with a trimmer offers a convenient and efficient way to achieve a clean-shaven look. Following the steps outlined in this guide, you can master the art of beard shaving with a trimmer. Whether you’re saying goodbye to your beard or simply maintaining a smooth look, this method provides a hassle-free alternative to traditional razors. Remember to take your time, follow proper skincare aftercare, and keep your trimmer in good condition for consistent, comfortable shaves.