How to Put a Wahl Beard Trimmer Back Together?
To put a Wahl beard trimmer back together, follow these steps: Be sure the blades are aligned correctly, then snap the top and bottom halves back together securely. Now, let’s dive into how you can easily reassemble your Wahl beard trimmer in a few simple steps.
Keeping your facial hair well-groomed and stylish is important for many men. Wahl beard trimmers are popular tools for achieving the desired look. However, after cleaning or replacing the blades, you may need to put the trimmer back together. Don’t worry, it’s a straightforward process.
We will guide you through the steps to easily reassemble your Wahl beard trimmer, ensuring it is ready for your next grooming session. Whether you are a beginner or an experienced user, these instructions will help you get your trimmer up and running in no time.
Disassembling The Wahl Beard Trimmer
Disassembling your Wahl Beard Trimmer may seem daunting at first, but with a few simple steps, you’ll be able to take it apart and put it back together in no time! Whether you need to clean your trimmer or replace a part, this guide will walk you through the process. In this section, we’ll focus on the first step: removing the trimmer head.
Removing the trimmer head
The trimmer head is the part of the Wahl Beard Trimmer that houses the blades and allows you to trim your beard with precision. To remove the trimmer head, follow these steps:
- Ensure that the trimmer is turned off and unplugged from the power source for safety purposes.
- Hold the trimmer firmly in one hand, making sure to grip it near the base where it connects to the body.
- Using your other hand, locate the release button or lever near the top of the trimmer head. This button or lever is usually marked with a small arrow or icon.
- Press and hold the release button or lever while gently pulling the trimmer head away from the body of the trimmer.
- Continue pulling until the trimmer head is completely detached from the body.
Once you have successfully removed the trimmer head, you can proceed to the next step: detaching the comb attachment.
Detaching the comb attachment
The comb attachment is the part of the Wahl Beard Trimmer that allows you to adjust the length of your beard or stubble. To detach the comb attachment, follow these steps:
- Hold the trimmer head with one hand, ensuring a secure grip.
- Locate the small release tabs or buttons on either side of the comb attachment.
- Press and hold these release tabs or buttons simultaneously.
- While still holding the release tabs or buttons, gently slide the comb attachment away from the trimmer head.
- Keep sliding until the comb attachment is fully detached from the trimmer head.
Now that you have successfully detached the comb attachment, you can proceed to separate the top and bottom housing of the Wahl Beard Trimmer.
Separating the top and bottom housing
The top and bottom housing of the Wahl Beard Trimmer encase the internal components and hold everything together. To separate the top and bottom housing, follow these steps:
- Ensure that the trimmer head and comb attachment are already removed.
- Lay the trimmer on a flat surface, with the front facing up.
- Locate the screws that secure the top and bottom housing together. These screws are usually located on the sides or at the back of the trimmer.
- Using a suitable screwdriver, carefully remove all the screws.
- Once all the screws are removed, gently separate the top and bottom housing by pulling them apart.
Replacing Parts And Components
When it comes to maintaining your Wahl Beard Trimmer, knowing how to replace the parts and components is essential. Whether you’ve identified damaged or worn-out parts, need to order replacement parts from Wahl, or want to remove and replace the battery or trimmer head, this guide will walk you through the process step by step.
Identifying damaged or worn-out parts
If you notice that your Wahl Beard Trimmer is not performing as well as it used to, it may be due to damaged or worn-out parts. Here’s how you can identify and address the issue:
- Inspect the trimmer for any visible signs of damage, such as cracks or breakage.
- Check the blades to see if they are dull or rusted. It is recommended to replace the blades every six months for optimal performance.
- Examine the trimmer’s motor for any unusual noises or vibrations, which could indicate a faulty component.
If you identify any damaged or worn-out parts, it’s time to order the necessary replacements from Wahl.
Ordering replacement parts from Wahl
Ordering the right replacement parts for your Wahl Beard Trimmer is crucial for proper functioning. Here’s how you can ensure you get the correct components:
- Visit the official Wahl website or authorized retailers to access genuine replacement parts.
- Search for your specific beard trimmer model to find compatible replacement parts.
- Make a note of the part numbers and quantities needed.
- Place your order either online or by contacting Wahl customer support.
By ordering replacement parts directly from Wahl, you can be confident in receiving high-quality components that will restore your trimmer’s performance.
Removing and replacing the battery
The battery is a critical component of your Wahl Beard Trimmer, and if it’s no longer holding a charge, it’s time for a replacement. Follow these steps to remove and replace the battery:
- Before starting, ensure the trimmer is turned off and disconnected from any power source.
- Locate the battery compartment, usually at the bottom of the trimmer.
- Use a small screwdriver to unscrew the compartment cover.
- Remove the old battery from its position, taking note of its orientation.
- Insert the new battery in the same orientation as the old one.
- Screw the compartment cover back into place.
By replacing the battery, you can enjoy a fully charged Wahl Beard Trimmer that’s ready for your grooming needs.
Installing a new trimmer head
If your trimmer head is damaged or not cutting as efficiently, it’s time for a replacement. Follow these steps to install a new trimmer head:
- Ensure the trimmer is turned off and disconnected from any power source.
- Hold the trimmer head firmly and twist it counterclockwise to remove the old head.
- Align the tabs on the new trimmer head with the slots on the trimmer.
- Twist the new head clockwise until it is securely in place.
With a new trimmer head installed, you’ll experience precise and effortless trimming with your Wahl Beard Trimmer.
Putting The Trimmer Back Together
When it comes to maintaining a well-groomed beard, a Wahl Beard Trimmer is the ultimate tool. However, after cleaning and oiling the trimmer, you may find yourself facing the challenge of putting it back together. Fear not! In this guide, we will walk you through the step-by-step process of putting your Wahl Beard Trimmer back together. So, let’s dive in and get your trimmer back in action!
Attaching the top and bottom housing
Once you have cleaned and oiled the individual components of your Wahl Beard Trimmer, it’s time to put them back together. The first step in the reassembly process is attaching the top and bottom housing. Here’s what you need to do:
- Start by aligning the top housing with the bottom housing, ensuring that the corresponding tabs and slots are properly lined up.
- Gently press the two housing pieces together to engage the locking mechanism.
- Once the top and bottom housing are securely connected, give it a gentle tug to ensure it is properly locked in place.
Securing the comb attachment
Next, it’s time to secure the comb attachment to the trimmer. The comb attachment helps you achieve the desired length and style of your beard. Follow these steps to securely attach the comb:
- Take the comb attachment and line up the guide teeth with the corresponding grooves on the trimmer head.
- Gently slide the comb attachment onto the trimmer head, making sure it fits snugly.
- Give the comb attachment a gentle pull to ensure it is properly secured.
Reassembling the trimmer head
The final step in putting your Wahl Beard Trimmer back together is reassembling the trimmer head. This is where the cutting action happens, so it’s important to ensure everything is properly aligned. Follow these steps:
- Take the trimmer head and align the cutting blade with the corresponding grooves on the trimmer body.
- Once aligned, gently slide the trimmer head onto the trimmer body, making sure it fits securely.
- Give the trimmer head a gentle twist to engage the locking mechanism.
And there you have it! You’ve successfully put your Wahl Beard Trimmer back together. Now, you can enjoy a clean, precise trim for your beard whenever you want. Remember to clean and oil your trimmer regularly to maintain its performance and longevity. Happy trimming!

Credit: www.amazon.com
Trimmer Not Assembling Properly
One common issue that many people face when using a Wahl beard trimmer is that it may not assemble properly. This can be frustrating, especially when you’re in a hurry to trim your beard and get ready for the day. However, with a few simple steps, you can troubleshoot and resolve this problem quickly. In this section, we will explore different tactics to ensure that all parts are aligned correctly, check for any obstructions or debris, and double-check the fit of the comb attachment.
Ensuring all parts are aligned correctly
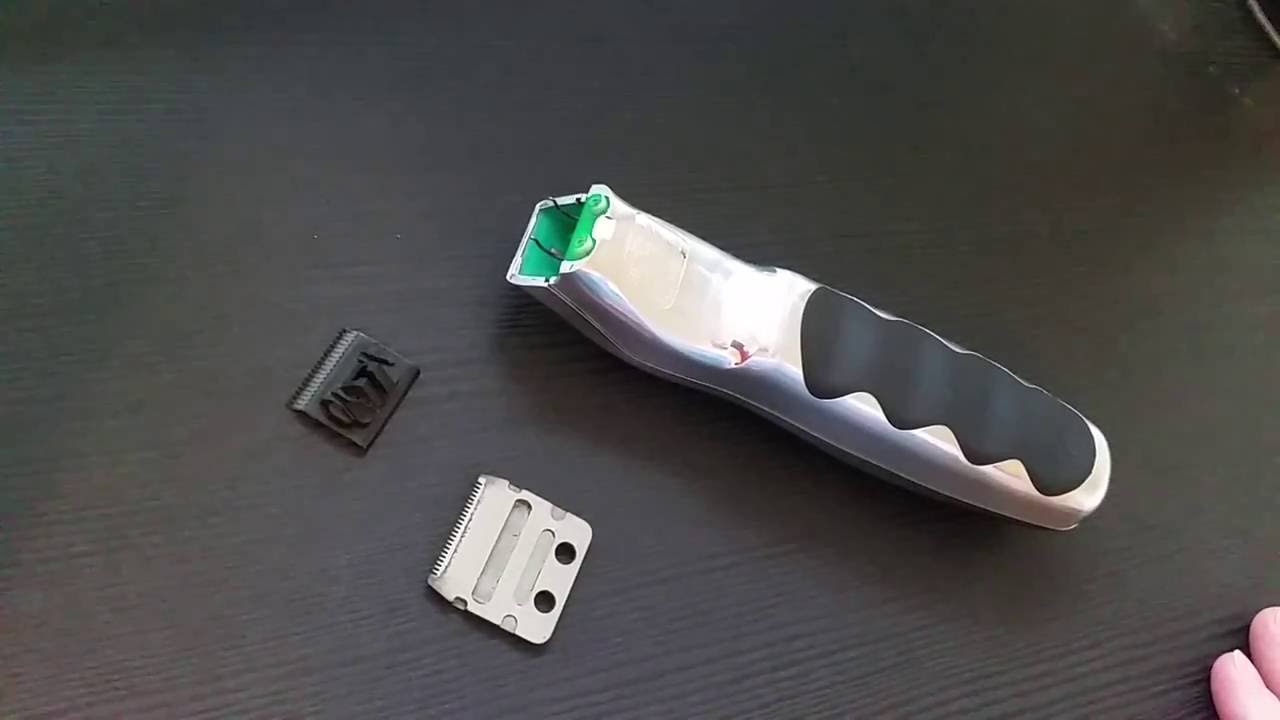
To begin, it is essential to ensure that all the parts of your Wahl beard trimmer are aligned correctly. Sometimes, during disassembly for cleaning or maintenance, some parts may not be put back in their proper positions.
- Start by locating the different components of the trimmer, such as the blade, housing, and handle.
- Carefully examine each part to ensure there are no visible signs of damage or misalignment.
- If you notice any misalignment, gently adjust the positioning until the parts fit together smoothly.
- Make sure to follow the manufacturer’s instructions and refer to any diagrams or illustrations provided.
By aligning all the parts correctly, you can prevent any issues with the assembly of your Wahl beard trimmer.
Checking for any obstructions or debris
Another common reason for a Wahl beard trimmer not assembling properly is the presence of obstructions or debris. Over time, hair clippings, dust, and other particles can accumulate inside the trimmer, affecting its performance.
To ensure smooth assembly, follow these steps to check for any obstructions or debris:
- Inspect the trimmer’s blade and housing for any visible build-up of hair or dust.
- If you spot any debris, use a small brush or toothpick to carefully remove it from the trimmer.
- Wipe the blade and housing clean with a soft cloth or tissue to eliminate any remaining particles.
By regularly cleaning your Wahl beard trimmer, you can prevent debris from interfering with the assembly process and maintain optimal performance.
Double-checking the fit of the comb attachment
The comb attachment on your Wahl beard trimmer plays a crucial role in achieving your desired beard length. If the trimmer is not assembling properly, it’s essential to double-check the fit of the comb attachment.
Follow these steps to ensure the comb attachment is correctly placed:
- Remove the comb attachment and inspect it for any signs of damage or wear.
- If the comb attachment appears damaged, consider replacing it with a new one.
- Align the tabs or guides on the comb attachment with the corresponding slots on the blade or housing.
- Gently press the comb attachment into place until you hear a click or feel a secure fit.
By properly fitting the comb attachment, you can ensure that your Wahl beard trimmer assembles correctly and maintains consistent cutting performance.
By following these steps to ensure proper alignment, checking for obstructions, and inspecting the fit of the comb attachment, you can troubleshoot and resolve the issue of your Wahl beard trimmer not assembling properly. Taking the time to attend to these common issues will help you achieve the desired results and keep your trimmer in optimal condition.
Battery Or Power Issues
When it comes to maintaining your beard trimmer, battery or power issues can be a common challenge. These issues can prevent your Wahl beard trimmer from functioning effectively, leaving you with an unruly beard. In this section, we will explore the steps you can take to address battery installation, test the battery and connections, and troubleshoot power supply problems. By following these troubleshooting techniques, you can easily put your Wahl beard trimmer back together and get back to shaping your beard with precision.
Verifying Proper Battery Installation
To begin troubleshooting battery or power issues with your Wahl beard trimmer, it is essential to ensure proper battery installation. Even a small misalignment can cause your trimmer to malfunction. Follow these steps to verify the correct battery installation:
- Refer to the user manual or product documentation for guidance on battery installation.
- Remove the battery cover or access panel, exposing the battery compartment.
- Inspect the battery compartment and confirm that the positive and negative terminals align correctly with the battery.
- Make sure the battery is securely placed and free from any debris or corrosion.
- Carefully close the battery cover or access panel, ensuring it locks into place.
Testing the Battery and Connections
If you have verified proper battery installation and your Wahl beard trimmer is still experiencing power issues, it is time to test the battery and connections. Follow these simple steps to assess the battery’s functionality:
- Remove the battery from the trimmer.
- Using a multimeter set to measure DC voltage, place the multimeter probes on the positive and negative terminals of the battery.
- Check the reading on the multimeter. If it matches the voltage specified in the user manual, the battery is functioning properly.
- If the reading is significantly lower or zero, the battery may need to be replaced.
- Inspect the battery terminals and the trimmer’s connection points for any signs of damage or corrosion. Clean them if necessary, ensuring a secure connection.
Troubleshooting Power Supply Problems
If your Wahl beard trimmer is still not receiving power, even after verifying proper battery installation and testing the battery and connections, it may be facing power supply problems. Follow these troubleshooting steps:
- Check the power cord or adapter to ensure it is securely connected to an electrical outlet or power source.
- If using a rechargeable trimmer, check if the charging station or cable is functioning correctly.
- Inspect the power cord or adapter for any signs of damage or frayed wires. Replace if needed.
- Test the electrical outlet with another device to confirm if it is providing power.
- If all else fails, consider reaching out to Wahl customer support for further assistance.
By following these troubleshooting steps, you can easily address battery or power issues with your Wahl beard trimmer. Remember to always refer to the user manual for specific instructions tailored to your trimmer model. With a properly functioning trimmer, you can maintain a well-groomed beard effortlessly.
Removing Hair And Debris
Safely cleaning the trimmer head
Removing hair and debris from your Wahl beard trimmer is an essential step in its maintenance. Safely cleaning the trimmer head will not only ensure optimal performance but also extend the lifespan of your trimmer. To begin, follow these steps:
- Switch off the trimmer and unplug it from the power source before starting the cleaning process. This will eliminate any risk of injury.
- Use a small cleaning brush specifically designed for trimmers. Gently brush the trimmer head to remove any loose hair or debris. Ensure that you brush from both the top and bottom of the trimmer head to achieve a thorough clean.
- For stubborn debris that may have accumulated over time, dip the cleaning brush in warm, soapy water. Be cautious not to immerse the entire trimmer in water, as this can damage the electrical components.
- Run the brush along the blades and comb of the trimmer head in a back-and-forth motion. This will help dislodge any trapped hair or debris.
- After cleaning, rinse the trimmer head with warm water to remove any remaining soap residue. Ensure the trimmer head is completely dry before reassembling the trimmer.
Clearing hair from other components
In addition to cleaning the trimmer head, it’s crucial to remove hair from other components of the Wahl beard trimmer to maintain its functionality. Follow these steps to clear hair from other parts:
- Remove any detachable parts from the trimmer, such as the comb attachments or guards.
- Inspect each component for hair or debris accumulation. Use a brush or your fingers to carefully remove any visible hair.
- For components that cannot be easily accessed, use a cotton swab dipped in rubbing alcohol to clean the area. This will help dissolve any sticky residue and ensure thorough cleaning.
- Once all the components are free from hair and debris, wipe them gently with a dry cloth to remove any moisture.
Using compressed air for thorough cleaning
To ensure a deep and thorough clean, consider using compressed air to blow out any remaining particles from hard-to-reach crevices. Follow these steps:
- Ensure the trimmer is turned off and unplugged to prevent accidents.
- Using a canister of compressed air, direct the nozzle towards the trimmer’s crevices and gaps.
- Press the trigger on the canister to release short bursts of air, forcing out any trapped hair or debris.
- Continue this process throughout the trimmer, targeting areas such as the power switch and any exposed crevices.
- Finally, wipe down the trimmer with a dry cloth to remove any residual debris.
Regular cleaning and maintenance of your Wahl beard trimmer will not only ensure optimal performance but also help prevent any damage caused by hair and debris accumulation. Incorporate these simple cleaning techniques into your grooming routine to keep your trimmer looking and performing its best.
Lubricating The Blades
When it comes to maintaining your Wahl beard trimmer, one important step is lubricating the blades. This helps to ensure smooth operation and extend the life of your trimmer. In this section, we will walk you through the process of applying oil to the trimmer head, keeping the blades in good condition, and preventing rust to maximize performance.
Applying oil to the trimmer head
To lubricate the blades of your Wahl beard trimmer, you will need to apply oil directly to the trimmer head. This helps to reduce friction and promote smooth cutting. Follow these steps to properly apply oil:
- First, make sure your trimmer is turned off and unplugged to avoid any accidents during the lubrication process.
- Remove any hair or debris from the trimmer head using a small brush or by gently tapping it.
- Apply a small amount of Wahl blade oil to the blades. Be sure to use only a few drops to prevent oversaturation.
- Turn on the trimmer and let it run for a few seconds to distribute the oil evenly across the blades.
- Wipe off any excess oil with a clean cloth or tissue before using the trimmer.
Keeping the blades in good condition
Regular maintenance and care can help keep your Wahl beard trimmer blades in optimal condition. Follow these tips to ensure longevity and performance:
- After each use, remove any excess hair or debris from the trimmer blades using a brush or by tapping it gently.
- Periodically clean the trimmer head by following the manufacturer’s instructions. This may involve removing the blades for a more thorough cleaning.
- Avoid using excessive force when trimming. Let the blades do the work to prevent unnecessary wear and tear.
- Do not use the trimmer on wet or damp hair, as this can lead to rust and damage the blades.
Preventing rust and maximizing performance
Rust can compromise the performance of your Wahl beard trimmer and shorten its lifespan. To prevent rust and maximize performance, follow these simple steps:
- Store your trimmer in a dry and cool place when not in use.
- Periodically apply a thin layer of Wahl blade oil to the blades, even when not in use, to help protect against rust.
- Avoid exposing the trimmer to moisture or damp environments.
- Regularly check for signs of rust or corrosion. If you notice any, clean the blades thoroughly and apply oil to protect against further damage.
By regularly lubricating the blades of your Wahl beard trimmer, you can ensure smooth operation, prevent rust, and maximize its performance. Follow these simple steps and maintenance tips to keep your trimmer in top shape for years to come.
Frequently Asked Questions Of How To Put A Wahl Beard Trimmer Back Together
How Do You Assemble A Wahl Trimmer?
To assemble a Wahl trimmer, follow these steps:
1. Attach the comb guide by sliding it onto the trimmer blade securely.
2. Attach the trimming head by aligning it with the trimmer body and pushing it until it clicks into place.
3. Ensure that the power switch is off before inserting the battery or plugging in the cord.
4. Insert the battery or plug in the cord, and then turn on the trimmer to start using it.
How Do You Put A Wahl Nose Trimmer Back Together?
To put a Wahl nose trimmer back together, follow these steps: remove the battery cover and insert the batteries correctly, align the trimmer head with the body and twist it until it locks into place, then attach the desired trimming guide or blade and push it firmly onto the trimmer head.
How Do You Put Clippers Back On?
To put clippers back on, follow these steps:
1. Align the clipper blades with the grooves on the clipper body.
2. Gently press the blades down until they snap into place.
3. Ensure they are securely attached before using. Taking care when reattaching the blades helps maintain the effectiveness and safety of your clippers.
How Do I Change The Head On My Wahl Trimmer?
To change the head on your Wahl trimmer, follow these steps:
1. Turn off the trimmer and unplug it from the power source.
2. Hold the trimmer firmly and locate the head release button or lever.
3. Press or move the release button/lever to unlock the head.
4. Remove the old head by pulling it away from the trimmer.
5. Attach the new head by aligning it with the trimmer and pressing it firmly until it clicks into place.
Conclusion
Putting a Wahl Beard Trimmer back together may seem daunting, but with a little patience and attention to detail, it’s a manageable task. Remember to refer to the manufacturer’s instructions for guidance on reassembling the trimmer. Take your time and ensure all the pieces fit snugly and securely. Once you’ve successfully put it back together, you can confidently continue your grooming routine with a fully functional Wahl Beard Trimmer, ready to keep your beard sharp and well-maintained.