How to Open Dyson Stick Vacuum Head: Easy Step-by-Step Guide
Opening a Dyson stick vacuum head might seem tricky. But it’s simple with the right steps.
Dyson stick vacuums are known for their powerful cleaning and sleek design. Yet, like any vacuum, they need regular maintenance. Sometimes, you need to open the vacuum head to clean or check for blockages. Knowing how to do this can keep your vacuum working at its best.
This guide will explain the steps to open your Dyson stick vacuum head. Follow along to ensure your vacuum remains in top condition, ready to tackle dirt and dust in your home.
Tools Needed
Opening the Dyson stick vacuum head requires some specific tools. Using the right tools makes the process smooth. Below is a list of tools you’ll need and some optional accessories that might be helpful.
Required Tools
- Screwdriver: A Phillips head screwdriver is usually needed.
- Flathead Screwdriver: Helps in prying open the vacuum head.
- Soft Cloth: To clean parts without scratching them.
- Small Brush: Useful for cleaning dust and debris.
Optional Accessories
- Compressed Air Can: Blows away hard-to-reach dust.
- Magnifying Glass: Helps in seeing small screws and parts.
- Plastic Pry Tool: Prevents damage when opening the head.
Having these tools ready will save you time. Always handle parts with care. Happy cleaning!
Safety Precautions
Opening the Dyson stick vacuum head requires careful handling. Ensuring safety is crucial to prevent any damage or injury. Follow these safety precautions to ensure a smooth process.
Power Off The Vacuum
Always turn off the vacuum before opening the head. Disconnect the vacuum from the power source. This prevents any accidental activation. A live device can lead to injuries. Ensure the vacuum is completely off before proceeding.
Avoid Water Contact
Keep the vacuum head away from water. Water can damage the electrical components. It can also cause short circuits. Always work in a dry area. Ensure your hands are dry to prevent any mishaps.
Removing The Vacuum Head
Removing the vacuum head from your Dyson stick vacuum can seem tricky. But, it’s a straightforward process. Follow these steps to make it easy.
Detach The Stick
Turn off your Dyson vacuum. Unplug it if it’s charging. Hold the vacuum in one hand. Use your other hand to grip the stick. The stick connects the vacuum head to the main body. Twist the stick gently to release it. Pull it away from the main body.
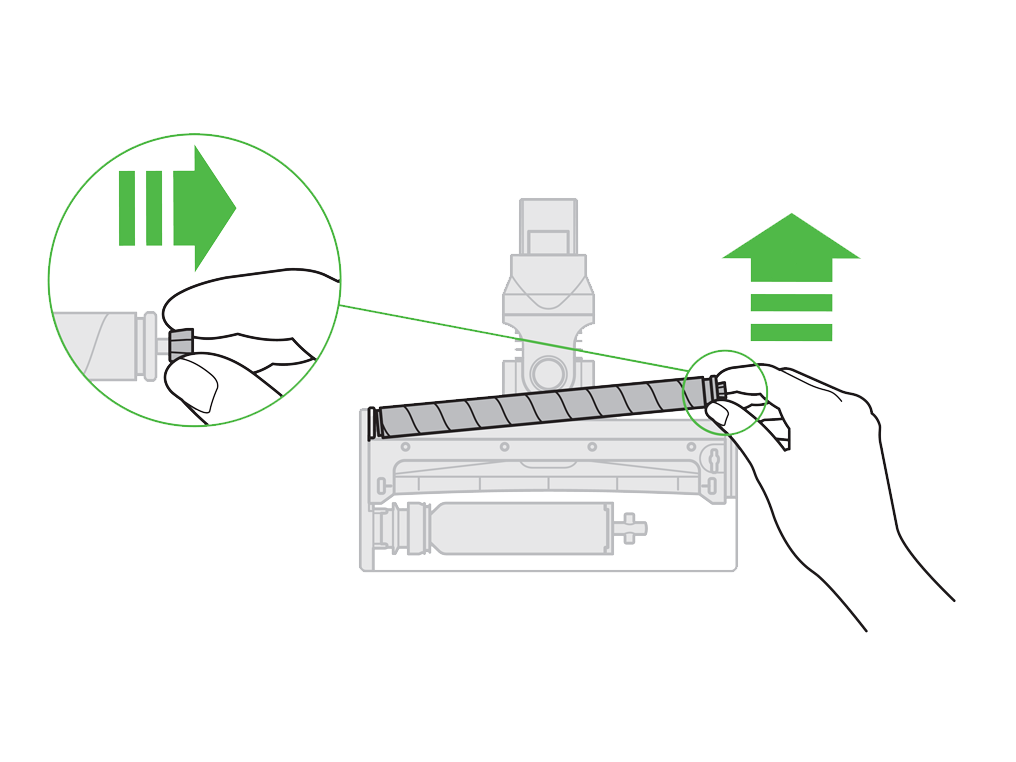
Locate The Release Button
Next, find the release button on the vacuum head. The button is near where the stick was connected. Press the button firmly. While pressing, pull the vacuum head away. The head should detach easily.
With the vacuum head removed, you can now clean it or replace it as needed. Remember to reattach it securely before using your vacuum again.
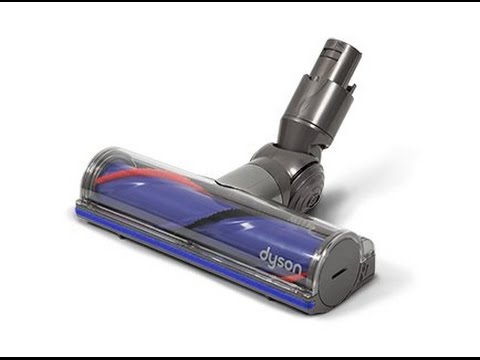
Credit: support.sa.dyson.com
Opening The Vacuum Head
Opening the vacuum head of your Dyson stick vacuum is easy. Whether for cleaning or maintenance, follow these steps to avoid damage. Below are the simple steps to open the vacuum head.
Loosen Screws
Find the screws holding the vacuum head. Use a Phillips screwdriver to loosen the screws. Turn them counterclockwise until they come out. Place the screws in a safe spot to avoid losing them.
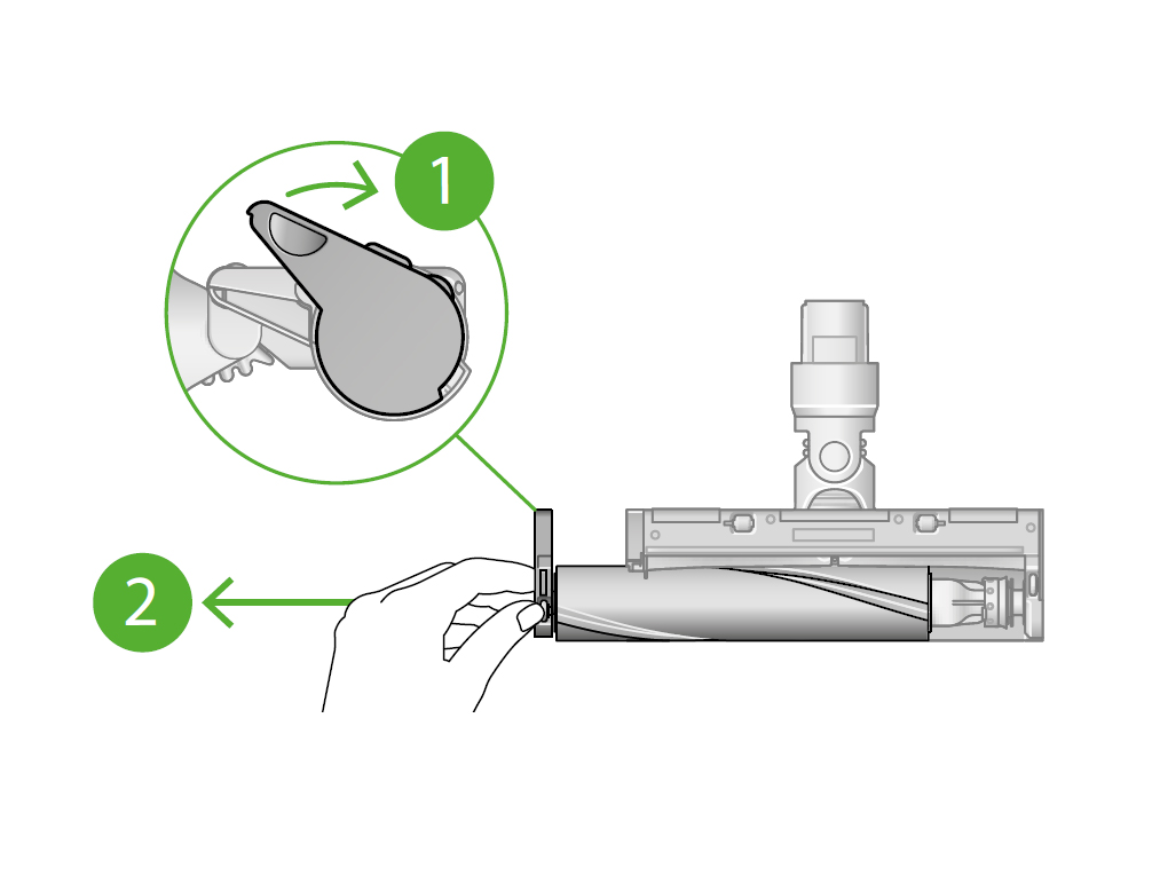
Separate The Components
After removing the screws, gently pull the vacuum head apart. Be careful not to force it. Separate the components slowly to avoid breaking any parts. You will see the brush and other internal parts.
Once separated, you can clean the brush and other components. Always follow the manual for detailed instructions. Reassemble the vacuum head by reversing the steps.
Cleaning The Internal Parts
Opening the Dyson stick vacuum head is the first step. This helps you clean the internal parts. Regular cleaning ensures your vacuum works at its best. It also helps extend its lifespan. In this section, we will cover how to clean the brush and roller. We will also look at checking for blockages.
Brush And Roller Cleaning
Start by removing the brush bar from the vacuum head. Look for any hair or debris wrapped around it. Use a pair of scissors to cut through the tangled hair. Be careful not to damage the bristles. Once the hair is cut, pull it away from the brush bar.
Use a damp cloth to wipe the brush bar. This removes any dust or dirt. Ensure it is dry before putting it back. If the roller is removable, take it out and clean it as well. Use the same steps as with the brush bar.
Checking For Blockages
Blockages can reduce the vacuum’s suction power. To check for blockages, first, detach the vacuum head. Look inside the opening for any stuck debris. Use a flashlight if needed. Remove any blockages with your fingers or a thin tool.
Check the vacuum tube for blockages. Detach the tube and look through it. If you see any debris, push it out with a long object. Finally, reattach all parts securely.
Regular cleaning and maintenance will keep your Dyson stick vacuum running smoothly. Follow these steps to ensure it stays in top condition.
Reassembling The Vacuum Head
Once you have cleaned and inspected all parts of the Dyson stick vacuum head, it’s time to reassemble it. This process ensures your vacuum works efficiently again. Follow these steps to reassemble your vacuum head correctly.
Reattach The Components
Start by reattaching the main brush bar. Align it with the slots in the vacuum head. Push it gently until it clicks into place.
- Insert the brush bar back into the vacuum head.
- Align the brush bar with the corresponding slots.
- Push the brush bar until it clicks securely.
Next, reattach the small brush and plastic cover. Position the small brush properly and snap the cover back on.
Secure The Screws
Use a screwdriver to secure the screws. Ensure each screw is tight but not overly tight.
- Place each screw in its original hole.
- Use a screwdriver to tighten each screw.
- Double-check each screw to ensure it is secure.
Check that all parts are firmly in place. This step helps prevent any loose components.
| Component | Action |
|---|---|
| Main Brush Bar | Reattach and align |
| Small Brush | Reattach |
| Plastic Cover | Snap back on |
| Screws | Secure with screwdriver |
Reassembling your Dyson stick vacuum head is straightforward. Ensure each part is in its proper place for optimal performance.
Testing The Vacuum
After opening and cleaning your Dyson stick vacuum head, it’s vital to ensure everything works. This step will help you confirm that the vacuum head is reassembled correctly. If there are any issues, you can catch them early and make adjustments. Follow these simple steps to test your vacuum.
Reconnect The Stick
Make sure you reconnect the stick to the vacuum head. Align the stick with the vacuum head and push it until it clicks into place. This ensures a secure connection. A loose connection can affect the performance.
Power On And Test
Next, power on your Dyson vacuum. Check if the vacuum head spins and the suction is strong. Test it on a small patch of floor. Observe if it picks up dirt and debris effectively.
Here are some points to check:
- Check if the vacuum head rotates smoothly.
- Ensure there are no unusual noises.
- Verify the suction power is strong.
If everything works as expected, your Dyson vacuum is ready to use. Otherwise, recheck the assembly and clean any remaining debris.

Credit: www.youtube.com
Maintenance Tips
Proper maintenance of your Dyson stick vacuum ensures its longevity and efficiency. Regular care prevents blockages and keeps the vacuum running smoothly. Follow these tips to maintain your vacuum.
Regular Cleaning Schedule
Establishing a regular cleaning schedule is crucial. Clean the vacuum head at least once a month. Remove any hair or debris from the brush bar. Check for blockages in the suction path.
Here is a simple cleaning routine:
- Remove the vacuum head.
- Check the brush bar for tangles.
- Clear any debris from the suction path.
- Wipe the exterior with a damp cloth.
This routine ensures optimal performance. A clean vacuum works more efficiently and lasts longer.
Storing The Vacuum Properly
Proper storage is essential for maintaining your Dyson stick vacuum. Store it in a cool, dry place. Avoid direct sunlight and high humidity.
Use the following tips for storage:
- Remove the battery if not in use for long periods.
- Hang the vacuum on a wall mount.
- Keep attachments organized and accessible.
- Ensure the vacuum is fully charged before storage.
Proper storage prevents damage and ensures your vacuum is ready for the next use. Always store it upright to avoid any internal blockages.
Credit: support.dyson.co.nz
Conclusion
Opening a Dyson stick vacuum head is simple with the right steps. Follow the instructions provided above. You’ll maintain your vacuum’s efficiency and extend its life. Remember to handle parts gently to avoid damage. Regular cleaning ensures optimal performance. Keep your vacuum in top shape and enjoy a cleaner home.