How to Empty Dyson Stick Vacuum V10: Quick and Easy Steps
Emptying your Dyson Stick Vacuum V10 is simple and quick. Just follow a few steps to keep it running smoothly.
Regular maintenance is crucial for any vacuum cleaner. The Dyson V10, known for its powerful suction and sleek design, is no exception. Proper emptying ensures it performs at its best. A full bin can reduce suction power and efficiency. Knowing how to empty it correctly saves time and keeps your vacuum in top condition.
This guide will walk you through the process. You’ll find it easy and efficient, ensuring your Dyson V10 remains a cleaning powerhouse.
Preparation Steps
Cleaning your Dyson Stick Vacuum V10 is essential for maintaining its performance. Before you start, follow these preparation steps to ensure a smooth process. Let’s dive into the key steps to prepare for emptying your vacuum.
Gather Necessary Tools
Start by collecting the tools you need. This makes the process easier and quicker. Here’s a simple list of what you might need:
- A soft, dry cloth
- A small brush
- A garbage bag
Having these tools ready will help you clean efficiently. A soft, dry cloth is essential for wiping parts. A small brush helps to remove debris. A garbage bag ensures you dispose of the dirt properly. It’s always better to be prepared.
Ensure Vacuum Is Off
Before you start, make sure the vacuum is off. Safety first. Unplug the charger to avoid any accidents. Confirm the power button is in the off position. This prevents the vacuum from turning on unexpectedly. Here’s a quick checklist:
- Turn off the vacuum.
- Unplug the charger.
- Check the power button is off.
By ensuring the vacuum is off, you protect yourself from any mishaps. These steps create a safer environment for cleaning. Your safety is a priority.
Removing The Bin
The Dyson Stick Vacuum V10 is a marvel of cleaning technology. But even the best vacuums need maintenance. Emptying the bin is a simple task that ensures your vacuum runs efficiently. Follow these steps to remove the bin with ease.
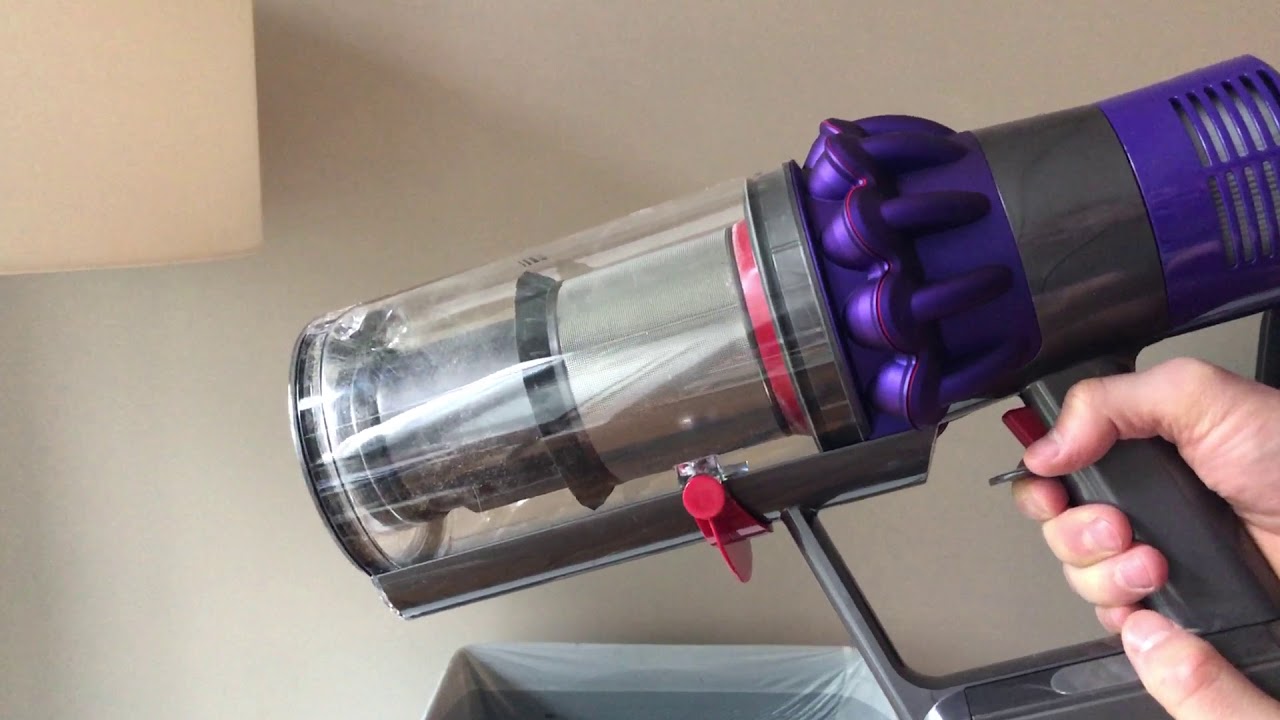
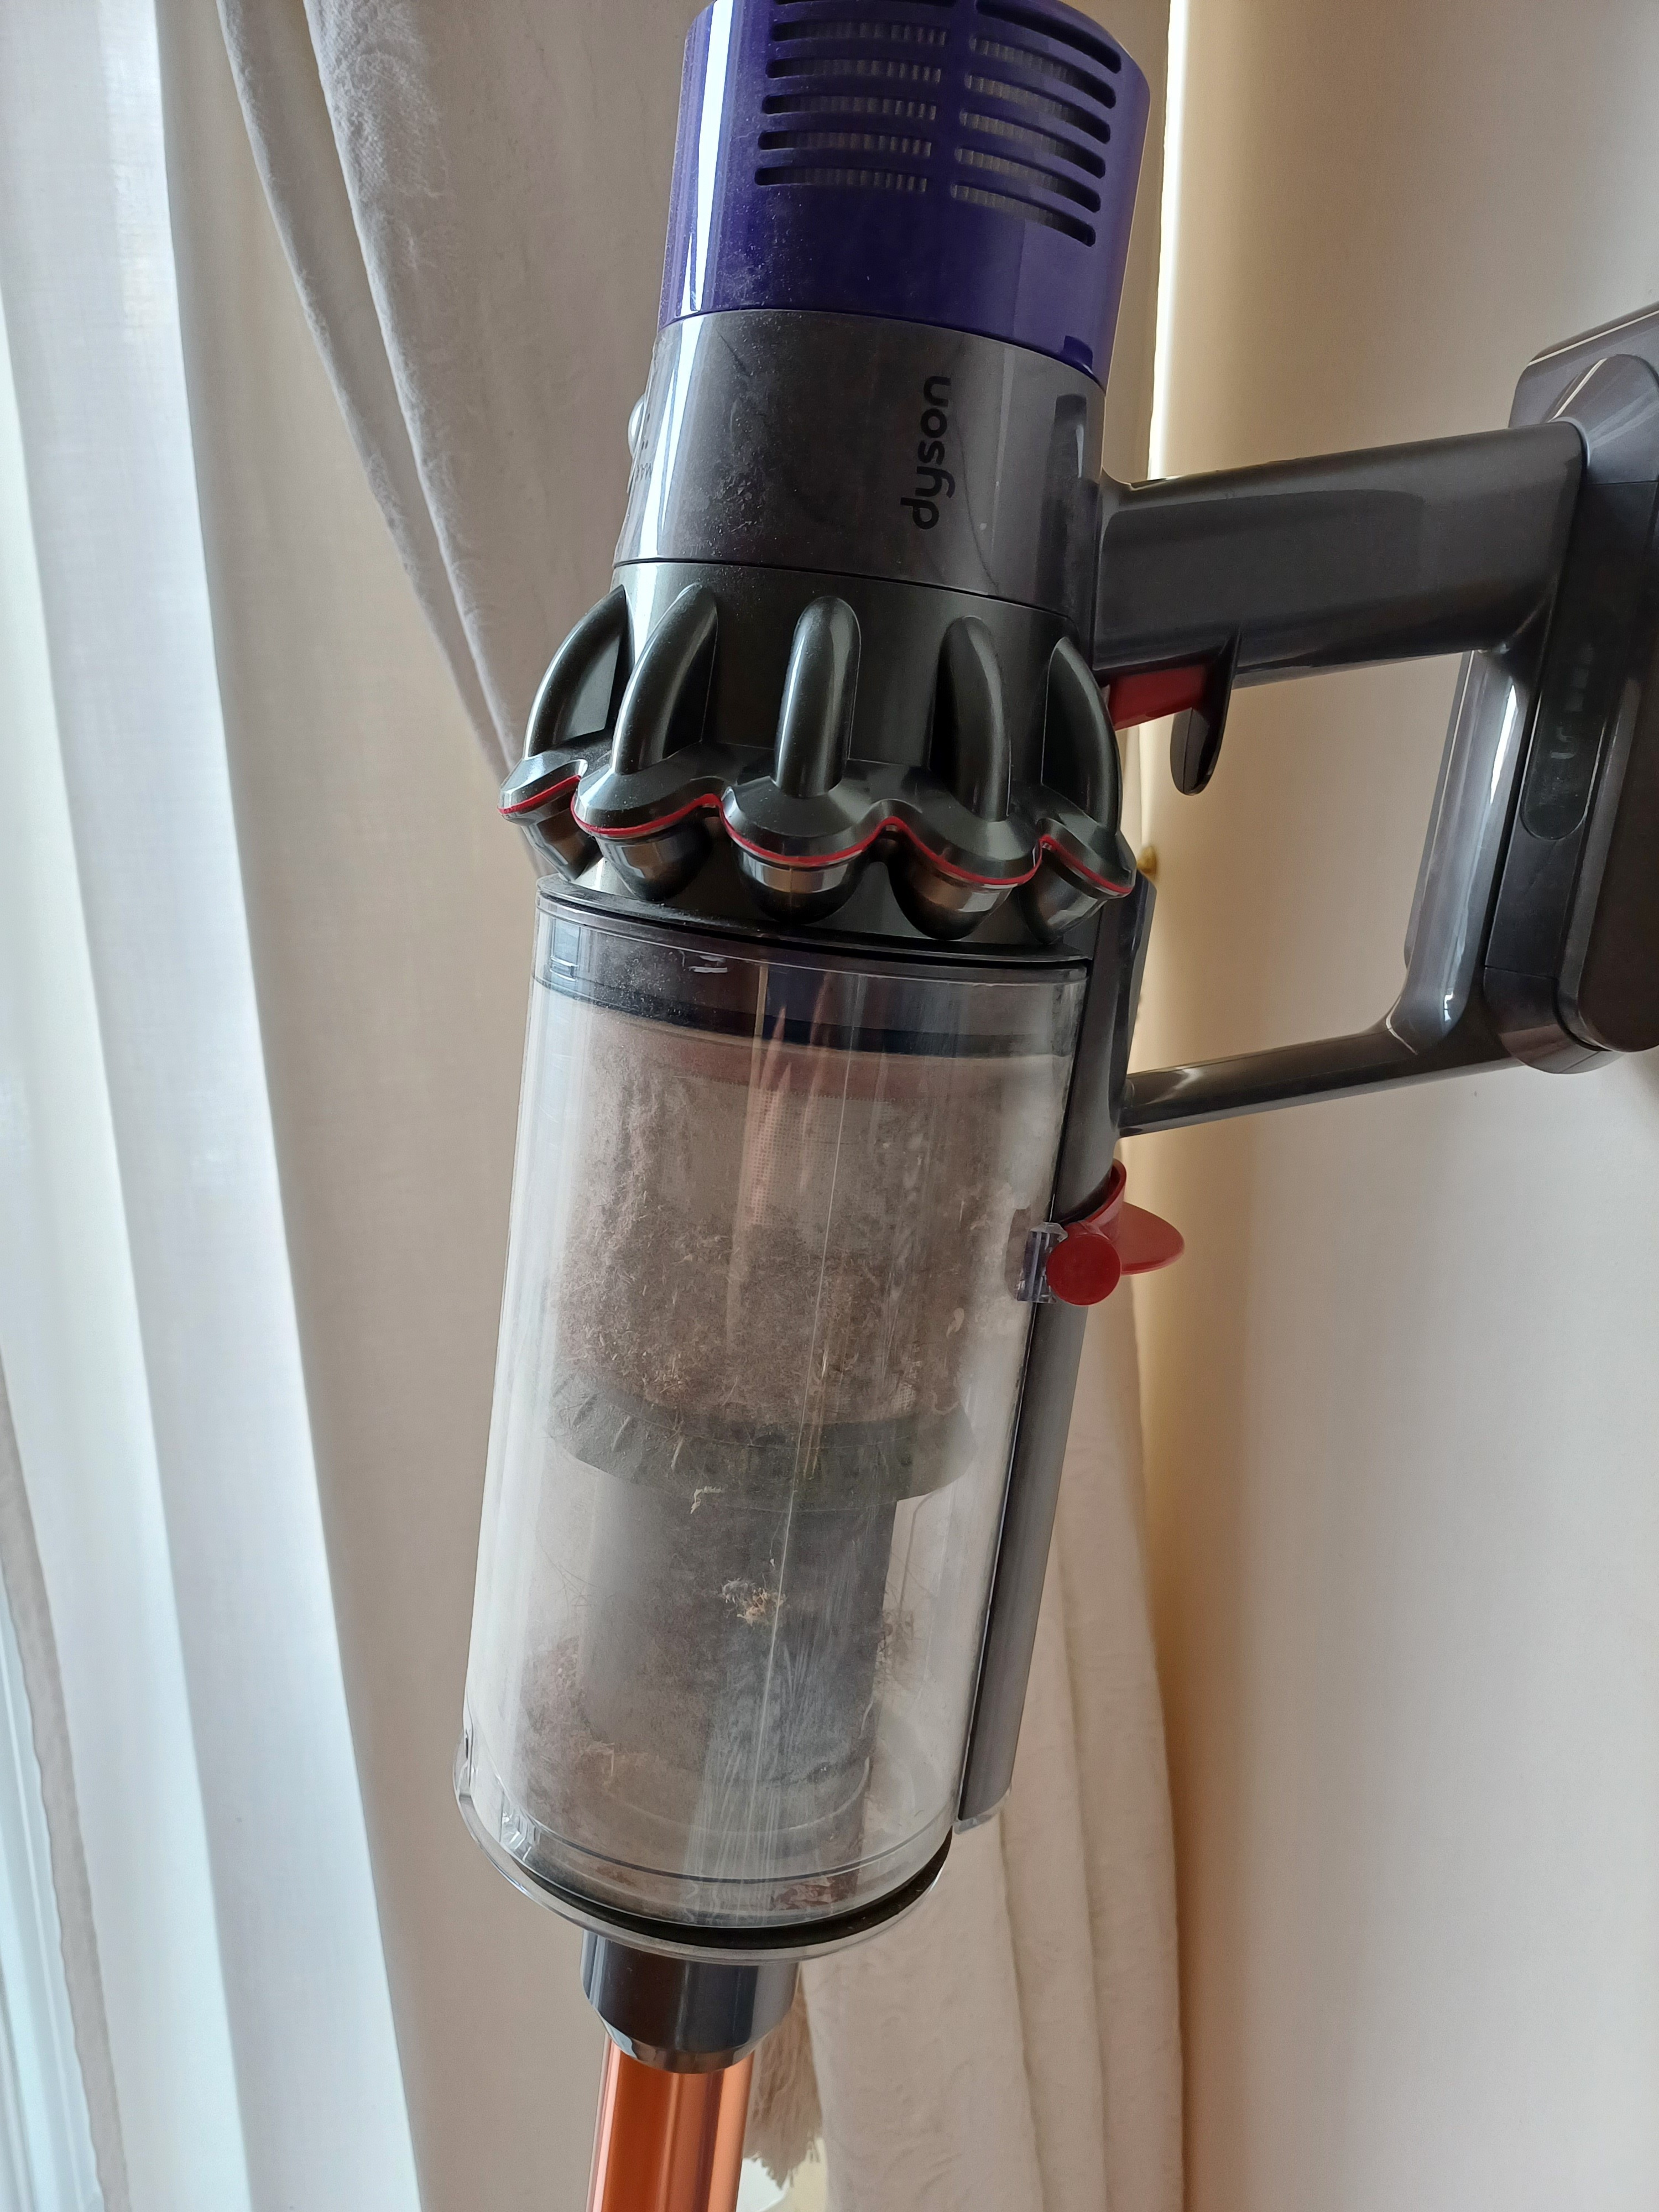
Locate The Red Lever
Find the red lever on your Dyson V10. It’s located near the bin. This lever is essential for detaching the bin. Make sure your vacuum is turned off and unplugged.
Detach The Bin
Once you have located the red lever, press it firmly. The bin will slide down and away from the vacuum body. Hold the bin over your trash can to avoid spills. Pull the bin down until it clicks and detaches completely.
Empty the contents into your trash can. Make sure the bin is fully empty before reattaching it. This ensures your Dyson V10 is ready for the next use.
Emptying The Bin
Emptying the bin on your Dyson Stick Vacuum V10 is essential. It ensures optimal performance and helps maintain cleanliness. Follow these steps to empty the bin properly without making a mess.
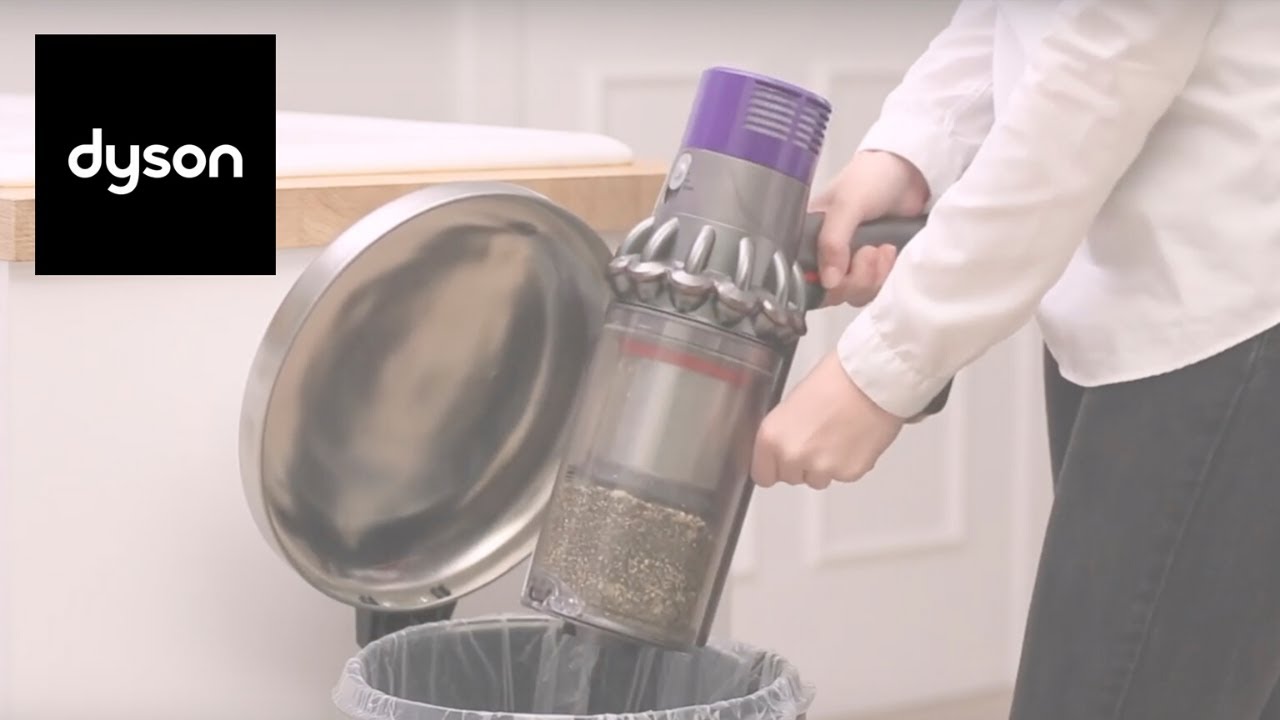
Position Over Trash Can
Hold your vacuum over a trash can. This prevents debris from spilling onto the floor. Make sure the bin is positioned right above the opening of the trash can.
Release Debris
Locate the red lever on the vacuum. Pull it to open the bin. The debris will fall directly into the trash can. Ensure the bin is fully emptied.
After emptying, close the bin securely. Double-check to ensure it is locked in place. This step prevents dust from escaping during the next use.
Cleaning The Bin
Keeping your Dyson Stick Vacuum V10 in top condition requires regular maintenance. One critical task is cleaning the bin. This ensures your vacuum continues to perform at its best. Follow these simple steps to clean the bin of your Dyson V10.
Remove Remaining Dirt
Disconnect the vacuum from its power source. Hold the vacuum over a trash can. Press the red release button to open the bin. Shake the vacuum gently to remove any remaining dirt. Ensure all debris falls into the trash can.
Wipe With Damp Cloth
Take a damp cloth. Wipe the inside of the bin thoroughly. Remove any dust or residue stuck to the sides. Avoid using any harsh chemicals or detergents. Let the bin air dry completely before reassembling.
Reattaching The Bin
Reattaching the bin to your Dyson V10 stick vacuum is an essential step. Properly securing the bin ensures your vacuum operates smoothly. Let’s break it down step by step to make it easy for you.
Align With Vacuum Body
Align the bin with the vacuum body. Ensure the bin’s clip matches the slot on the vacuum. This alignment is crucial for a secure fit. Take a moment to double-check the alignment before proceeding.
Secure The Bin
Push the bin towards the vacuum until you hear a click. This sound indicates the bin is securely attached. Gently pull on the bin to confirm it is locked in place. If it moves, repeat the alignment process. A secure bin prevents dust from escaping and maintains the vacuum’s performance.

Credit: www.amazon.com
Maintaining The Filter
Keeping your Dyson Stick Vacuum V10 in top condition involves regular filter maintenance. A clean filter ensures strong suction and extends the vacuum’s lifespan. Here’s a simple guide on maintaining the filter.
Locate The Filter
First, you need to find the filter. The filter is located at the back of the vacuum.
To access it, press the release button and gently pull out the filter. It should come out easily.
Rinse Under Water
Once the filter is out, it’s time to clean it. Rinse the filter under cold water. Ensure the water runs clear through the filter.
Important: Do not use soap or other cleaning agents.
After rinsing, gently shake the filter to remove excess water. Let it dry for 24 hours before reinserting.
Here is a quick guide:
- Locate the filter at the back.
- Press the release button.
- Rinse the filter under cold water.
- Let it dry for 24 hours.
Following these steps ensures your vacuum performs at its best.
Drying And Reassembling
Drying and reassembling your Dyson V10 stick vacuum is simple. After cleaning the filter, it is essential to ensure it is completely dry before reassembling. This step prevents damage and maintains efficiency.
Air Dry The Filter
After rinsing the filter, shake off excess water. Place the filter in a dry, warm spot. Ensure it stays there for at least 24 hours. Avoid direct sunlight or heat sources. A well-ventilated area works best. This ensures the filter dries thoroughly.
Reinsert Filter
Once the filter is completely dry, it is time to reinsert it. Align the filter with the slot on the vacuum. Push it gently until it clicks into place. Make sure it is secure before using the vacuum again. Proper reassembly ensures optimal performance.
Credit: www.youtube.com
Final Checks
After emptying your Dyson Stick Vacuum V10, it’s crucial to perform some final checks. These checks ensure your device operates efficiently and remains in good condition. Follow these steps to complete the final checks.
Test The Vacuum
First, turn on your vacuum. Listen for any unusual noises. Check the suction power. A strong suction indicates everything is working well.
If the vacuum sounds normal, move it across various floor types. This helps you detect any operational issues. Pay attention to how it handles carpets and hard floors.
Ensure Proper Operation
Inspect the vacuum’s components. Look at the filter, brush bar, and dustbin. Ensure they are clean and properly attached.
Check the filter for dirt or blockages. A clean filter improves performance. Verify the brush bar rotates freely. This ensures effective cleaning.
Lastly, recheck the dustbin. Make sure it is correctly secured. An improperly attached dustbin can affect suction power.
By performing these final checks, you ensure your Dyson Stick Vacuum V10 remains in top condition.
Credit: community.dyson.com
Conclusion
Emptying your Dyson Stick Vacuum V10 is straightforward and essential. Regularly emptying the bin ensures optimal performance. Always switch off and unplug before emptying. Press the red button to release the bin. Slide the bin down to empty dust and debris.
Clean the bin if necessary. Reattach the bin securely. Now, your Dyson V10 is ready for the next use. Keeping your vacuum clean helps it last longer. Follow these steps and maintain your vacuum’s efficiency.