How to Clean Toaster Oven Baking Soda: Quick and Easy Guide

Cleaning a toaster oven with baking soda is easy. It removes grime and keeps your appliance fresh.
A dirty toaster oven can affect your food’s taste and even pose a fire risk. Using baking soda, a natural and effective cleaner, makes the task simple and safe. This common household item gently scrubs away stuck-on food and grease without harsh chemicals.
It’s budget-friendly and readily available. In this guide, we’ll walk you through the steps to clean your toaster oven efficiently. By the end, you’ll have a sparkling, odor-free appliance ready for your next meal.

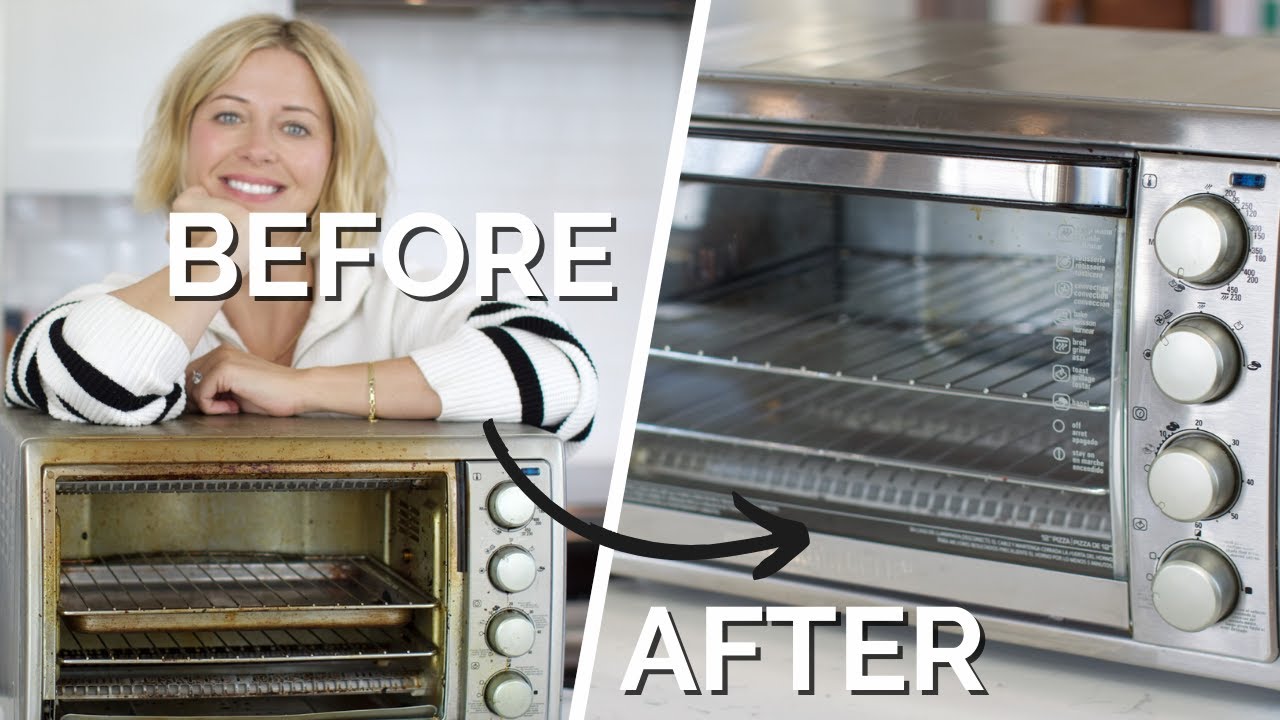
Credit: www.youtube.com
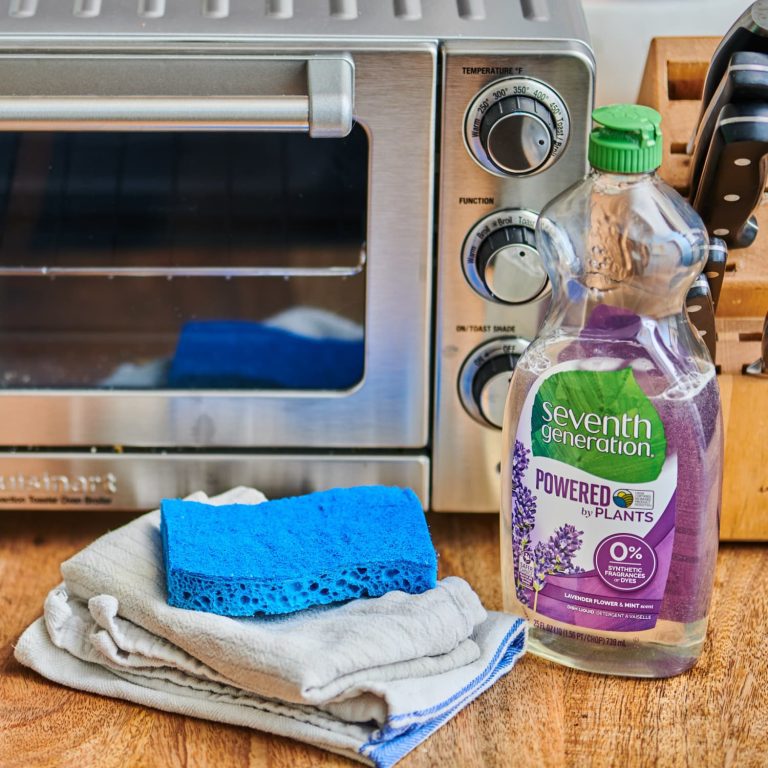
Gather Supplies
Cleaning a toaster oven with baking soda is simple. Before starting, you need to gather the necessary supplies. Having everything ready will make the process smooth. Let’s look at what you need to get started.
Essential Cleaning Tools
To clean your toaster oven, you need a few essential tools. These tools include:
- A sponge or soft cloth
- A small bowl
- Measuring spoons
- An old toothbrush
- Baking soda
- Water
Each tool plays a key role in cleaning. The sponge or cloth helps wipe down surfaces. The bowl holds the cleaning solution. Measuring spoons ensure you use the right amount of baking soda. The toothbrush helps scrub small areas. Water and baking soda create the cleaning paste.
Why Baking Soda
Baking soda is a powerful and natural cleaner. It’s safe for your toaster oven and the environment. Baking soda is non-toxic and won’t leave harmful residues. It also effectively removes grease and grime.
Using baking soda has several benefits:
- It’s affordable
- It eliminates odors
- It acts as a mild abrasive
These benefits make baking soda an ideal choice for cleaning. It’s gentle yet effective. Baking soda ensures your toaster oven is clean and fresh.
Prepare The Toaster Oven
Before you start cleaning your toaster oven, you need to prepare it. This step ensures your safety and makes the process easier. Follow these simple steps to get your toaster oven ready for a thorough clean.
Unplug And Cool Down
First, unplug your toaster oven. This step is crucial to avoid any electrical accidents. Make sure the toaster oven is completely cool. Cleaning a hot appliance can be dangerous. Wait at least 15-20 minutes after use to ensure it has cooled down.
Remove Racks And Trays
Next, remove all racks and trays from inside the toaster oven. Take out any removable parts to make cleaning easier. Set them aside for separate cleaning. This will also allow you to reach all corners of the toaster oven.
Create Baking Soda Paste
Cleaning your toaster oven is easier with a baking soda paste. This natural cleaner removes grime and stains effectively. Let’s break down the steps to create this powerful paste.
Mixing Ingredients
First, gather your ingredients. You only need baking soda and water. Use a small bowl for mixing. Add 4 tablespoons of baking soda to the bowl. Slowly pour in 2 tablespoons of water. Mix them together.
Achieving The Right Consistency
The paste should be thick, not runny. If it’s too dry, add a bit more water. If it’s too wet, add more baking soda. Stir until smooth. The paste is now ready to use.
Apply Baking Soda Paste
Cleaning your toaster oven can be easy with baking soda. This natural cleaner is safe and effective. Follow these steps to clean your toaster oven with a baking soda paste.
Covering Dirty Areas
First, mix baking soda with water to form a paste. Use a ratio of three parts baking soda to one part water. This should create a thick paste that sticks well.
Spread the paste over the dirty areas inside your toaster oven. Make sure to cover all spots with grime or burnt-on food. Use a spatula or an old toothbrush to apply the paste evenly.
Avoid the heating elements and any electrical parts. Focus on the walls, floor, and door of the oven. The baking soda will help break down tough stains and grease.
Letting It Sit
After applying the paste, let it sit. This allows the baking soda to work its magic. The longer it sits, the better it can loosen grime and stains.
For best results, leave the paste on for at least 12 hours. You can apply the paste in the evening and let it sit overnight.
Once the paste has had time to work, you can move on to the next step. This involves wiping off the paste and cleaning the oven.
Scrub And Wipe
Cleaning your toaster oven can seem daunting, but it’s simpler than it looks. The key step, scrub and wipe, ensures your appliance is not only clean but also safe to use. A clean toaster oven enhances cooking efficiency and extends the appliance’s life.
Using A Sponge Or Brush
Start by using a damp sponge or brush. A sponge is gentle on surfaces, while a brush can reach tight spots. First, dip the sponge or brush in a mixture of baking soda and water. This mixture is natural and effective for grime removal. Gently scrub the interior walls and racks of the toaster oven. For stubborn spots, let the baking soda paste sit for a few minutes before scrubbing.
| Tool | Use |
|---|---|
| Sponge | Gentle on surfaces |
| Brush | Reaches tight spots |
Removing Residue
After scrubbing, it’s time to remove the residue. Use a clean, damp cloth to wipe away the baking soda paste. This step is crucial to avoid baking soda buildup. Make sure you wipe down all areas, including corners and crevices. For a thorough clean, repeat the process if necessary.
- Dip cloth in warm water
- Wipe interior walls and racks
- Ensure all residue is removed
For the final touch, dry the toaster oven with a soft, dry cloth. This prevents water spots and keeps your appliance looking pristine. Regular cleaning with baking soda ensures your toaster oven remains in top condition.
Credit: www.youtube.com
Rinse And Dry
After scrubbing your toaster oven with baking soda, the next steps are crucial. Rinsing and drying ensure that your appliance is ready for the next use. Proper care in this stage keeps your toaster oven in good condition and prolongs its life.
Wiping With A Damp Cloth
First, use a damp cloth to wipe away the baking soda residue. Make sure the cloth is not too wet. Excess water can damage the toaster oven’s electrical parts. Gently wipe the interior and exterior surfaces, focusing on areas with baking soda build-up.
For stubborn spots, you may need to wipe more than once. Ensure you remove all baking soda traces. This step is important for both cleanliness and the longevity of your appliance.
Air Drying Or Towel Drying
Once you’ve wiped away the baking soda, it’s time to dry the toaster oven. Air drying is the simplest method. Leave the oven door open in a well-ventilated area. This allows the moisture to evaporate naturally.
Towel drying is faster. Use a clean, dry towel to pat the surfaces dry. Pay special attention to corners and crevices where moisture can hide. Ensure the oven is completely dry before plugging it back in.
Here is a quick comparison:
| Drying Method | Pros | Cons |
|---|---|---|
| Air Drying | Easy and hands-free | Takes longer |
| Towel Drying | Fast and thorough | Requires effort |
Both methods are effective. Choose the one that suits your time and preference.
Reassemble And Test
Reassemble the toaster oven after cleaning. Test it to ensure it works properly. Enjoy a clean and functional appliance.
After a thorough clean, reassembling your toaster oven is crucial. This step ensures your appliance works correctly. Proper reassembly prevents any issues during future use.
Putting Racks And Trays Back
Start by drying all parts. Make sure racks and trays are completely dry. Insert the trays into their slots gently. Align the racks with their guides and slide them in. Ensure each part fits snugly in its place. Check that nothing is loose or out of alignment.
Testing The Toaster Oven
Plug in the toaster oven. Set it to a low temperature. Let it run for a few minutes. Observe for any unusual sounds or smells. Ensure the heat distributes evenly. Test each function, such as toasting and baking. Confirm that everything works as expected. If all is good, your toaster oven is clean and ready to use.
:max_bytes(150000):strip_icc()/sea-how-clean-toaster-oven-madeline-muzzi-02-162cda53044541909c7c95d5220ba2dd.jpeg)
Credit: www.seriouseats.com
Maintenance Tips
Regular maintenance of your toaster oven can extend its lifespan and keep it looking new. Cleaning with baking soda is an effective and natural way to maintain your toaster oven. Let’s explore some maintenance tips to ensure your appliance stays in top shape.
Regular Cleaning Schedule
Set a regular cleaning schedule for your toaster oven. Clean it once a week or after every heavy use. Remove crumbs and debris after each use to prevent buildup. Baking soda is a gentle abrasive that won’t damage surfaces. Mix baking soda with water to create a paste. Apply the paste to the interior and let it sit for 15 minutes. Scrub gently with a soft cloth or sponge. Rinse with a damp cloth and dry thoroughly.
Preventing Future Buildup
Preventing buildup will make future cleanings easier. Line the bottom tray with aluminum foil to catch drips and spills. Replace the foil regularly to avoid grease accumulation. Wipe down the interior with a damp cloth after each use. Avoid using harsh chemicals that can damage the toaster oven. Stick to natural cleaners like baking soda and vinegar. Regular maintenance will keep your toaster oven clean and efficient.
Conclusion
Cleaning your toaster oven with baking soda is simple and effective. It keeps your appliance clean and safe. Just remember to unplug it first. Mix baking soda with water to form a paste. Apply the paste and let it sit.
Then, scrub gently and rinse with a damp cloth. Repeat if necessary for stubborn stains. Regular cleaning can prolong your toaster oven’s life. It’s a natural and affordable method. Try this easy solution today and enjoy a cleaner kitchen.