How to Clean the Bottom of a Toaster Oven

Cleaning the bottom of a toaster oven is easier than you think. With a few simple steps, you can keep it spotless and efficient.
Toaster ovens are handy kitchen appliances, but they can get dirty fast. Crumbs, grease, and food bits often collect at the bottom. If ignored, this buildup can affect performance and even pose a fire hazard. Regular cleaning not only extends the life of your toaster oven but also ensures your food tastes better.
You will learn how to clean the bottom of a toaster oven quickly and effectively. We’ll show you simple techniques and tips to keep your appliance in top shape, making your cooking experience safer and more enjoyable.
Gather Necessary Supplies
Before starting the cleaning process, it’s essential to gather the necessary supplies. This preparation will make the task easier and more efficient. Having the right tools and protective gear ensures you can clean the bottom of your toaster oven effectively and safely.
Cleaning Tools
Ensure you have the following cleaning tools:
- Soft cloths or microfiber towels
- Non-abrasive scrub brush
- Dish soap or mild cleaner
- Baking soda and vinegar for tougher stains
- Small handheld vacuum or brush for crumbs
Avoid using metal scouring pads or harsh chemicals. They can damage your toaster oven.
Protective Gear
It’s also important to wear protective gear:
- Rubber gloves to protect your hands
- Apron to keep your clothes clean
These items help you stay safe and clean during the process.
With these supplies ready, you can clean the bottom of your toaster oven with ease. This preparation ensures you handle the task efficiently.

Credit: www.reddit.com
Unplug And Cool Down
Unplug and cool down the toaster oven before cleaning. Remove crumbs and debris from the bottom with a brush. Wipe with a damp cloth for a thorough clean.
Cleaning the bottom of a toaster oven might seem simple, but it’s essential to take the right steps to ensure safety. The first step? Always unplug the toaster oven and let it cool down completely. This will prevent accidents and make the cleaning process much easier.
Safety First
Safety is key. Always unplug the toaster oven before cleaning it. Electricity and water don’t mix. Even a small amount of moisture can cause a short circuit. By unplugging, you eliminate this risk entirely.
Wait For Complete Cool Down
Patience is important. Wait until the toaster oven is completely cool. This may take some time, but it’s worth it. Touching hot surfaces can cause burns. A cool toaster oven is much easier to handle.
To help you remember these steps, here’s a quick checklist:
- Unplug the toaster oven.
- Ensure it is completely cool.
- Proceed to clean.
Taking these precautions ensures a safe and efficient cleaning process. Plus, it protects you from potential accidents.
Follow these steps every time for a smooth and safe cleaning experience.
“`
Remove Crumb Tray
Cleaning the bottom of your toaster oven is essential for its longevity. One of the first steps in this process is to remove the crumb tray. The crumb tray collects fallen food particles and crumbs, preventing them from burning or causing a fire hazard. Regularly cleaning the crumb tray ensures your toaster oven operates efficiently and safely.
Accessing The Tray
First, make sure the toaster oven is unplugged. This guarantees your safety while cleaning. Locate the crumb tray, usually found at the bottom of the toaster oven. Pull the tray out gently. If it resists, check for any clips or latches holding it in place. Release these before attempting to remove the tray again.
Proper Cleaning Method
Once the tray is out, shake off loose crumbs into a trash bin. Use a damp cloth or sponge with mild detergent to wipe the tray clean. Avoid using abrasive materials that could scratch the surface. Rinse the tray thoroughly with water and dry it completely before reinserting it into the toaster oven. This prevents any moisture from causing rust or damage.
Clean Interior Surfaces
Cleaning the interior surfaces of your toaster oven is crucial. It ensures your food stays safe and the appliance works well. This section will guide you through the process of scrubbing walls and removing stubborn stains.
Scrubbing Walls
Start by unplugging the toaster oven. Let it cool completely before cleaning. Remove the racks and any crumb trays. You can clean these separately. Use a damp cloth to wipe the inner walls. This removes loose crumbs and light grease.
For tougher spots, use a soft sponge with a bit of mild dish soap. Avoid using steel wool or abrasive pads. These can scratch the surfaces. Rinse your sponge regularly to avoid spreading grease around.
Work in small sections. Wipe down one area before moving to the next. This ensures thorough cleaning without missing spots.
Removing Stubborn Stains
Stubborn stains need extra attention. Baking soda is a great natural cleaner. Make a paste with baking soda and water. Apply this paste to the stained areas. Let it sit for 10-15 minutes.
After waiting, use a soft sponge to scrub the paste away. The baking soda helps lift the stains without scratching. Rinse the sponge often to avoid spreading the paste around.
For persistent stains, white vinegar is effective. Dampen a cloth with white vinegar. Gently rub the stained areas. The vinegar helps break down the residue. Rinse with a damp cloth to remove any vinegar smell.
Address Heating Elements
Cleaning the heating elements in your toaster oven is crucial. Dirty elements can affect the oven’s efficiency. It can also be a fire hazard. Keeping them clean ensures safe and effective cooking.
Gently Wipe Elements
First, unplug your toaster oven. Let it cool completely. Use a soft, damp cloth to wipe the heating elements. Be gentle. Avoid using abrasive materials. This can scratch the surface. Remove any visible crumbs or grease.
Avoiding Damage
Do not use excessive force. This can damage the elements. Avoid using harsh chemicals. They can corrode the metal. Stick to mild soap and water. Ensure the cloth is not too wet. Excess moisture can cause electrical issues.
Clean The Glass Door
Cleaning the glass door of your toaster oven can be a simple task with the right approach. A clean glass door allows you to see your food while cooking and ensures your appliance looks neat. Follow these easy steps to get that glass door sparkling clean.
Safe Cleaning Solutions
First, choose a safe cleaning solution. You can use commercial glass cleaners or make your own. A mix of vinegar and water works well.
- Mix equal parts vinegar and water in a spray bottle.
- Spray the solution on the glass door.
- Let it sit for a few minutes to loosen grime.
If you prefer a commercial cleaner, ensure it is non-toxic. This ensures safety while cleaning.
Drying Techniques
After cleaning, drying the glass door is crucial. Use a soft, lint-free cloth for this task. A microfiber cloth works best.
- Wipe the glass in a circular motion.
- Ensure all moisture is removed.
- Check for streaks and wipe again if necessary.
This method leaves the glass door shiny and streak-free.
Remember to clean your toaster oven regularly. This keeps it in good condition and ensures your food tastes great.
Reassemble And Inspect
After thoroughly cleaning the bottom of your toaster oven, it’s crucial to reassemble and inspect it. This ensures it functions properly and safely. Let’s go through the steps to get your toaster oven back in working order.
Reinsert Crumb Tray
First, carefully slide the crumb tray back into its slot. Ensure it fits snugly. A secure crumb tray prevents crumbs from falling into the heating elements.
Check For Remaining Debris
Next, check the interior for any remaining debris. Look closely in corners and near heating elements. Any leftover crumbs or grease can affect the performance and safety of your toaster oven.
Use a small brush or cloth to remove any missed debris. Keeping the interior clean prolongs the life of your toaster oven.

Credit: m.youtube.com
Regular Maintenance Tips
Keeping your toaster oven clean enhances its performance and longevity. Regular maintenance prevents buildup and ensures safe usage. Follow these tips to keep the bottom of your toaster oven spotless.
Frequency Of Cleaning
Regular cleaning is key to maintaining a toaster oven. Clean the bottom at least once a month. If you use it daily, consider cleaning it every two weeks.
Frequent cleaning prevents crumbs and grease buildup. This avoids unpleasant odors and potential fire hazards.
Preventive Measures
Preventive measures can simplify the cleaning process.
- Use a baking sheet: Place a baking sheet on the bottom rack. It catches crumbs and spills.
- Line with aluminum foil: Line the bottom with aluminum foil. Replace it when it gets dirty.
- Regularly empty the crumb tray: Empty the crumb tray after each use. This prevents crumbs from burning.
- Avoid overfilling: Avoid overfilling the toaster oven. This prevents spills and reduces cleanup.
Implement these measures to make cleaning easier and extend the life of your toaster oven.

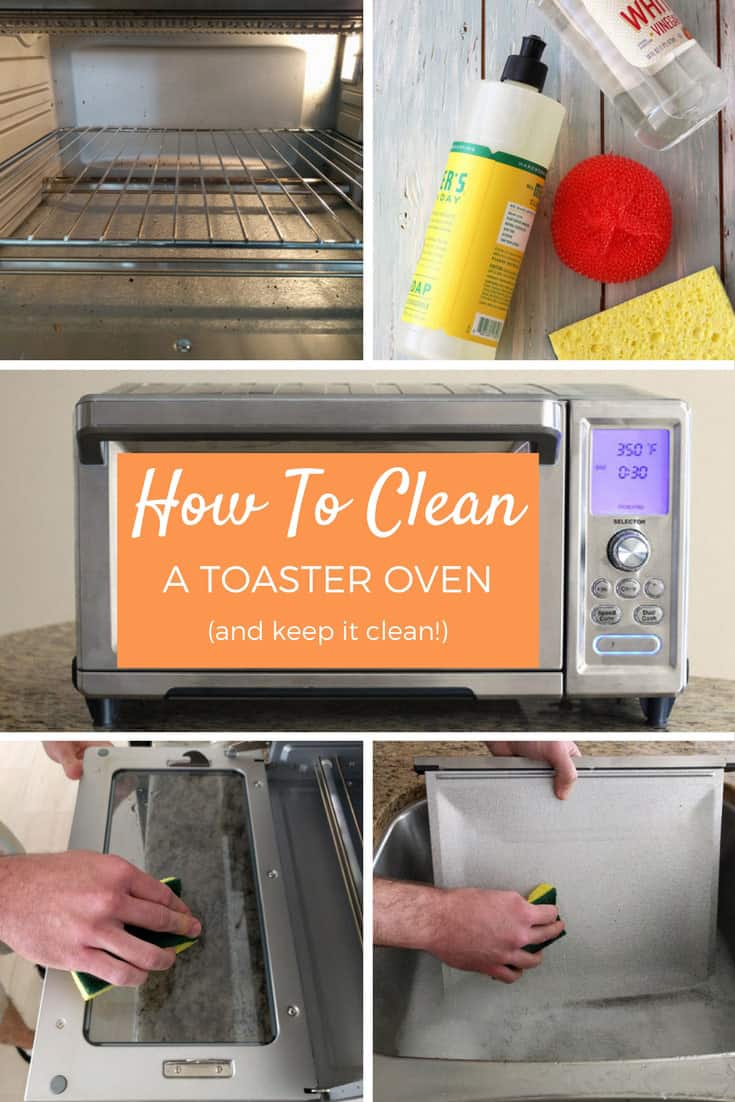
Credit: toasterovenlove.com
Conclusion
Cleaning the bottom of a toaster oven is simple. A clean toaster oven works better and lasts longer. Regular maintenance prevents buildup and keeps your kitchen safe. Follow the steps outlined to make this task quick and easy. Gather your supplies, unplug the oven, and get started.
Wipe away crumbs and grease for a sparkling result. Consistent care ensures your toaster oven stays in top condition. Enjoy a clean, efficient appliance every time you use it.


