How to Clean Stick Vacuum: Expert Tips for Optimal Performance
Cleaning a stick vacuum can seem daunting. But it’s simpler than you think.
Stick vacuums are great for quick cleanups. They are lightweight and easy to use. Over time, though, they can get clogged and dirty. Regular cleaning ensures they work efficiently and last longer. Stick vacuums are popular for their convenience. They are perfect for small spaces and quick jobs.
Yet, like any tool, they need maintenance. Dirt and debris can block the filters and reduce suction. This guide will teach you the steps to keep your stick vacuum in top shape. You’ll learn how to clean the filters, empty the dustbin, and check for clogs. With just a little effort, your stick vacuum will stay clean and effective.
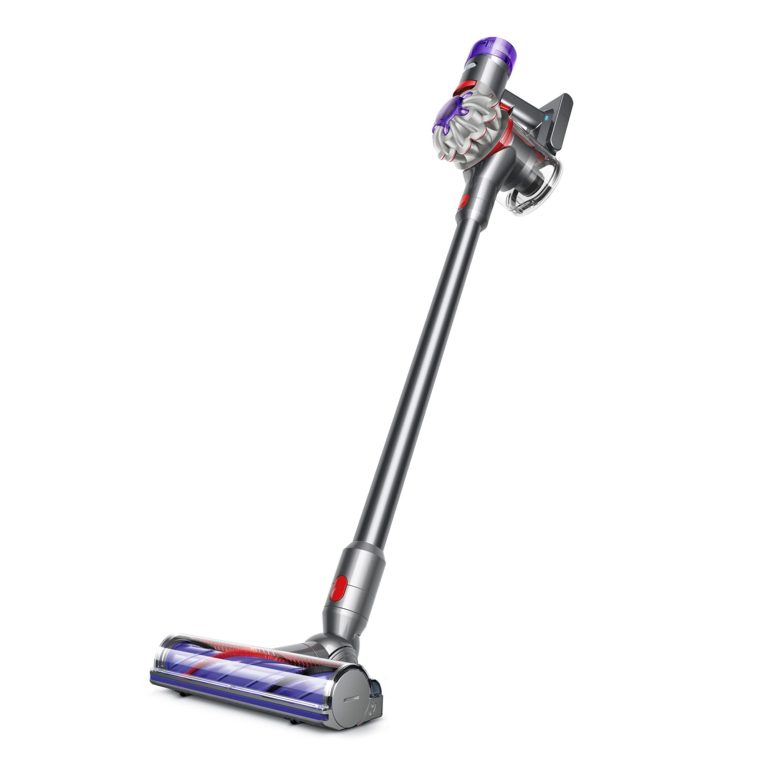
Choosing The Right Stick Vacuum
Choosing the right stick vacuum can transform your cleaning routine. Stick vacuums are lightweight, easy to maneuver, and perfect for quick clean-ups. But with so many options, how do you choose the best one for your needs? Here are some important points to consider.
Types Of Stick Vacuums
Stick vacuums come in various types. Corded stick vacuums offer consistent power. You do not need to worry about battery life. Cordless stick vacuums provide flexibility. They are great for moving around the house without a cord in the way. Handheld stick vacuums are small. They are perfect for cleaning cars or small spaces. Each type has its own benefits.
Key Features To Consider
Pay attention to the vacuum’s weight. A lighter vacuum is easier to carry. Look at the battery life for cordless models. Longer battery life means more cleaning time. Check the suction power. Strong suction ensures effective cleaning. Consider the dustbin capacity. A larger dustbin means fewer trips to empty it. Finally, look at the attachments. Different attachments help clean various surfaces and hard-to-reach areas.

Credit: www.amazon.com
Preparation Before Cleaning
Ensure the stick vacuum is unplugged before cleaning. Gather necessary tools like a soft brush and microfiber cloth. Check the manual for specific instructions.
Cleaning a stick vacuum can improve its performance and extend its life. Before diving into the cleaning process, it’s essential to prepare properly. This ensures safety and efficiency. Follow these steps to get everything ready.
Gather Necessary Tools
Start by gathering the tools you will need. This includes a soft cloth, a brush, and a small screwdriver. A pair of scissors can help remove tangled hair or threads. A bowl of warm, soapy water is useful for washing removable parts. Having these tools on hand will make the task easier and quicker.
Safety Precautions
Before you start cleaning, ensure the vacuum is unplugged. This prevents any risk of electric shock. If your vacuum is battery-operated, remove the battery. Wear gloves to protect your hands from dust and debris. Make sure you are in a well-ventilated area. This helps avoid inhaling dust particles.
By following these preparation steps, you will be ready to clean your stick vacuum effectively and safely.
Cleaning The Dustbin
Cleaning the dustbin of your stick vacuum is crucial for its performance. A clean dustbin ensures your vacuum works efficiently. It also helps in maintaining good air quality in your home. Let’s dive into the steps for cleaning the dustbin effectively.
Emptying The Dustbin
Start by unplugging your vacuum. You do not want any accidents. Next, locate the dustbin. It is usually transparent and attached to the main body of the vacuum. Press the release button to detach it. Hold the dustbin over a trash can. Open the bottom flap and let the dirt fall out. You may need to shake it gently to remove all debris.
Washing The Dustbin
After emptying the dustbin, it is time to wash it. Remove any remaining debris by hand. Use warm, soapy water to clean the inside and outside of the dustbin. A soft brush or cloth can help scrub any stubborn dirt. Rinse the dustbin thoroughly to remove all soap. Let it air dry completely before reattaching it to the vacuum. This prevents mold and mildew from forming.
Cleaning The Filters
Maintaining your stick vacuum involves regular cleaning of its filters. Clean filters ensure your vacuum works efficiently. Dirty filters can reduce suction power and strain the motor. Let’s dive into the details of filter cleaning.
Types Of Filters
Stick vacuums typically have two types of filters: pre-motor filters and post-motor filters.
| Filter Type | Description |
|---|---|
| Pre-Motor Filter | Located before the motor. It captures large dust particles. |
| Post-Motor Filter | Located after the motor. It traps fine dust and allergens. |
Steps To Clean Filters
- Turn off the vacuum and unplug it.
- Remove the filter. Refer to the user manual if needed.
- Tap the filter gently to remove loose dust.
- Rinse the filter under cold water. Do not use soap or chemicals.
- Allow the filter to air dry completely. This may take up to 24 hours.
- Reinstall the filter in the vacuum once dry.
Regular cleaning of filters extends the life of your vacuum. It ensures optimal performance every time you clean.
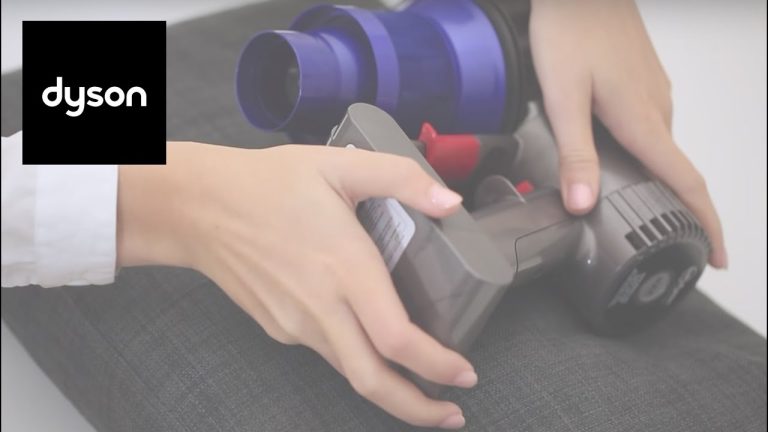
Maintaining The Brush Roll
Keeping the brush roll of your stick vacuum clean ensures it works well. A clean brush roll picks up dirt better and protects the motor. Regular maintenance also prevents hair and debris build-up. Follow these steps to keep your brush roll in top condition.
Removing Debris
First, unplug your vacuum or turn it off. Remove the brush roll from the vacuum. Check your vacuum’s manual for instructions if needed.
Use scissors or a seam ripper to cut away any hair or threads. Be careful not to damage the bristles. Pull out any large pieces of debris with your fingers.
For smaller debris, use a brush or cloth to wipe the roll clean. Be thorough. Even small particles can affect performance.
Deep Cleaning The Brush Roll
For a deeper clean, fill a basin with warm, soapy water. Soak the brush roll for about 10 minutes. This will loosen any stuck-on dirt.
After soaking, use an old toothbrush to scrub the bristles. Pay special attention to any areas with stubborn dirt. Rinse the brush roll under running water to remove any soap residue.
Allow the brush roll to dry completely before reattaching it to the vacuum. A wet brush roll can damage the vacuum’s motor.
Regularly deep cleaning your brush roll ensures it stays effective. Your stick vacuum will thank you.
Cleaning The Vacuum’s Exterior
Keeping the exterior of your stick vacuum clean helps maintain its appearance. It also prevents dust and grime buildup. Regular exterior cleaning ensures smooth operation and extends the vacuum’s life.
Wiping Down Surfaces
Begin by unplugging the vacuum. Use a damp cloth to wipe the vacuum’s body. Avoid using too much water. Focus on areas with visible dust and dirt. Pay special attention to the control buttons and handle. These areas often gather grime from frequent use. For stubborn spots, use a mild detergent. Ensure to wipe it off completely.
Cleaning The Wheels
Check the wheels for hair and debris. These can hinder the vacuum’s movement. Use your fingers or tweezers to remove tangled hair. Wipe the wheels with a damp cloth. Clean wheels ensure smooth and easy movement on different surfaces. Inspect the wheel axles as well. A little dirt here can affect mobility. A clean stick vacuum performs better and lasts longer.
Checking For Blockages
Cleaning your stick vacuum regularly ensures its efficiency. Blockages can reduce suction and performance. Checking for blockages is a crucial step in this process. It involves inspecting the hose and clearing the pathways. Let’s dive into these steps to keep your vacuum running smoothly.
Inspecting The Hose
First, detach the hose from the vacuum. Look inside the hose for any debris. Use a flashlight if needed. Even small items can cause blockages. Clear out any visible obstructions. A straightened wire hanger can help. Be gentle to avoid damaging the hose. Check both ends of the hose. Ensure there are no kinks or bends. These can also impede airflow.
Clearing The Pathways
Next, focus on the pathways inside the vacuum. Remove the dustbin and filters. Look inside the vacuum’s airways. Debris often gets stuck here. Use a long, flexible brush to clear these areas. Pay attention to corners and crevices. Even small clogs can affect performance. Ensure all pathways are clear before reassembling.
Reassembling The Vacuum
Once your stick vacuum parts are clean and dry, it is time to reassemble it. Proper reassembly ensures the vacuum works efficiently and extends its lifespan. Follow these steps for a seamless process.
Ensuring All Parts Are Dry
Before you start reassembling, make sure all parts are completely dry. Moisture can damage the motor and other electrical components. You can use a dry cloth to wipe down each part, or leave them to air dry.
If you are short on time, use a hairdryer on a cool setting. This speeds up the drying process without causing heat damage.
Proper Reassembly Techniques
Reassembling a stick vacuum is a step-by-step process. Follow the user manual for specific instructions related to your model. Here are some general tips:
- Filter Placement: Ensure the filter is dry and placed correctly. A misplaced filter can reduce suction power.
- Dustbin Attachment: Secure the dustbin tightly to avoid dust leakage. Check for any cracks or damages before attaching.
- Brush Roll: Align the brush roll properly. It should rotate freely without any obstruction.
- Nozzle and Attachments: Ensure all attachments click into place. Loose attachments can fall off during use.
| Part | Action |
|---|---|
| Filter | Ensure it is dry and correctly placed |
| Dustbin | Secure tightly to avoid leakage |
| Brush Roll | Align properly for free rotation |
| Nozzle | Click into place securely |
Regular maintenance and proper reassembly will keep your vacuum running smoothly. It also helps in maintaining optimum performance and increasing the longevity of your appliance.
Regular Maintenance Tips
Keep your stick vacuum working well by cleaning it regularly. Remove debris from filters and empty the dustbin often. Check for clogs in the hose to ensure efficient performance.
Maintaining your stick vacuum keeps it performing well. Regular maintenance extends the vacuum’s life. It also ensures efficient cleaning. Let’s explore some key tips for regular maintenance.
Establishing A Cleaning Schedule
Create a regular cleaning schedule. Clean your stick vacuum weekly. This prevents dust build-up. It also helps avoid clogs. Stick to a routine for best results.
Empty the dust bin often. A full dust bin reduces suction. Clean the filters regularly. This keeps airflow optimal. Replace filters as per the manufacturer’s instructions.
Check the brush roll. Remove hair and debris. This helps the brush roll spin freely. Inspect the vacuum’s attachments. Ensure they are clean and functional.
Signs That Your Vacuum Needs Attention
Watch for signs your vacuum needs attention. Reduced suction is a major sign. This indicates a clogged filter or full dust bin. Strange noises can signal a problem. Check for blockages if you hear unusual sounds.
Overheating is another sign. The vacuum may shut off automatically. This means it needs cleaning. A burning smell is a serious sign. Unplug the vacuum immediately. Inspect for stuck debris or motor issues.
Regular maintenance is simple. It keeps your vacuum running smoothly. Follow these tips to ensure a long-lasting, efficient stick vacuum.
:max_bytes(150000):strip_icc()/rsp-detail-tineco-pure-one-s11-tango-smart-stick-handheld-vacuum-at-tineco-hwortock-0015-8885297ca9724189a2124fd3ca15225a.jpg)
Credit: www.realsimple.com
Conclusion
Cleaning your stick vacuum is easy and keeps it working well. Regular maintenance ensures long-lasting performance. Empty the dustbin after each use. Check and clean the filters monthly. Remove any tangled hair or debris from the brush roll. Wipe down the vacuum’s exterior with a damp cloth.
By following these simple steps, your vacuum will stay efficient and clean. Remember, a well-maintained vacuum means a cleaner home. Keep your stick vacuum in top shape with these easy tips.