How to Clean Oster Toaster Oven: Step-by-Step Guide

Cleaning your Oster toaster oven is essential for its longevity. A clean oven also ensures better tasting food and safety.
Toaster ovens can get dirty quickly with regular use. Grease, crumbs, and burnt food can accumulate, leading to unpleasant odors and even potential fire hazards. Learning to clean your Oster toaster oven effectively can save you time and effort. In this guide, you will find simple steps to keep your toaster oven in top shape.
Regular cleaning can also help maintain its performance and extend its life. Let’s dive into the easy and practical ways to clean your Oster toaster oven, ensuring it stays spotless and works efficiently.

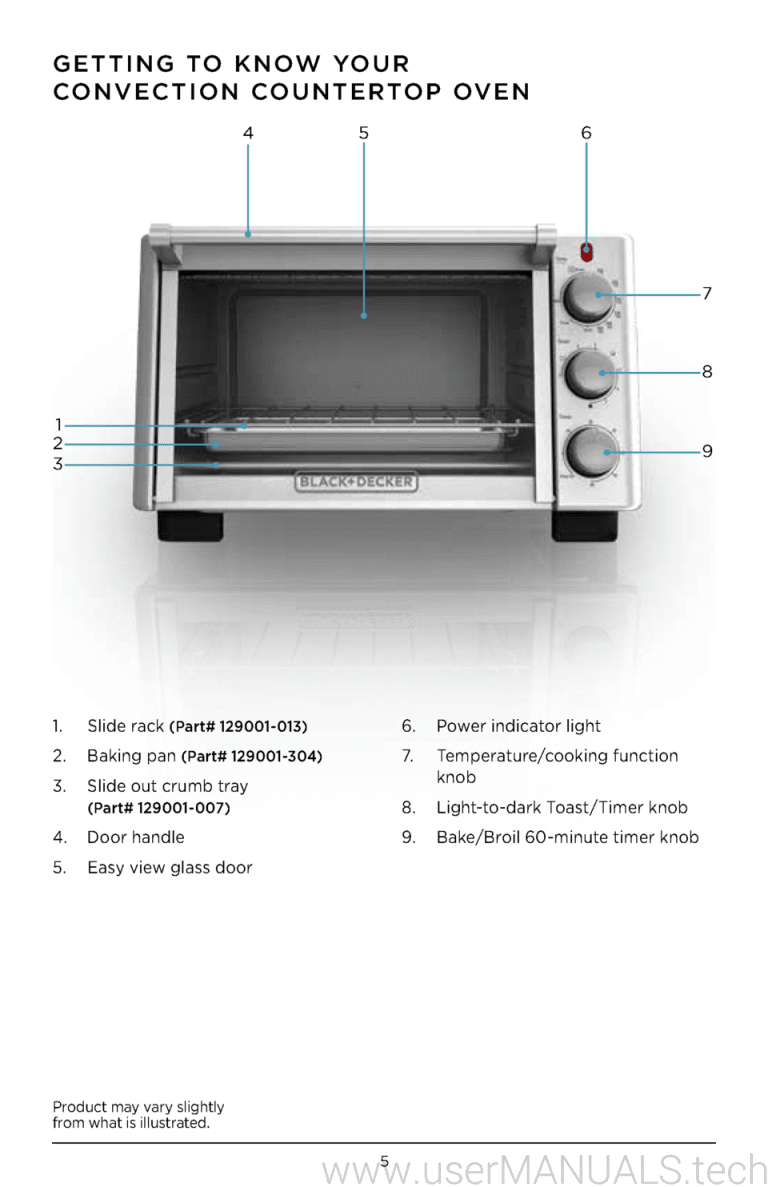
Credit: www.oster.com
Gather Cleaning Supplies
Cleaning your Oster toaster oven is essential for maintaining its efficiency and lifespan. The first step in this process is to gather all the necessary cleaning supplies. This ensures you have everything ready and can clean effectively. Below are the essential tools and cleaning solutions you will need.
Necessary Tools
Before you start, make sure you have the following tools:
- Soft cloth or sponge: These are gentle on the oven’s surface.
- Non-abrasive scrubber: Ideal for stubborn stains.
- Old toothbrush: Perfect for cleaning small crevices.
- Microfiber cloth: Great for drying and polishing.
- Plastic or wooden spatula: Useful for scraping off crumbs.
Cleaning Solutions
Choosing the right cleaning solutions is crucial. Here are some options:
| Cleaning Solution | Usage |
|---|---|
| Dish soap and water: | Mix for a basic and effective solution. |
| Baking soda paste: | Combine with water for tough grease and stains. |
| Vinegar and water: | Use for a natural disinfectant. |
Ensure these supplies are within reach before you start cleaning your Oster toaster oven.

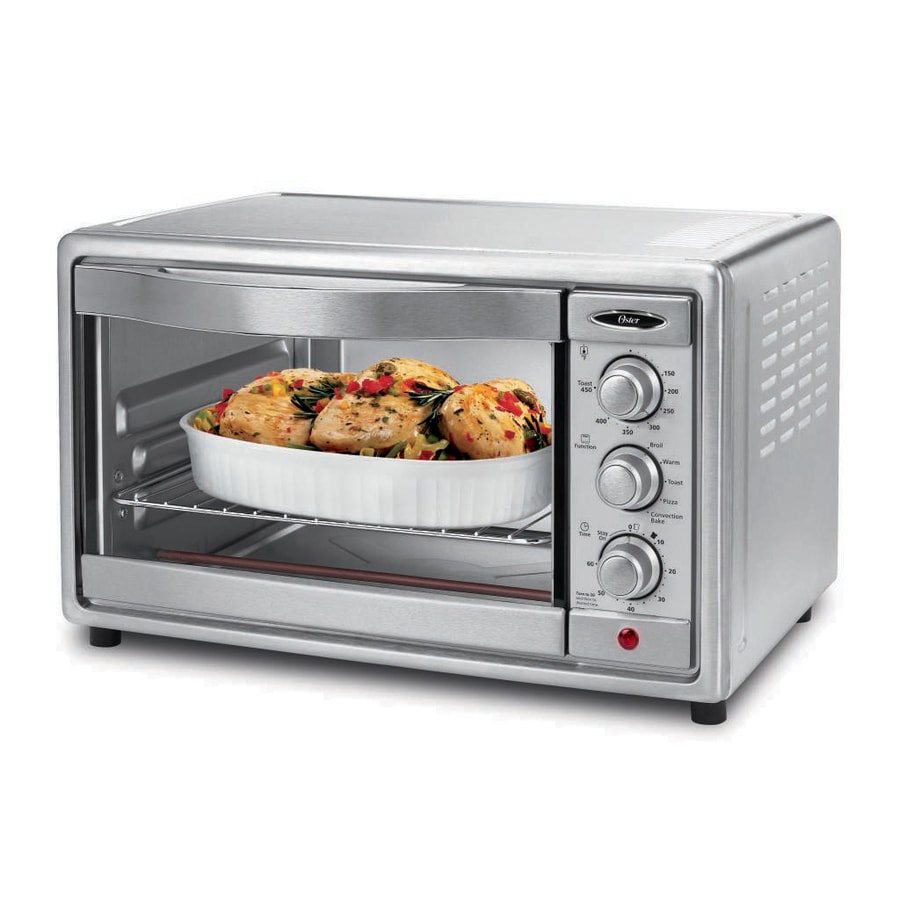
Credit: www.reddit.com
Unplug The Toaster Oven
Cleaning your Oster toaster oven starts with an important step: unplugging it. This step ensures safety and prevents any electric shock. Properly unplugging your toaster oven is simple but crucial. Let’s break it down into easy steps.
Safety Precautions
Before unplugging, make sure your hands are dry. Wet hands can cause electric shock. Stand on a dry surface. This reduces the risk of electric shocks.
Cooling Time
After cooking, let your toaster oven cool down. Wait at least 15 minutes. This prevents burns from hot surfaces. Once it’s cool, you can touch it safely. Now, you can unplug the toaster oven without risks.
Remove And Clean Trays
Cleaning your Oster toaster oven is essential for maintaining its performance and extending its lifespan. One of the most important steps in this process is to remove and clean the trays. This step ensures that crumbs and grease do not build up, which can affect the taste of your food and even pose a fire hazard. Below, we’ll walk you through the steps to properly remove and clean the trays.
Taking Out Trays
First, make sure the toaster oven is unplugged and has cooled down. Safety first! Open the door and locate the trays inside. Gently pull them out. If they are stuck, wiggle them a bit to loosen. Set the trays aside for cleaning.
Washing Techniques
Use warm, soapy water to clean the trays. A soft sponge or cloth works best. Avoid using abrasive materials that can scratch the surface. For stubborn stains, let the trays soak in soapy water for a few minutes. This makes it easier to scrub off the grime.
| Cleaning Step | Details |
|---|---|
| Step 1 | Unplug toaster oven and let it cool |
| Step 2 | Remove trays by gently pulling them out |
| Step 3 | Wash trays with warm, soapy water |
| Step 4 | Use a soft sponge or cloth to clean |
| Step 5 | Soak trays if needed for stubborn stains |
After washing, rinse the trays thoroughly. Make sure no soap residue remains. Dry them completely with a clean towel. Allow them to air dry if needed. Once dry, place the trays back into the toaster oven. Ensure they are properly aligned and slide in smoothly. Your trays are now clean and ready for use!
Credit: www.lowes.com
Clean Interior Surfaces
Keeping the interior surfaces of your Oster toaster oven clean ensures it works efficiently and lasts longer. Regular cleaning prevents burnt food and grease buildup. This makes your toaster oven look and perform better. Let’s dive into how you can clean the interior surfaces effectively.
Removing Crumbs
Crumbs can accumulate at the bottom of your toaster oven. This can lead to burnt smells and even fires. Follow these steps to remove crumbs:
- Unplug the toaster oven and let it cool completely.
- Remove the crumb tray and discard the crumbs.
- Use a soft brush to sweep out any remaining crumbs inside the oven.
- Wipe the crumb tray with a damp cloth and let it dry before placing it back.
Wiping Grease
Grease and oil can stick to the interior walls. This can affect the taste of your food and reduce the toaster oven’s efficiency. Follow these steps to wipe grease:
- Mix a solution of warm water and mild dish soap.
- Dip a soft cloth or sponge into the soapy water.
- Wipe the interior walls, ceiling, and floor of the toaster oven.
- For stubborn grease spots, use a baking soda paste (mix baking soda with water).
- Apply the paste on the grease spots and let it sit for 10 minutes.
- Scrub gently with a non-abrasive scrubber.
- Wipe clean with a damp cloth to remove any residue.
- Dry the interior with a clean, dry cloth.
Regular cleaning keeps your Oster toaster oven in top condition. Follow these steps to ensure a clean and efficient appliance.
Clean Exterior Surfaces
Keeping your Oster toaster oven clean not only ensures it looks good but also helps maintain its functionality. Cleaning the exterior surfaces is an important part of the maintenance process. This section will guide you through the steps to clean the exterior surfaces effectively.
Wiping Down
First, unplug your toaster oven. Use a damp cloth to wipe down the exterior surfaces. Make sure the cloth is not too wet, as excessive moisture can damage the appliance. Focus on areas that may have grease or food splatters.
For stubborn spots, use a mixture of warm water and mild dish soap. Dip your cloth into the soapy water, wring out excess water, and gently scrub the surface. Avoid using abrasive sponges or harsh chemicals as they can scratch the finish.
Polishing Tips
After wiping down the surfaces, it’s time to polish. Use a dry microfiber cloth to buff the exterior. This helps remove any remaining water spots and leaves a nice shine.
For stainless steel models, consider using a small amount of stainless steel cleaner. Apply it to a cloth and gently rub it onto the surface in the direction of the grain. This will keep your toaster oven looking brand new.
Be sure to avoid spraying cleaner directly onto the toaster oven. Always apply it to the cloth first, then wipe the surface.
| Cleaning Step | Materials Needed |
|---|---|
| Wiping Down | Damp cloth, warm water, mild dish soap |
| Polishing | Dry microfiber cloth, stainless steel cleaner (optional) |
Clean The Glass Door
The glass door of your Oster toaster oven can get dirty fast. Oil splatters and food stains are common. Keeping the glass clean ensures you can see your food cooking. It also makes your kitchen look tidier.
Removing Stains
To remove stains, you need a few simple tools. Gather a soft cloth, mild dish soap, and warm water. Avoid harsh chemicals. They can scratch the glass or leave harmful residues.
- Unplug the toaster oven. Safety first!
- Mix a few drops of dish soap with warm water.
- Dip the cloth into the soapy water. Wring out excess water.
- Gently scrub the glass door. Focus on stained areas.
- Rinse the cloth. Wipe the door with clean water to remove soap.
For tough stains, use a baking soda paste. Mix baking soda with water to form a thick paste. Apply the paste to the stain. Let it sit for 15 minutes. Scrub gently with a soft cloth. Rinse with clean water.
Drying Methods
Drying the glass is important. It prevents water spots and streaks. Use a dry, lint-free cloth. Microfiber cloths work best.
- Wipe the glass in a circular motion.
- Ensure all moisture is removed.
- Check for streaks. Buff them out with a dry part of the cloth.
If you prefer, you can use paper towels. They are absorbent and disposable. But they can leave lint. Use high-quality, lint-free paper towels.
Now, your glass door is clean and clear. Ready for the next delicious meal!
Reassemble The Toaster Oven
After cleaning your Oster toaster oven, it’s time to put it back together. The reassembly process is simple, and following these steps will ensure your oven works perfectly. Make sure all parts are dry before reassembling.
Inserting Trays
First, start with the trays. Place the crumb tray at the bottom of the oven. Ensure it fits snugly in place. Next, insert the baking tray and wire rack. Position them at your preferred heights. Check that they slide in and out smoothly.
| Part | Position |
|---|---|
| Crumb Tray | Bottom |
| Baking Tray | Middle |
| Wire Rack | Top |
Final Checks
Now, perform some final checks. Ensure all parts are securely in place. Close the door and check its alignment. Turn the knobs to ensure they move freely. Plug in your toaster oven and test the functions briefly. This helps to confirm everything works fine.
- Check all parts are dry.
- Ensure trays and racks are secure.
- Close the door properly.
- Test the knobs and functions.
Following these steps will help your Oster toaster oven function efficiently. Enjoy your clean and well-assembled toaster oven!
Regular Maintenance Tips
Keeping your Oster Toaster Oven clean ensures it runs efficiently and lasts longer. Regular maintenance helps avoid buildup of grease and crumbs. It also ensures better cooking results.
Frequency Of Cleaning
Clean the toaster oven every week. This prevents buildup of crumbs and grease. Wipe down surfaces after each use. A quick wipe helps keep it clean.
Preventive Measures
Use a baking sheet or aluminum foil. This catches drips and crumbs. Avoid using harsh chemicals. They can damage the interior. Use mild soap and water instead. Keep the toaster oven unplugged when not in use.
Conclusion
Cleaning your Oster toaster oven keeps it working well. Regular cleaning removes crumbs and grease. Follow the simple steps we shared. Use mild soap and a soft cloth. Avoid harsh chemicals. Clean the crumb tray often. Wipe the interior and exterior thoroughly.
Doing this helps your oven last longer. A clean oven also cooks food evenly. Enjoy delicious meals from a clean toaster oven.