How to Clean My Toaster Oven: Simple Steps for Sparkling Results

Cleaning your toaster oven is simple and essential. It ensures your food tastes great and your appliance lasts longer.
A clean toaster oven not only performs better but also extends its lifespan. Over time, crumbs and grease can build up, affecting your food’s taste and even posing a fire hazard. Regular maintenance is key. In this guide, we’ll walk you through easy steps to clean your toaster oven.
With just a few minutes of effort, you’ll have a spotless appliance ready to cook your next meal.
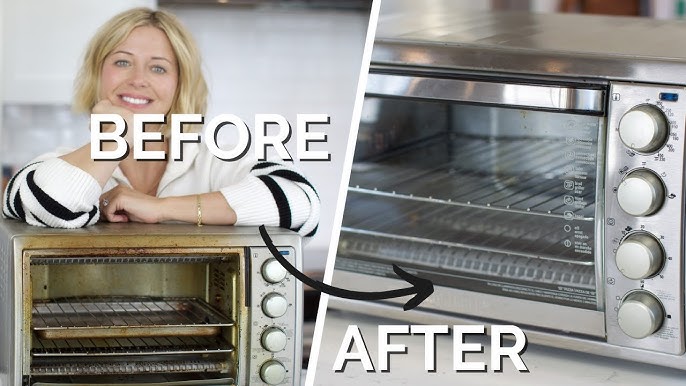
Credit: www.youtube.com
Preparation
Cleaning your toaster oven is an important task. Proper preparation makes the process easier and more effective. Before you start, gather all the necessary supplies and ensure the toaster oven is unplugged. This will help you clean safely and efficiently.
Gather Supplies
First, gather all the supplies you will need. This will make the cleaning process smoother.
- Soft cloths or sponges
- Mild dish soap
- Baking soda
- White vinegar
- Old toothbrush
- Warm water
- Trash bag
Having these supplies ready saves time and ensures you do not need to stop in the middle of cleaning.
Unplug The Toaster Oven
Next, unplug the toaster oven from the power source. This is a crucial safety step.
Unplugging the toaster oven prevents any electrical accidents. It also makes it easier to move the toaster oven to a more suitable cleaning area, such as a kitchen counter.
Once unplugged, allow the toaster oven to cool if it has been recently used. A cool appliance is safer and more comfortable to clean.
Removing Crumbs
Removing crumbs from your toaster oven is a vital step in its maintenance. Crumbs can accumulate quickly and may cause unpleasant odors or even smoke. Regular cleaning ensures your toaster oven works efficiently and lasts longer.
Take Out Trays And Racks
First, unplug your toaster oven to ensure safety. Take out the trays and racks. These components often collect the most crumbs and need attention.
Place the trays and racks in a sink filled with warm, soapy water. Let them soak while you focus on the interior of the oven.
Shake Out Loose Crumbs
Next, turn your toaster oven upside down over a trash can. Gently shake it to remove loose crumbs. Be careful not to damage the heating elements during this process.
Use a small brush to sweep out any remaining crumbs. A soft brush works best to avoid scratching the interior surfaces.
Cleaning Trays And Racks
Keeping the trays and racks of your toaster oven clean is essential. It not only ensures your food tastes good but also extends the life of your appliance. Regular cleaning prevents build-up, making it easier to maintain. Here’s how you can clean your toaster oven trays and racks effectively.
Soak In Warm, Soapy Water
Start by removing the trays and racks from the toaster oven. Fill your sink with warm water and add a few drops of dish soap. Place the trays and racks into the soapy water. Let them soak for at least 15 minutes. Soaking helps to loosen any stuck-on food or grease.
Scrub With A Non-abrasive Sponge
After soaking, use a non-abrasive sponge to scrub the trays and racks. Avoid using steel wool or abrasive pads. These can scratch the surface. Focus on areas with stubborn stains. For tougher spots, apply a bit more pressure. Rinse the trays and racks with clean water. Dry them thoroughly before placing them back in the toaster oven.
Cleaning The Interior
To keep your toaster oven in top shape, regular cleaning of the interior is essential. This ensures the appliance works efficiently and lasts longer. Follow these simple steps to clean the inside of your toaster oven.
Wipe Down Walls And Ceiling
Start by unplugging the toaster oven. Wait until it cools down completely. Remove any trays or racks inside.
Use a damp cloth or sponge with mild dish soap. Wipe down the walls and ceiling of the toaster oven.
For tough stains, use a mixture of baking soda and water. Let it sit for 15 minutes. Then scrub gently with a non-abrasive pad.
Rinse the cloth or sponge and wipe down the walls again. This removes any soap residue. Dry with a clean towel.
Clean The Heating Elements
Be careful when cleaning the heating elements. These are delicate and can break easily. Use a soft brush or cloth to clean them.
If there is stubborn grime, dip the cloth in a vinegar solution. Gently clean the elements without applying too much pressure.
Do not use water directly on the heating elements. This can damage them.
Once done, ensure everything is dry. Then, reassemble the toaster oven. Plug it back in and it’s ready to use.
Regular cleaning keeps your toaster oven safe and efficient. Happy cleaning!
Dealing With Stubborn Stains
Cleaning your toaster oven can be easy. But what do you do with stubborn stains? These stains can be tough and need special care. Let’s explore some effective ways to tackle them.
Use Baking Soda Paste
Baking soda is a powerful cleaner. It can break down tough stains. To make a baking soda paste, mix baking soda with water. Use a ratio of three parts baking soda to one part water.
| Ingredients | Ratio |
|---|---|
| Baking Soda | 3 parts |
| Water | 1 part |
Apply this paste to the stained areas. Ensure the paste covers the stains well. Use a spatula or old toothbrush for this task.
Let It Sit And Scrub
Let the baking soda paste sit for 15-20 minutes. This waiting time is crucial. It allows the paste to work on the stains.
After letting it sit, use a scrub brush. Scrub the stained areas gently but firmly. Circular motions work best. You might need to apply more paste if the stains are very stubborn.
Once scrubbed, wipe the area with a damp cloth. Make sure to remove all the paste. Repeat the process if needed.
Always dry your toaster oven completely before using it again. This prevents any electrical issues.

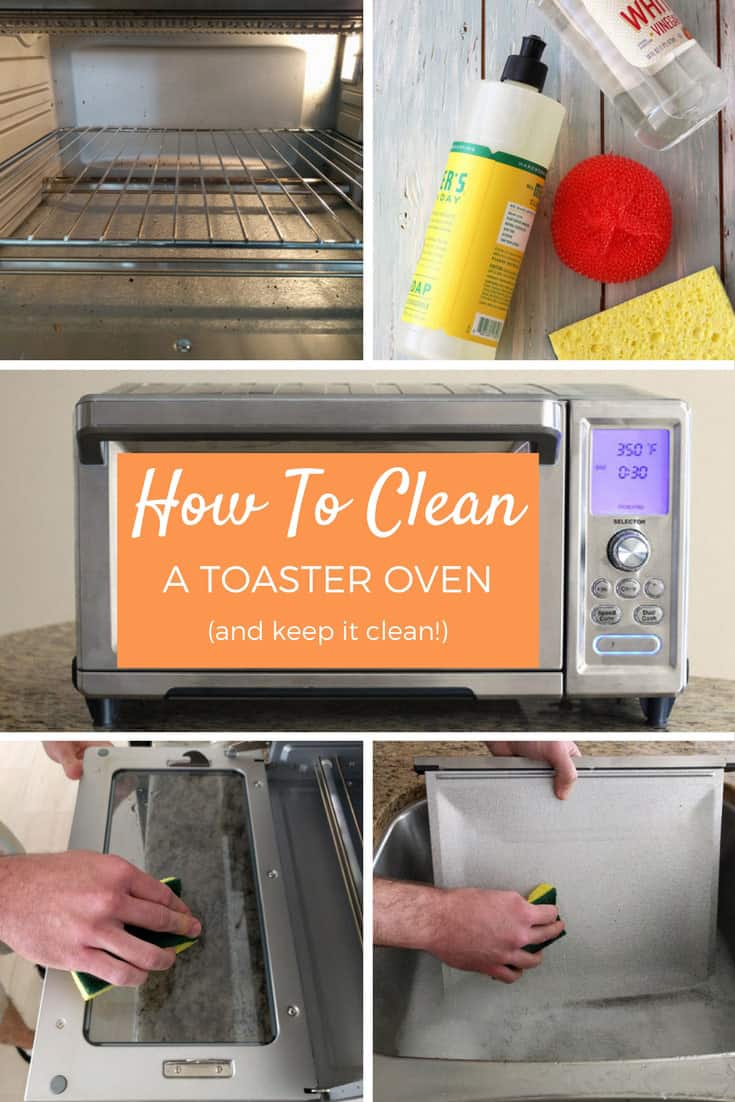
Credit: www.youtube.com
Cleaning The Door
Toaster oven doors often get greasy and dirty with regular use. Keeping the door clean helps maintain your toaster oven’s appearance and function. Let’s break down the steps to make this task easy and effective.
Wipe With Vinegar Solution
Mix equal parts of water and white vinegar. Dip a soft cloth into this solution. Gently wipe the inside and outside of the door. Focus on any greasy spots and stains. Vinegar cuts through grease and grime, leaving the door fresh.
Dry With A Soft Cloth
After wiping with the vinegar solution, take a clean, dry cloth. Carefully dry the door to remove any remaining moisture. Ensure no streaks are left behind. A dry door prevents water spots and keeps it looking shiny.
Cleaning The Exterior
Keeping the exterior of your toaster oven clean is essential. It not only enhances the look but also extends the appliance’s life. Follow these simple steps to ensure your toaster oven stays spotless.
Wipe With Damp Cloth
First, unplug your toaster oven. Safety is important. Then, take a damp cloth and wipe the exterior gently. This will remove any dust or light stains. Avoid using too much water. Excess moisture can damage the toaster oven.
Polish With Dry Cloth
Once you have wiped with a damp cloth, use a dry cloth. This step will polish the surface and remove any remaining moisture. A dry cloth also helps to prevent streaks and keeps your toaster oven looking shiny and new.
Reassembling
Reassembling your toaster oven correctly ensures it works well and safely. Follow these steps to reassemble it properly after cleaning.
Dry All Components
Make sure all parts are completely dry before reassembling. Use a soft cloth to dry each component thoroughly. This prevents any water from causing electrical issues.
If some parts are hard to dry, let them air dry. Place them in a warm, dry spot for a few hours. Check each part to ensure no moisture remains.
Place Trays And Racks Back
Once all parts are dry, start with the trays and racks. Put the crumb tray back in its slot at the bottom. Ensure it fits snugly and slides in easily.
Next, place the racks back in their positions. If your oven has multiple racks, remember their original spots. This helps in even cooking and heating later.
Final Check
Before plugging in the toaster oven, do a final check. Make sure all parts are properly placed. Close the door and ensure it seals well.
Now, your toaster oven is clean and ready to use. Enjoy cooking with your fresh and clean appliance!
Maintenance Tips
Clean your toaster oven by removing the racks and trays. Wipe the interior with a damp cloth. Use a non-abrasive cleaner for stubborn stains.
Keeping your toaster oven clean ensures its longevity and performance. Regular maintenance prevents build-up and potential hazards. Here are some practical maintenance tips to keep your toaster oven in top shape.
Regular Cleaning Schedule
Clean your toaster oven weekly. Unplug it before you start. Remove the racks and trays. Wash them with warm soapy water. Use a soft cloth to wipe the interior. Avoid harsh chemicals. Dry all parts thoroughly before reassembling.
Avoiding Grease Build-up
Grease can accumulate fast. Place a tray or foil at the bottom. This catches drips and crumbs. Wipe spills immediately after each use. Use a damp cloth for grease stains. Avoid abrasive pads. They can scratch the surface.
Following these simple tips helps maintain your toaster oven. This ensures it works efficiently for years.
Credit: toasterovenlove.com
Conclusion
Cleaning your toaster oven is easy and important. Regular cleaning ensures better performance. Start by unplugging the oven. Remove crumbs and wash removable parts. Use a damp cloth for the interior. Avoid harsh chemicals. Let it dry completely before use.
Clean it every few weeks. This keeps it safe and efficient. A clean toaster oven makes your cooking more enjoyable. Follow these steps, and your toaster oven will last longer.