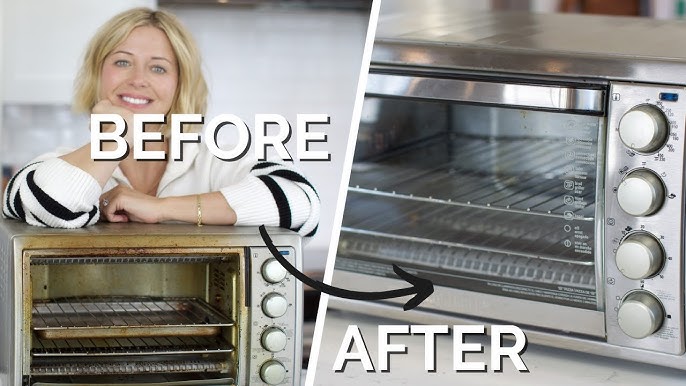
How to Clean Kitchenaid Toaster Oven: Expert Tips & Tricks
Cleaning your KitchenAid toaster oven may seem like a chore. But it’s easier than you think.
Keeping it clean ensures better performance and longevity. Regular maintenance helps prevent food buildup and keeps your appliance in top shape. A clean toaster oven also means healthier meals, free from burnt crumbs and grease. This guide will show you simple steps to clean your KitchenAid toaster oven.
No need for fancy tools or harsh chemicals. Just follow these easy tips to keep your toaster oven sparkling clean. Ready to make your kitchen shine? Let’s dive in and learn how to clean your KitchenAid toaster oven effectively.
Preparation
Cleaning your KitchenAid toaster oven is essential for maintaining its performance. Before you start cleaning, preparation is key. In this section, we will cover the steps you need to take to ensure a smooth cleaning process. Let’s get started with gathering your supplies and making sure your toaster oven is safe to handle.
Gather Supplies
First, gather all the cleaning supplies you will need. You will need a soft cloth, a sponge, dish soap, baking soda, and a brush. Having everything ready will save you time and effort. You might also want to have some gloves to protect your hands.
Unplug And Cool Down
Next, unplug your KitchenAid toaster oven. This is important for your safety. Make sure the toaster oven has completely cooled down before you start cleaning. Cleaning a hot toaster oven can be dangerous. Wait until it is cool to the touch.
Credit: www.youtube.com
Exterior Cleaning
Cleaning the exterior of your KitchenAid toaster oven keeps it looking new. It also ensures the appliance remains free from dirt and grime. Regular cleaning prevents the buildup of grease and food particles. This process is simple and takes only a few minutes.
Wipe Down Surface
First, unplug the toaster oven. Use a damp cloth to wipe the surface. Avoid using abrasive cleaners. These can scratch the surface. Focus on removing any visible dirt. Pay attention to the top and sides. For stubborn spots, use a mild soap solution. Rinse the cloth and wipe again. Ensure the surface is dry before plugging it back in.
Clean Control Panel
The control panel needs gentle cleaning. Use a soft, damp cloth. Avoid spraying water directly on the panel. This can damage the controls. Gently wipe the buttons and knobs. Remove any fingerprints or smudges. For tight spots, use a cotton swab. Ensure the control panel is dry before use. Regular cleaning keeps the panel functioning well.
Interior Cleaning
Keeping the interior of your Kitchenaid toaster oven clean is important. It ensures the appliance functions well and lasts longer. Regular cleaning helps maintain a hygienic cooking environment. Below are steps to clean the interior effectively.
Remove Crumbs
First, unplug the toaster oven. Let it cool completely. Remove the crumb tray from the bottom. Shake the crumbs into the trash. Use a small brush to remove any stuck crumbs. Wipe the tray with a damp cloth. Dry it thoroughly before placing it back.
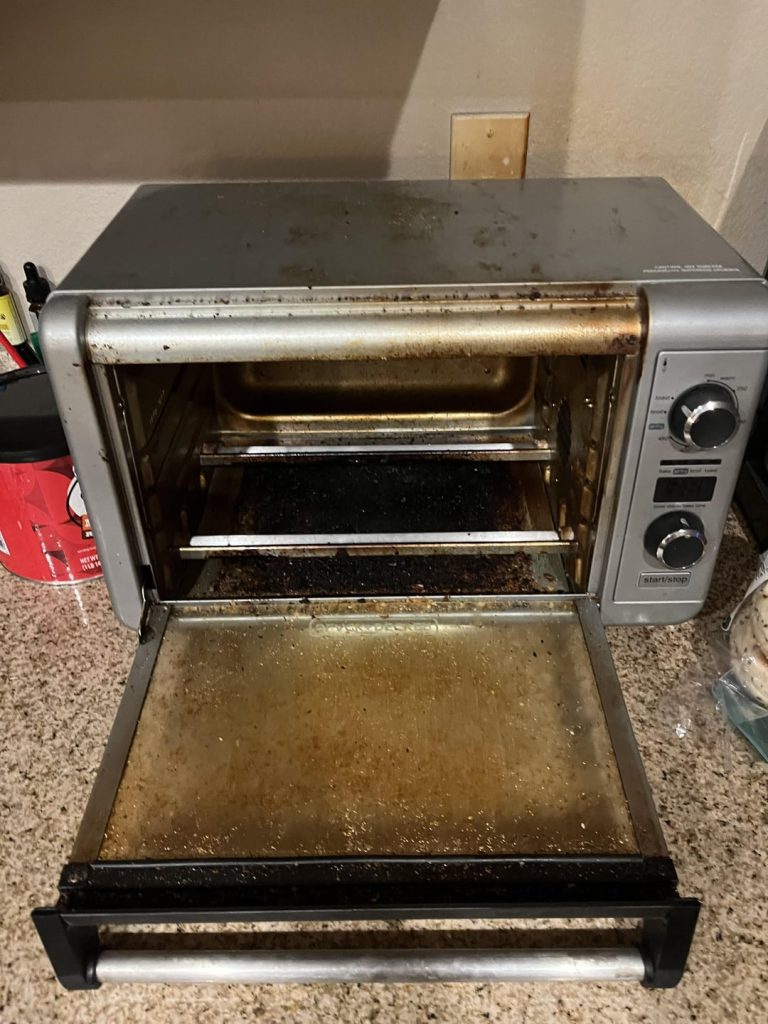
Clean Heating Elements
To clean the heating elements, be gentle. Use a soft cloth or sponge. Dampen it with water but avoid soaking. Wipe the elements carefully to remove any residue. Avoid using abrasive cleaners. Let the elements dry completely before using the oven again.

Credit: www.kitchenaid.com
Deep Cleaning
Deep cleaning your KitchenAid toaster oven ensures it works efficiently. Regular maintenance can extend its lifespan. Follow these steps to give your toaster oven a thorough clean.
Remove Racks And Trays
Unplug the toaster oven. Allow it to cool completely. Open the door and remove all racks and trays. These parts need separate cleaning.
Soak And Scrub
Fill your sink with warm, soapy water. Place the racks and trays inside. Let them soak for 15 minutes. This helps loosen any stuck-on food or grease.
After soaking, use a soft sponge or brush. Gently scrub the racks and trays. Focus on any tough spots. Rinse them thoroughly with clean water.
Dry the racks and trays with a clean towel. Make sure they are completely dry before placing them back in the toaster oven.
Cleaning Glass Door
Keeping the glass door of your Kitchenaid toaster oven clean is essential. It ensures clear visibility and maintains the appliance’s appearance. Here’s a step-by-step guide to help you clean the glass door efficiently.
Use Glass Cleaner
First, gather your supplies. You will need a glass cleaner, a soft cloth, and some paper towels. Spray the glass cleaner directly onto the glass door. Ensure the cleaner covers the entire surface.
Let the glass cleaner sit for a minute. This helps to break down any grease and grime. Use a sponge or a cloth to gently scrub the glass. Focus on spots with stubborn stains.
Dry With Soft Cloth
After scrubbing, it’s time to dry the glass. Use a soft cloth to wipe away the cleaner. This prevents streaks and keeps the glass shiny. Make sure to dry every part of the glass door.
If any streaks remain, use a dry section of the cloth. Polish the glass in circular motions. This ensures the door looks spotless and clear.

Credit: www.kitchenaid.com
Reassembly
After cleaning your KitchenAid toaster oven, it’s time to put everything back together. Reassembly ensures your appliance is ready for use and works properly. Follow these steps to reassemble your toaster oven.
Reinstall Racks And Trays
Start by placing the racks and trays back inside the oven. Make sure each piece fits into its designated slot. The racks should slide in easily without resistance. The trays should sit flat and stable on the racks.
Check For Proper Fit
After reinstalling the racks and trays, check for proper fit. Ensure they are secure and not wobbly. Proper fit is crucial for safe and efficient operation of your toaster oven. If anything seems out of place, adjust until it fits correctly.
Maintenance Tips
Maintaining your Kitchenaid toaster oven is crucial for its longevity and performance. Regular care helps prevent buildup and ensures your appliance works efficiently. Here are some practical maintenance tips to keep your toaster oven in top shape.
Regular Wipe Downs
Regular cleaning is essential. After each use, allow the oven to cool. Then, wipe the interior and exterior with a damp cloth. This prevents grease and crumbs from accumulating. For stubborn spots, use a soft sponge with warm, soapy water. Avoid scrubbing too hard. Gentle cleaning preserves the oven’s finish.
Avoid Harsh Chemicals
Harsh chemicals can damage your toaster oven. They can leave residues that affect your food. Instead, opt for mild cleaning agents. Make a simple solution with baking soda and water. Apply the mixture to stubborn stains, then wipe clean. Vinegar is another safe alternative. Spray it on greasy areas, let it sit, then clean with a damp cloth.
Here’s a simple cleaning schedule to follow:
| Task | Frequency |
|---|---|
| Wipe Down Interior | After Each Use |
| Clean Crumb Tray | Weekly |
| Deep Clean | Monthly |
Remember to always unplug your toaster oven before cleaning. Safety first!
Troubleshooting
Keeping your KitchenAid toaster oven clean ensures it works efficiently. Occasionally, issues might arise that need troubleshooting. This section will cover how to address stubborn stains and when to seek professional help.
Addressing Stubborn Stains
Stubborn stains can be tricky. Here’s a step-by-step guide to help:
- Unplug the toaster oven. Safety first.
- Remove all removable parts. This includes racks and trays.
- Soak these parts in warm, soapy water for 15 minutes.
- Use a soft sponge. Scrub the parts gently to remove stains.
- For the interior, mix baking soda and water. It should form a paste.
- Apply the paste to the stains. Let it sit for 20 minutes.
- Wipe off the paste with a damp cloth. Repeat if needed.
- Dry all parts completely. Then reassemble your toaster oven.
When To Seek Professional Help
Sometimes, issues are beyond basic cleaning. Here are signs you might need professional help:
- The toaster oven isn’t heating properly.
- There’s a burning smell even after cleaning.
- The electrical components seem faulty or damaged.
- Unusual noises during operation.
If you notice these issues, contact a professional repair service. Avoid trying to fix electrical problems yourself. It can be dangerous.
Conclusion
Keep your KitchenAid toaster oven clean to ensure it lasts longer. Regular maintenance prevents dirt buildup and keeps it efficient. Follow the steps provided for a quick, thorough clean. Consistent care makes your appliance work better and look great. Enjoy a spotless, well-functioning toaster oven with minimal effort.