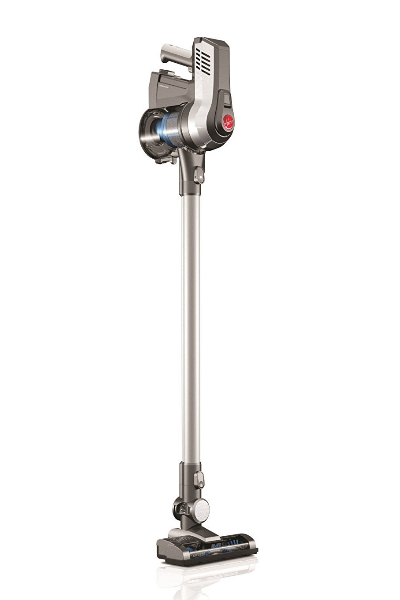
How to Clean Hoover Stick Vacuum: Step-by-Step Guide

Cleaning your Hoover stick vacuum keeps it efficient. Proper maintenance extends its life.
Regular cleaning ensures your vacuum performs at its best. Dust and debris can clog filters and reduce suction power. Following simple steps will help you keep your vacuum running smoothly. In this guide, we’ll show you how to clean your Hoover stick vacuum effectively.
You’ll learn to maintain its parts, remove blockages, and ensure optimal performance. Whether you’re a new owner or have had your vacuum for years, these tips will be useful. Keep your Hoover stick vacuum in top shape with our easy-to-follow instructions.
Credit: morethanvacuums.com
Gathering Supplies
Cleaning your Hoover Stick Vacuum requires the right supplies. Proper tools and solutions make the process easier. Before starting, ensure you have everything you need. This will save time and ensure a thorough cleaning.
Necessary Tools
You will need a few essential tools. A soft brush is helpful for dusting off the vacuum. A screwdriver will assist in disassembling parts. A pair of gloves will protect your hands from dirt and cleaning solutions. Also, keep a microfiber cloth handy for wiping surfaces.
Cleaning Solutions
Choose the right cleaning solutions for your vacuum. A mild detergent mixed with water works well. Avoid harsh chemicals that can damage the vacuum. You can also use a vinegar-water mixture for natural cleaning. Ensure all solutions are safe for your vacuum parts.
Initial Preparation
Cleaning your Hoover Stick Vacuum regularly ensures it performs at its best. The first step to a thorough cleaning is the initial preparation. This process involves getting the vacuum ready for disassembly and cleaning. Follow these simple steps to prepare your vacuum for a deep clean.
Unplug The Vacuum
Safety first. Always unplug the vacuum before cleaning. This prevents accidental starts and electric shocks. Find the power cord and remove it from the outlet. Make sure the vacuum is completely off before proceeding.
Disassemble Parts
Next, disassemble the vacuum parts. Start with the dustbin. Remove it carefully and set it aside. Then, detach the brush roll. Check the manual for guidance if needed. Take off the filters. Each part should be handled gently to avoid damage.
Empty The Dust Bin
Cleaning your Hoover stick vacuum is essential to keep it running efficiently. One of the most important steps is to empty the dust bin regularly. This ensures that your vacuum performs at its best and prolongs its lifespan. Below, we’ll guide you through the process of removing and emptying the dust bin properly.
Removing The Bin
First, locate the dust bin on your Hoover stick vacuum. It is usually situated near the vacuum’s handle or body. To remove the bin, press the release button or lever. This will detach the bin from the vacuum. Carefully pull the bin out and set it aside.
Disposing Of Debris
Now that you have removed the bin, it’s time to dispose of the debris. Hold the bin over a trash can. Open the bin’s bottom flap or lid by pressing the designated button or lever. The debris will fall out into the trash can. Shake the bin gently to ensure all debris is removed.
| Step | Action |
|---|---|
| 1 | Locate the dust bin |
| 2 | Press the release button |
| 3 | Remove the bin |
| 4 | Hold bin over trash can |
| 5 | Open the bin’s flap |
| 6 | Shake out debris |
After disposing of the debris, inspect the bin for any remaining dirt. Use a damp cloth to wipe the inside of the bin if necessary. Make sure the bin is completely dry before reattaching it to the vacuum.
Reattach the bin by aligning it with the vacuum’s body. Press it firmly until it clicks into place. Your Hoover stick vacuum is now ready for use again.

Credit: hoover.com
Clean The Filters
Keeping the filters of your Hoover stick vacuum clean is crucial. It ensures optimal performance and extends the lifespan of your vacuum. Dirty filters can reduce suction power and release dust back into the air. Follow these simple steps to clean your Hoover stick vacuum filters.
Removing Filters
First, unplug your vacuum. Locate the filter compartment, usually near the dustbin. Open the compartment carefully. Remove the filters gently to avoid tearing.
Check your user manual if unsure about the filter location. Different models may have filters in various positions.
Washing And Drying
Rinse the filters under cold water. Avoid using soap or detergents. These can damage the filter material. Gently squeeze out excess water.
Place the filters on a clean towel. Let them air dry for 24 hours. Ensure they are completely dry before reinserting them into the vacuum. This prevents mold and bacteria growth.
Regular filter cleaning maintains your vacuum’s efficiency. Aim to clean filters every month for optimal performance.
Clean The Brush Roll
Cleaning the brush roll of your Hoover Stick Vacuum is essential for maintaining its performance. A clean brush roll ensures that your vacuum picks up dirt and debris efficiently. Follow these steps to keep your brush roll in top shape.
Removing The Brush
Turn off and unplug your vacuum. Lay it down on a flat surface. Look for the brush roll cover. Use a screwdriver to remove the screws holding the cover in place. Lift the cover off to reveal the brush roll.
Removing Hair And Debris
Carefully lift the brush roll from its slot. Check for any hair or debris wrapped around it. Use scissors to cut through tangled hair. Pull the hair and debris off the brush roll. Be gentle to avoid damaging the bristles.
Inspect the brush roll ends. Remove any trapped dirt or debris. Use a small brush to clean the bristles. Ensure the brush roll spins freely. If it does not, check for blockages and remove them.
Once clean, place the brush roll back into its slot. Secure the cover back in place with screws. Plug in your vacuum and test it. Your brush roll should now be clean and ready for use.

Credit: www.amazon.com
Clean The Hose And Attachments
Keeping your Hoover stick vacuum clean ensures it works efficiently. An important part of this process involves cleaning the hose and attachments. These components often collect dirt, dust, and debris, which can clog the vacuum and reduce its suction power. Regularly cleaning these parts will help maintain your vacuum’s performance and extend its lifespan.
Detaching The Hose
Start by turning off and unplugging your vacuum. This is crucial for safety. Next, locate the hose connection point. Depending on your model, the hose may be attached with clips or screws. Carefully detach the hose from the vacuum. If it’s secured with screws, use a screwdriver to remove them.
Once the hose is free, check for blockages. Use a long, flexible brush to clear any debris. You can also run water through the hose to rinse it. Make sure the hose is completely dry before reattaching it to the vacuum.
Wiping Attachments
Attachments like the crevice tool and brush roll also need regular cleaning. Detach each attachment from the vacuum. Wipe them down with a damp cloth to remove dust and dirt. For stubborn grime, use a small brush and soapy water.
Dry the attachments thoroughly before reattaching them. This prevents mold and mildew. Regularly cleaning these parts keeps your vacuum running smoothly and your home cleaner.
Reassemble The Vacuum
Once you’ve cleaned your Hoover stick vacuum, it’s time to put it back together. Proper reassembly ensures your vacuum performs at its best. Follow these steps to reassemble your vacuum correctly.
Reattaching Parts
Begin by reattaching the main components of your vacuum. Make sure each part is clean and dry before reassembling.
- Dustbin: Align the dustbin with the vacuum body. Slide it into place until you hear a click.
- Filter: Insert the filter back into its compartment. Ensure it fits snugly.
- Brush Roll: Position the brush roll in its housing. Secure it with the provided screws.
Checking For Secure Fit
After reattaching all parts, check each connection. A secure fit ensures optimal vacuum performance.
- Inspect each attachment for any gaps or loose connections.
- Test the dustbin: Gently pull it to ensure it doesn’t come loose.
- Check the filter: Make sure it sits firmly in its place.
- Examine the brush roll: Rotate it to ensure it moves freely without wobbling.
These steps help ensure your Hoover stick vacuum is ready for use. Proper reassembly is key to maintaining its efficiency and lifespan.
Final Steps
After thoroughly cleaning your Hoover Stick Vacuum, it’s time for the final steps. These steps ensure your vacuum runs smoothly and is ready for future use. Follow these easy steps to complete the cleaning process.
Plugging In
First, reconnect all parts of the vacuum. Make sure everything is secure. Then, plug the vacuum back into the power source. This step ensures the vacuum receives the necessary power to operate.
Test Run
Next, turn on the vacuum. Listen for unusual sounds. These could indicate a problem. Check the suction power. If it seems weak, inspect the components again. Make sure there is no blockage. A test run helps confirm the vacuum is working properly.
Once the test run is successful, your Hoover Stick Vacuum is ready for use. Regular maintenance and cleaning will keep it in top condition. Enjoy a clean home with your well-maintained vacuum.
Conclusion
Keeping your Hoover stick vacuum clean ensures it works effectively. Regular maintenance extends its life. Follow the steps provided for best results. Always unplug before cleaning. Empty the dustbin frequently. Clean filters as instructed. Check for blockages in the hose.
Wipe the exterior with a damp cloth. By caring for your vacuum, you enjoy better performance. A well-maintained vacuum picks up dirt efficiently. Remember, a clean vacuum makes cleaning easier.