How to Clean Greasy Toaster Oven: Ultimate Guide for Sparkling Results

Got a greasy toaster oven that needs cleaning? Here’s a quick guide.
Keep reading to learn how to make your toaster oven shine again. A greasy toaster oven can be a real headache. It affects cooking and can even pose a fire hazard. Regular cleaning keeps it in top shape and extends its life.
We’ll walk you through simple steps to clean your toaster oven. This guide is easy to follow and uses common household items.
Essential Supplies
Cleaning a greasy toaster oven can feel like a daunting task. But with the right supplies, the process becomes much easier. Gathering essential supplies before you start will save you time and effort. You’ll need specific cleaning agents and tools to get the job done right.
Cleaning Agents
You don’t need fancy cleaners. Simple household items work best. White vinegar is excellent for cutting through grease. Baking soda helps scrub tough stains. Dish soap is useful for general cleaning. Remember to choose non-toxic options, especially for kitchen appliances.
Tools And Equipment
Basic tools make a big difference. A sponge and a soft cloth are essential. A toothbrush helps reach small areas. A small bucket or bowl is useful for mixing cleaning solutions. Rubber gloves protect your hands from harsh chemicals. You may also need a plastic scraper to remove baked-on grease.
Having these supplies ready helps you tackle the mess efficiently. It ensures you won’t have to stop halfway to find something you need. With the right tools and cleaning agents, your greasy toaster oven will soon look new again.
Safety Precautions
Cleaning a greasy toaster oven can be a daunting task. It involves dealing with built-up grease and food residues. To ensure your safety during this process, you must take certain precautions. These steps will help prevent injuries and ensure a smooth cleaning experience.
Unplugging The Oven
Before you start cleaning, always unplug the toaster oven. This is crucial to avoid any electrical hazards. Water and electricity do not mix well. By unplugging the appliance, you eliminate the risk of electric shock. Wait for the oven to cool down completely. A hot toaster oven can cause burns. Patience is key to safely cleaning your toaster oven.
Protective Gear
Wearing protective gear is essential for your safety. Here’s what you need:
| Gear | Purpose |
|---|---|
| Rubber Gloves | Protects your hands from harsh chemicals and hot surfaces. |
| Safety Glasses | Prevents cleaning agents from getting into your eyes. |
| Apron | Keeps your clothes clean and free from grease stains. |
Always wear these protective items. They help you stay safe and make the cleaning process more efficient. Never underestimate the importance of protective gear. Your safety should always come first.
Initial Preparation
Gather necessary supplies like dish soap, baking soda, and a soft sponge. Unplug the toaster oven and remove trays.
Before diving into the deep clean, it’s crucial to start with some initial preparation. This step ensures that the cleaning process is effective and your toaster oven remains in good condition. Let’s break down these tasks into manageable steps.
Removing Racks And Trays
First, unplug your toaster oven. This ensures safety. Next, carefully remove all racks and trays. These components can be cleaned separately. Place them aside for now. You will clean them later.
Disposing Of Loose Debris
Once the racks and trays are out, focus on the inside. Use a dry cloth or paper towel. Wipe away any loose crumbs or debris. This makes the next steps easier. By removing loose bits now, you avoid making a bigger mess.

Credit: www.reddit.com
Cleaning The Interior
Cleaning the interior of a greasy toaster oven can seem challenging. But with the right steps, it can be straightforward. A clean interior ensures your toaster oven works efficiently. It also keeps your food tasting fresh.
Applying Cleaning Solution
Start by unplugging your toaster oven. Remove any trays or racks inside. Prepare a cleaning solution. Mix equal parts water and vinegar in a spray bottle. Spray the solution inside the oven. Focus on the greasy areas.
Let the solution sit for 10-15 minutes. This helps to loosen the grease. Be sure not to soak the heating elements.
Scrubbing Techniques
Use a soft sponge or cloth to scrub the interior. Avoid using abrasive materials. They can damage the surface. For stubborn grease, use a baking soda paste. Mix baking soda with water to form a thick paste. Apply this paste to tough spots. Let it sit for a few minutes.
Gently scrub the paste with your sponge. Wipe the interior with a damp cloth. Make sure to remove all residue. Finally, dry the interior with a clean towel. Reinstall the trays and racks. Plug in your toaster oven, and it’s ready to use!
Dealing With Stubborn Grease
Cleaning a greasy toaster oven can be a tough task. Grease builds up over time and becomes hard to remove. But with the right methods, you can make your toaster oven shine again. Let’s explore some effective ways to tackle stubborn grease.
Using Baking Soda
Baking soda is a great cleaner for stubborn grease. First, unplug your toaster oven and remove the trays. Mix three parts baking soda with one part water. This creates a thick paste. Spread the paste on the greasy areas inside the oven. Let it sit for 15 minutes. This helps to loosen the grease.
After 15 minutes, use a damp cloth to wipe away the paste. The grease should come off easily. If any stubborn spots remain, use a soft brush to scrub them. Rinse the cloth and wipe the area again. Finally, dry the inside with a clean towel.
Alternative Methods
Vinegar is another effective cleaner for grease. Mix equal parts of vinegar and water in a spray bottle. Spray the solution on the greasy areas inside the toaster oven. Let it sit for 10 minutes. Wipe with a damp cloth to remove the grease. The vinegar breaks down the grease, making it easy to clean.
Lemon juice can also help with stubborn grease. Cut a lemon in half and rub the cut side on the greasy spots. Let the lemon juice sit for 10 minutes. The acid in the juice helps to dissolve the grease. Wipe away the juice and grease with a damp cloth. Dry the inside with a clean towel.
These methods can make your toaster oven look new again. Use them regularly to keep it clean and grease-free.
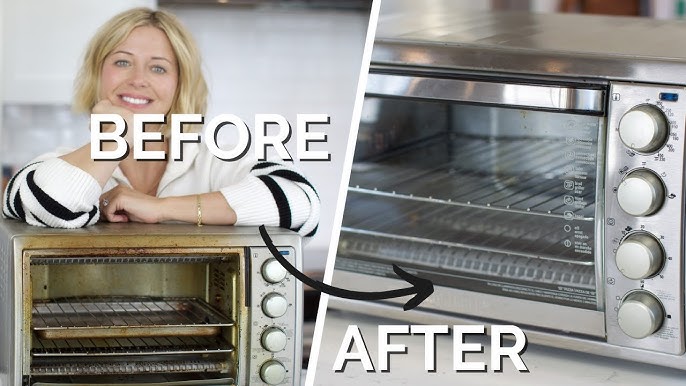
Credit: www.youtube.com
Cleaning The Exterior
Cleaning the exterior of your greasy toaster oven is essential for maintaining its appearance and hygiene. A clean exterior not only looks good but also helps in extending the life of your appliance. Let’s break down the process into simple steps to make your toaster oven shine like new.
Wiping Down Surfaces
Start by unplugging the toaster oven. This ensures safety. Use a damp cloth to wipe down the surfaces. Focus on areas with visible grease or grime. Gently scrub in circular motions. For stubborn stains, use a mild soap solution. Avoid harsh chemicals to prevent damage. Rinse the cloth and wipe again to remove any soap residue. Pat the exterior dry with a clean towel.
Polishing Stainless Steel
If your toaster oven has stainless steel parts, polishing is key. Use a dedicated stainless steel cleaner. Apply the cleaner to a soft cloth. Rub the cloth on the stainless steel in the direction of the grain. This prevents scratches. Buff the surface with a dry cloth to achieve a shiny finish. Regular polishing keeps the toaster oven looking new and reduces fingerprints and smudges.
Rinse And Dry
After scrubbing your toaster oven, it’s time to rinse and dry it. Proper rinsing and drying are essential to avoid residue buildup and prevent water damage. This process will ensure your toaster oven remains clean and functional for a longer period.
Rinsing Off Residue
Use a damp cloth to wipe off the soapy residue. Make sure the cloth is well-rung to avoid excess water. Rinse the cloth frequently to ensure you remove all soap. Pay special attention to corners and crevices. These areas often trap grime.
For removable parts, use warm water. Rinse them thoroughly in the sink. Avoid using too much water on electrical components. Dry them immediately with a clean towel.
Drying Components
Dry all components with a soft, clean towel. This will prevent water spots and rust. Ensure every part is completely dry before reassembling. Use a dry cloth for the interior of the toaster oven. Leave the door open for a few minutes. This allows any remaining moisture to evaporate.
Proper drying is crucial. It prevents electrical issues and maintains the longevity of your toaster oven. Always check for any remaining moisture before plugging it back in.

Credit: www.reddit.com
Reassembling The Toaster Oven
Once you have cleaned all parts of your toaster oven, it’s time to put everything back together. This step is crucial to ensure your toaster oven works efficiently. Follow these simple steps to reassemble it correctly.
Reinstalling Racks And Trays
Start by reinstalling the racks. Insert them into their slots gently. Ensure they fit securely. Next, place the trays back in their positions. Check that they slide in and out smoothly. Properly installed racks and trays ensure even cooking.
Final Inspection
After reinstalling the parts, conduct a final inspection. Check for any leftover grease or debris. Ensure all parts are clean and in their correct places. Finally, close the toaster oven door and plug it back in. Your toaster oven is now ready for use.
Conclusion
Cleaning a greasy toaster oven doesn’t have to be hard. Follow these steps for a clean appliance. Regular cleaning keeps your toaster oven working well. Plus, it will last longer. A clean toaster oven also makes your food taste better.