How to Clean Beard Trimmer | Say Goodbye to Gunk
To clean a beard trimmer, start by removing the blade and gently brushing away any hair or debris. Then, wash the blade and other detachable parts with warm soapy water, rinse thoroughly, and dry before reassembling the trimmer.
Why Regular Cleaning Is Important
Regular cleaning is essential for maintaining the performance of your beard trimmer and ensuring the health of your skin. Neglecting to clean your trimmer can lead to a variety of issues, including decreased efficiency in trimming, bacterial growth, and even skin infections. In this article, we will explore the benefits of cleaning your beard trimmer, how build-up affects its performance, and the importance of avoiding bacterial growth and skin infections.
Benefits of cleaning your beard trimmer
Regularly cleaning your beard trimmer offers several notable benefits:
- Enhanced performance: By removing the build-up of hair, oil, and debris from your trimmer, you can ensure that it operates at its optimal level. A clean trimmer can trim your beard more precisely and efficiently, resulting in a well-groomed and even appearance.
- Extended lifespan: Cleaning your trimmer regularly helps to prevent damage caused by clogging and excessive strain on the motor. By maintaining a clean and well-maintained trimmer, you can prolong its lifespan and save money by avoiding the need for frequent replacements.
- Improved hygiene: Using a clean trimmer reduces the risk of bacteria and other pathogens coming into contact with your skin. This is particularly important for individuals with sensitive skin or those prone to skin infections. Regular cleaning ensures that your trimmer remains free from bacteria and prevents the development of unpleasant odors.
How build-up affects trimmer performance
Over time, the accumulation of hair clippings, oils, and other residues can have a detrimental impact on your beard trimmer’s performance. Here’s how build-up can affect your trimmer:
- Reduced cutting efficiency: Build-up in the blades and other parts of the trimmer can impede its ability to cut through hair smoothly. This can lead to uneven trimming results, requiring multiple passes and potentially causing discomfort or irritation to your skin.
- Increased strain on the motor: Build-up can also clog the motor of your trimmer, leading to increased strain and decreased performance. This extra strain not only affects the efficiency of the trimmer but also puts the motor at risk of overheating or even burning out.
- Difficult maintenance: The more build-up your trimmer has, the more challenging it becomes to clean thoroughly. Residues can become hardened and stubborn, making it harder to remove them and resulting in a time-consuming and frustrating cleaning process.
Avoiding bacterial growth and skin infections
Perhaps the most crucial reason to clean your beard trimmer regularly is to prevent the growth of bacteria and the potential for skin infections. Consider the following:
| Bacterial growth: | When hair clippings, oils, and moisture accumulate in your trimmer, they create an ideal environment for bacterial growth. These bacteria can transfer onto your skin during each use, potentially leading to breakouts, irritations, and other skin problems. |
| Skin infections: | If bacteria are left unchecked, they can cause more severe skin infections. Conditions such as folliculitis, an infection of the hair follicles, can result in redness, swelling, and painful bumps on your skin. Regularly cleaning your trimmer helps prevent the spread of bacteria and reduces the likelihood of developing such infections. |
By understanding the importance of regular cleaning, you can ensure that your beard trimmer remains in optimal condition, performs at its best, and helps you achieve the well-groomed appearance you desire. Keep reading to learn how to clean your beard trimmer effectively.
Tools And Materials Needed
Keeping your beard trimmer clean is essential for ensuring optimal performance and prolonging its lifespan. By regularly cleaning and maintaining your trimmer, you can keep it functioning at its best, prevent hair buildup, and maintain hygiene. To effectively clean your beard trimmer, you will need a few tools and materials. Let’s explore the required tools, recommended cleaning solutions, and proper storage options.
Required tools for cleaning
Before getting started, gather the following tools:
- A small cleaning brush with soft bristles
- A pair of tweezers
- Isopropyl alcohol or a specialized cleaning solution
- Cotton swabs
- A clean cloth or towel
Recommended cleaning solutions
While isopropyl alcohol is a popular choice for cleaning beard trimmers, it is also important to consider the particular type of trimmer you have. Some trimmers may require specific cleaning solutions recommended by the manufacturer. It is advisable to consult the user manual or the manufacturer’s website to determine the best cleaning solution for your beard trimmer.
Proper storage options
After cleaning your beard trimmer, it is crucial to store it properly to prevent dust, dirt, and moisture from damaging the device. Ensure you follow these proper storage options:
- Thoroughly dry the trimmer before storing it to prevent moisture buildup.
- Store the trimmer in a clean and dry area away from excessive humidity.
- Consider using a protective case or pouch to shield the trimmer from dust and damage.
- Avoid storing the trimmer near water sources or in direct sunlight.
Step 1: Disassemble The Trimmer
Properly cleaning your beard trimmer is essential to maintain its performance and hygiene. The first step in this process is to disassemble the trimmer into its detachable parts.
1.1 Remove Detachable Trimmer Parts
Start by identifying the parts of your beard trimmer that can be detached for cleaning. These often include the blade, guard combs, and any other removable attachments. Check the user manual or manufacturer’s instructions if you are unsure about which parts can be detached.
Once you have identified the detachable parts, carefully remove them from the trimmer. Pay attention to any locking or release mechanisms that might be present. Use gentle force, ensuring not to damage or bend any of the parts.
If there are multiple detachable parts, you can arrange them in a clean and organized manner for easier assembly later on.
1.2 Safely Disconnect Power Source if Applicable
If your beard trimmer operates on electricity or has a rechargeable battery, it is important to safely disconnect the power source before cleaning. This step is crucial for your safety.
First, ensure that the trimmer is turned off or disconnected from any power outlet. Then, locate the power cord or charger and unplug it from the trimmer or wall socket, depending on the design of your device.
| Step | Action |
|---|---|
| 1 | Turn off the trimmer if it is still powered on. |
| 2 | Unplug the power cord from the trimmer or wall socket. |
By following these steps, you ensure that there is no risk of electrical shock or damage to the trimmer while cleaning.
- Always prioritize your safety by disconnecting the power source before cleaning.
- Refer to the user manual for specific instructions on disconnecting the power source.
Congratulations! You have successfully completed the first step in cleaning your beard trimmer. Now that you have disassembled the trimmer and safely disconnected the power source, you are ready to move on to the next step.

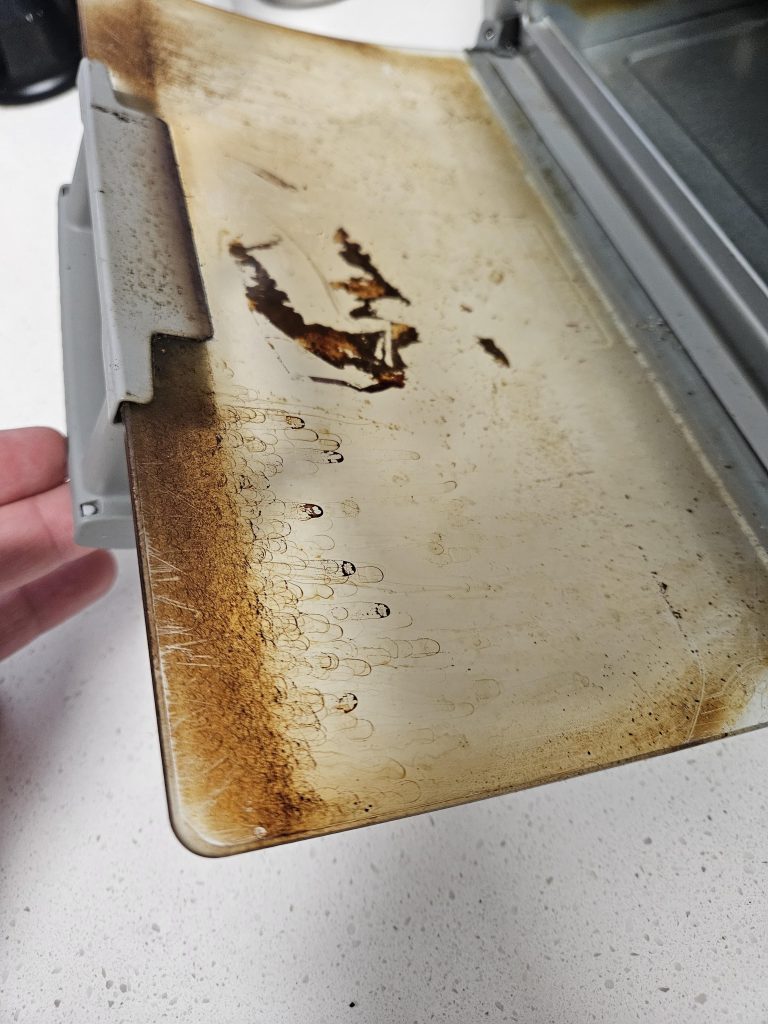
Credit: m.youtube.com
Step 2: Remove Loose Hair And Debris
Now that you’ve gathered all the necessary tools for cleaning your beard trimmer, it’s time to move on to step 2: removing loose hair and debris. This step is crucial in maintaining your trimmer’s performance and preventing any clogs or malfunctions. In this section, we will discuss two methods you can use to thoroughly clean your trimmer and ensure its longevity.
Shaking out loose hair and particles
The first method involves shaking out any loose hair and particles that may have accumulated on your trimmer. Start by turning off the trimmer and unplugging it from the power source, ensuring your safety during the cleaning process. Hold the trimmer over a sink or garbage can, with the blade facing downwards.
Using your free hand, gently tap the trimmer’s backside to dislodge any loose hair or debris that might be trapped between the blades. Begin shaking the trimmer in an up-and-down motion, allowing gravity to assist in removing the loose particles. You can also use your fingers to brush through the blade area, extracting any stubborn hair or debris that may have been missed initially.
Using a small brush to clean hard-to-reach areas
The second method involves using a small brush to clean the hard-to-reach areas of your trimmer. This brush can be either provided with the trimmer itself or a clean, soft-bristled toothbrush. The bristles should be firm enough to dislodge trapped hair and debris but gentle enough not to damage the trimmer’s delicate components.
Start by removing the trimmer’s comb attachment, if applicable. This will give you better access to the blade area. Carefully brush through the blade area, moving the brush in gentle circular motions. Make sure to pay extra attention to the crevices and corners, as these are the areas where hair and debris tend to accumulate the most.-
After brushing all the visible parts, it’s time to clean the inside of the trimmer head. To do this, remove the blade unit from the trimmer by following the manufacturer’s instructions. Once detached, use the brush to clean the individual blades, removing any remaining hair or debris. Be cautious not to apply too much pressure, as this can affect the blade’s alignment or cause damage.
Once you’ve completed the second step, your trimmer should be free from loose hair and debris, ready for the next step in the cleaning process. Moving forward, we will discuss step 3: sanitizing the trimmer head to ensure hygiene and prevent any bacterial growth.
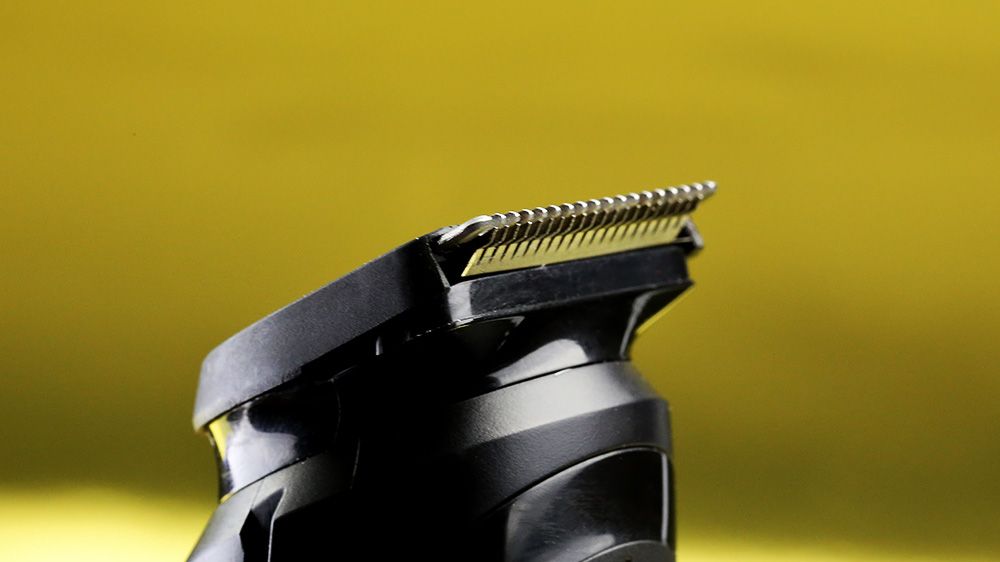
Step 3: Clean Blades And Guards
Properly cleaning the blades and guards of your beard trimmer is essential for its longevity and optimal performance. Regular maintenance not only ensures a clean and hygienic trimming experience but also prevents clogged blades and promotes a smooth trim. In this step, we will guide you through the process of disassembling and cleaning the blades, removing hair stuck in guards, and lubricating the blades for optimal performance.
Detailed instructions for disassembling and cleaning blades
The first step in cleaning your beard trimmer’s blades is to disassemble them. Please refer to the manufacturer’s instructions for your specific trimmer model, as the disassembly process may vary.
Once you have disassembled the blades, follow these detailed instructions to effectively clean them:
- Use a small brush or toothbrush to remove any loose hair and debris from the blades. Make sure to clean both the top and bottom blades thoroughly.
- Rinse the blades under running water to remove any remaining hair and product buildup. Be careful not to submerge the entire trimmer unit in water, as this could damage the motor.
- Dry the blades thoroughly using a clean cloth or towel. Ensure that no moisture remains on the blades before reassembling them.
By following these steps, you can effectively clean the blades of your beard trimmer, ensuring a fresh and hygienic trim every time.
Using a brush to remove hair stuck in guards
Hair often gets stuck in the guards of your beard trimmer, hindering its performance. To remove trapped hair from the guards, follow these simple steps:
- Remove the guards from the trimmer according to the manufacturer’s instructions.
- Take a soft-bristle brush or a toothbrush and gently brush the guards to dislodge any trapped hair. Pay attention to the crevices and small openings where hair tends to accumulate.
- After brushing, rinse the guards under running water to wash away any loosened hair.
- Wipe the guards dry with a clean cloth or towel before reattaching them to the trimmer.
Regularly removing hair from the guards will prevent clogs and ensure a smoother trimming experience.
Lubricating blades for optimal performance
Lubricating the blades of your beard trimmer is crucial for maintaining its performance and extending its lifespan. Follow these steps to lubricate the blades:
- Apply a small amount of beard trimmer oil or lubricant as recommended by the manufacturer. Check the product label or user manual for specific instructions.
- Turn on the trimmer and let it run for a few seconds to distribute the lubricant evenly across the blades.
- Wipe off any excess oil with a clean cloth or tissue before using the trimmer.
Regularly lubricating the blades will minimize friction, reduce wear and tear, and ensure a smooth and efficient trimming experience.
By following these instructions, you can effectively clean the blades and guards of your beard trimmer, ensuring optimal performance and longevity. Incorporating this step into your regular grooming routine will help maintain a clean and hygienic trim while prolonging the life of your trimmer.
Step 4: Deep Cleaning The Trimmer
Soaking Detachable Parts in Cleaning Solution
To ensure a thorough deep cleaning, it’s essential to properly soak the detachable parts of your beard trimmer. Soaking these parts helps to loosen any built-up hair, oils, or product residue that may have accumulated over time.
Start by removing any detachable parts such as the trimming head, comb attachments, and blade assembly. Then, prepare a cleaning solution by combining warm water with a few drops of mild liquid soap or a specified trimmer cleaning solution.
Table: Soaking Detachable Parts
| Steps | Details |
|---|---|
| 1 | Remove detachable parts |
| 2 | Prepare cleaning solution |
| 3 | Soak detachable parts for 10-15 minutes |
Once the cleaning solution is ready, fully immerse the detachable parts in it and allow them to soak for about 10-15 minutes. This soaking period will help to loosen and dissolve any stubborn dirt or debris. It’s essential to check the manufacturer’s instructions for specific soaking time recommendations, as they may vary depending on the trimmer model.
Gently Scrubbing Internal and External Surfaces
Once the detachable parts have finished soaking, it’s time to gently scrub the internal and external surfaces of the beard trimmer. This step will ensure that any remaining dirt or grime is removed, leaving the trimmer clean and ready for use.
Using a soft-bristle toothbrush or a dedicated trimmer cleaning brush, carefully scrub all the nooks and crannies of the trimmer, paying special attention to the blades, cutting edges, and comb attachments. Make sure to remove any hair, product residue, or debris that may have built up.
Steps for Scrubbing the Trimmer
- Remove the detachable parts from the cleaning solution.
- Gently scrub internal and external surfaces using a soft brush.
- Pay attention to blades, cutting edges, and comb attachments.
- Remove any hair, product residue, or debris.
Remember to be gentle while scrubbing to avoid damaging the trimmer’s delicate components. Additionally, avoid using harsh chemicals or abrasive materials that could potentially corrode or scratch the trimmer’s surfaces.
Drying Thoroughly Before Reassembly
After the scrubbing process, it’s important to ensure that all the detached parts and the trimmer itself are thoroughly dried before reassembling. Excess moisture can lead to corrosion or bacterial growth, which may affect the trimmer’s performance and hygiene.
To dry the parts effectively, use a clean, lint-free cloth or towel to wipe away any moisture. Give each part ample time to air dry completely, ideally for a couple of hours or until no moisture remains.
Drying the Trimmed Parts
- Use a clean, lint-free cloth to wipe away moisture.
- Air dry each part for a couple of hours.
- Ensure no moisture remains on the trimmer.
Once all the parts are dry, proceed with reassembling your beard trimmer by securely attaching the cleaned components. Follow the manufacturer’s instructions to ensure proper reassembly and alignment of the parts. Your trimmer should now be ready to provide a clean and precise grooming experience.
Step 5: Reassemble And Test
Step 5: Reassemble and Test
Ensuring all components are properly aligned
Carefully reassembling your beard trimmer is crucial to ensure its optimal performance. To start, place the blade guard back onto the trimmer head, ensuring that it aligns properly with the grooves. Next, attach the comb attachment, making sure it securely locks into place. This will prevent any accidental detachment during use, providing a safe and consistent trim.
Once these components are properly aligned, carefully attach the trimmer head back onto the main body of the beard trimmer. Ensure that it fits snugly and securely, without any wobbling or looseness. This will prevent any potential discomfort or accidents during your grooming routine.
Testing trimmer functionality before use
Before assuming your beard trimmer is ready for use, it is essential to test its functionality to ensure it is performing as expected. Test the power button to ensure it turns on and off smoothly. Examine the trimming blades to verify that they are rotating freely without any obstructions. Additionally, check if the adjustable settings for the trim length are functioning correctly.
Turn on the beard trimmer and gently run it through your hair to test its cutting ability. Pay attention to any unusual noises or vibrations, as these may indicate a problem. If everything sounds and feels normal, your trimmer is ready to go.
Remember, it’s always better to spend a few extra minutes on reassembling and testing your beard trimmer to avoid any mishaps or performance issues later on. Follow these steps diligently, and you’ll have a clean and fully functional beard trimmer ready for your grooming needs.
Maintenance Tips For Extended Lifespan
Maintenance Tips for Extended Lifespan
Proper maintenance is key to ensuring that your beard trimmer performs optimally and lasts for an extended period of time. By following a regular cleaning schedule, employing proper lubrication techniques, and storing your trimmer in a clean and dry space, you can significantly increase its lifespan. In this article, we will explore each of these maintenance tips in detail.
Regular Cleaning Schedule
Regular cleaning is essential for keeping your beard trimmer in excellent condition. Here are a few simple steps you can follow to maintain cleanliness:
- Start by unplugging the trimmer and removing any detachable parts, such as combs or cutting blades.
- Use a small brush, such as a toothbrush, to gently remove any hair or debris from the trimmer’s body and blades. Be mindful not to apply excessive pressure, as this may damage the blades.
- For a thorough clean, you can use a mild cleaning solution or rubbing alcohol to sanitize the detachable parts. Ensure that the solution is not applied directly to the trimmer itself, as this might cause damage. Instead, dampen a cloth or cotton swab and gently wipe the parts clean.
- Once all the parts are cleaned, allow them to air dry completely before reassembling the trimmer. This step is crucial to prevent water damage and maintain optimal functionality.
Proper Lubrication Techniques
Lubricating your beard trimmer regularly helps reduce friction and ensures smooth operation. Follow these steps to lubricate your trimmer effectively:
- Start by applying a few drops of clipper oil or lubricating spray to the trimmer blades. This will help minimize wear and tear and keep the blades sharp.
- Turn the trimmer on for a few seconds to allow the oil or lubricating spray to distribute evenly across the blades.
- Wipe off any excess oil with a clean cloth, as excessive oil can attract dirt and debris.
- Remember to lubricate your trimmer after each use or as recommended by the manufacturer.
Storing Trimmer in a Clean and Dry Space
Proper storage is vital for maintaining the longevity of your beard trimmer. By following these guidelines, you can ensure that your trimmer remains in top condition:
- Always store your trimmer in a clean and dry space. Moisture and humidity can damage the trimmer’s internal components, leading to malfunction.
- Avoid storing the trimmer near water sources, such as sinks or showers.
- Consider using a protective case or pouch to shield your trimmer from dust and debris when not in use.
- Additionally, store the trimmer in a place where it is protected from accidental falls or impact, as this can cause damage to the blades or internal mechanisms.
By adhering to a regular cleaning schedule, employing proper lubrication techniques, and storing your trimmer in a clean and dry space, you can maximize its lifespan and ensure it remains in excellent working condition for years to come.
Troubleshooting Common Issues
Keeping your beard trimmer in optimal working condition is essential to maintain a neat and well-groomed appearance. However, like any electronic device, beard trimmers can face common issues that hinder their performance. In this section, we will address motor issues or power inconsistencies, blade alignment problems, and unusual noises or vibrations that may occur while using your beard trimmer.
Addressing motor issues or power inconsistencies
If your beard trimmer is experiencing motor issues or power inconsistencies, there are a few things you can check and do to resolve the problem.
- Check the power source: Ensure that your beard trimmer is properly connected to a power source. If you are using a cordless trimmer, make sure the battery is charged.
- Clean the power contacts: Over time, dust and debris can accumulate on the power contacts, leading to power inconsistencies. Clean the power contacts using a dry, lint-free cloth.
- Inspect the power cord or battery: Look for any signs of damage or wear on the power cord. If you notice any issues, such as frayed wires or a damaged battery, it may be necessary to replace them.
Resolving blade alignment problems
If you notice that the blades of your beard trimmer are not aligned correctly, it can affect the quality of your trim. Follow these steps to resolve blade alignment problems:
- Remove the blade assembly: Carefully detach the blade assembly from the trimmer.
- Clean the blades: Use a small brush or a toothbrush to remove any hair clippings or debris that may be preventing the blades from aligning properly.
- Realign the blades: Place the blade assembly back onto the trimmer and ensure that the blades are properly aligned. You may need to refer to the trimmer’s instruction manual for specific guidance.
- Test the trimmer: After realigning the blades, test the trimmer to ensure that they are cutting smoothly and evenly.
Dealing with unusual noises or vibrations
If your beard trimmer is producing unusual noises or vibrations while in use, it may be a sign of a mechanical problem. Here’s what you should do to address this issue:
- Inspect the trimmer: Carefully examine the trimmer for any visible signs of damage or loose parts.
- Clean and lubricate the blades: Remove the blade assembly and clean it thoroughly. Apply a small amount of lubricating oil to the blades, following the manufacturer’s instructions.
- Tighten any loose screws or parts: Using a screwdriver or the appropriate tool, tighten any loose screws or parts that may be causing the unusual noises or vibrations.
- Test the trimmer: After completing the above steps, test the trimmer to ensure that the noises and vibrations have been eliminated.
By addressing these common issues, you can ensure that your beard trimmer continues to provide reliable and precise trimming for a well-groomed look. Regular maintenance, such as cleaning, lubricating, and checking for any mechanical problems, will help extend the lifespan of your beard trimmer and keep it in optimal condition.
Frequently Asked Questions For How To Clean Beard Trimmer
What Should I Clean My Beard Trimmer With?
Clean your beard trimmer with a small brush and warm, soapy water. Be sure to remove excess hair and rinse it thoroughly.
How Should I Clean My Trimmer?
To clean your trimmer, follow these steps:
1. Remove any excess hair from the trimmer blades.
2. Use a small brush to remove any debris or loose hairs.
3. Wipe the blades and body of the trimmer with a clean cloth or a disinfectant wipe.
4. Apply a few drops of oil to the blades to keep them lubricated.
5. Store the trimmer in a clean, dry place to prevent rust or damage.
How Do You Clean Trimmer After Trimming Balls?
Clean the trimmer after trimming your balls by following these steps:
1. Turn off the trimmer and unplug it.
2. Remove any loose hair from the blades using a brush or cloth.
3. Rinse the blades with water and gently dry them with a towel.
4. Apply a few drops of oil to the blade to keep it lubricated.
5. Store the trimmer in a clean and dry place to prevent any damage.
Is It Ok To Wash Trimmer?
Yes, it is generally safe to wash a trimmer. Just make sure to remove the blade and brush off any debris before rinsing with water. Let it dry thoroughly before reassembling and storing.
Conclusion
To keep your beard trimmer in optimal condition, regular cleaning is crucial. By following the proper cleaning techniques mentioned in this blog post, you can ensure longevity and efficient performance of your trimmer. Remember to remove the excess hair, use a cleaning brush, and disinfect the blades to avoid any bacterial growth.
Properly maintaining your beard trimmer will not only extend its lifespan but also provide you with a clean and precise trimming experience.