How to Clean a Stick Vacuum: Expert Tips for Optimal Performance
Cleaning a stick vacuum is easy with the right steps. Regular maintenance keeps it efficient and extends its life.
Stick vacuums are handy for quick cleanups, but they need care to work well. Dust, dirt, and debris can clog the vacuum over time, reducing its performance. Cleaning your stick vacuum properly ensures it runs smoothly and picks up dirt effectively.
In this guide, we will share simple steps to clean your stick vacuum. You’ll learn to take apart the vacuum, clean the filters, and remove blockages. It’s easy and quick, making your vacuum work like new.
Introduction To Stick Vacuums
Stick vacuums have become a popular choice for many households. They are lightweight and easy to use. Their slim design makes them perfect for quick cleanups. These vacuums are also easy to store. They fit into small spaces without taking up much room. Stick vacuums are ideal for busy people.
Benefits Of Stick Vacuums
Stick vacuums offer many benefits. They are light and easy to carry. This makes cleaning less tiring. Their compact size allows you to clean tight spots. Under furniture and in corners.
Stick vacuums are also versatile. Many models come with different attachments. These help you clean various surfaces. From carpets to hardwood floors. Even curtains and car interiors.
Another advantage is their ease of use. Many stick vacuums are cordless. This gives you freedom to move around. No need to worry about plugging and unplugging. The batteries are long-lasting. You can clean multiple rooms in one go.
Common Uses
Stick vacuums are perfect for everyday messes. They are great for picking up crumbs. Spilled cereal or pet hair. They can handle it all.
These vacuums are also good for quick touch-ups. If you have guests coming over. A stick vacuum can make your home look clean fast. They are handy for keeping your car clean too. Small and portable. Easy to use on car seats and floors.
Stick vacuums are also useful in small living spaces. Apartments or dorm rooms. They do not take up much space. Easy to store in a closet or corner.

Credit: inselife.com
Essential Cleaning Tools
Cleaning a stick vacuum is essential for its optimal performance. To do this effectively, you need the right tools. These tools help you clean every part of your vacuum, ensuring it works like new. Explore the essential cleaning tools you need and why they are important.
Tools You Need
Several tools are essential for cleaning a stick vacuum. You will need a small brush, a microfiber cloth, and a pair of scissors. A can of compressed air is also useful. A screwdriver is often needed to access certain parts.
Why Each Tool Is Important
The small brush helps remove dust and debris from tight spaces. It can reach into crevices and corners. This ensures no dirt is left behind.
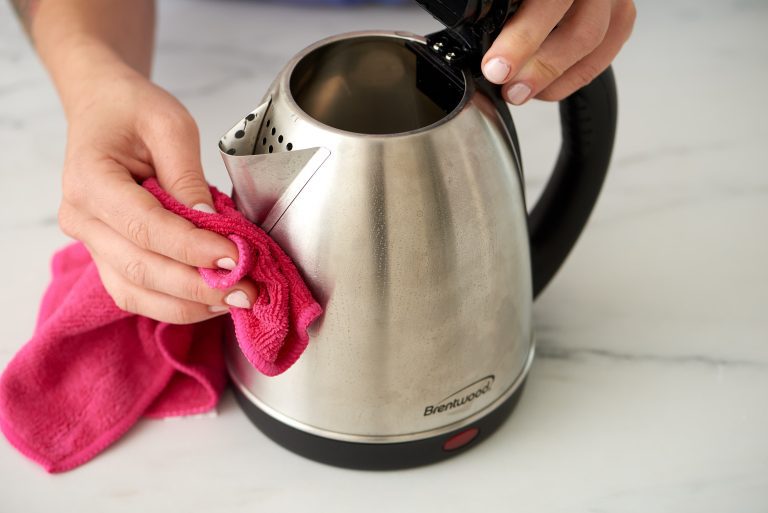
The microfiber cloth is perfect for wiping surfaces. It picks up fine dust and leaves no streaks. This keeps the vacuum’s exterior looking clean.
Scissors are essential for cutting hair and fibers wrapped around the brush roll. This prevents the vacuum from clogging and maintains its suction power.
Compressed air is great for blowing out dust from hard-to-reach areas. It helps clean the motor and other internal parts without disassembling the vacuum.
A screwdriver is necessary to open parts of the vacuum. This allows you to clean the filters and other internal components thoroughly.
Pre-cleaning Preparation
Cleaning a stick vacuum is essential for maintaining its efficiency. Proper preparation before cleaning ensures a smooth process. Follow these simple steps to get your vacuum ready for a thorough clean. Let’s dive into the pre-cleaning preparation.
Unplugging The Vacuum
Always unplug the vacuum from the power source. This step ensures safety. Working with an unplugged vacuum prevents electrical hazards. It also allows you to move freely while cleaning. Never skip this crucial step.
Disassembling Parts
Next, disassemble the parts of your stick vacuum. Most vacuums have detachable components. Follow the user manual for guidance. Common parts to remove include:
- Dustbin
- Filters
- Brushes
- Attachments
Place the parts on a clean surface. This helps keep track of everything. It also makes cleaning each part easier. Handle each component gently to avoid damage.
Proper pre-cleaning preparation saves time. It also ensures a thorough cleaning. Follow these steps for a hassle-free experience.
Cleaning The Filter
Keeping the filter clean in your stick vacuum is very important. A clean filter ensures your vacuum works at its best. It helps in maintaining strong suction power and extends the life of your vacuum. Follow these simple steps to clean your vacuum filter.
Removing The Filter
First, turn off and unplug your vacuum. This step is crucial for your safety. Next, locate the filter. Most stick vacuums have the filter near the dust bin. Check your user manual if you are unsure. Gently remove the filter. Be careful not to damage it.
Washing And Drying
Now it is time to wash the filter. Use lukewarm water and a mild detergent. Avoid harsh chemicals as they can damage the filter. Gently rinse the filter until it is clean.
After washing, let the filter dry completely. This step is very important. A wet filter can damage your vacuum. Place the filter in a dry, sunny spot. Allow it to dry for at least 24 hours. Once dry, reinstall the filter into your vacuum.
A clean filter ensures your vacuum works efficiently. Regular cleaning will help keep your home dust-free. Follow these steps every month for best results.
Clearing The Brush Roll
One of the crucial steps in cleaning your stick vacuum is clearing the brush roll. The brush roll is responsible for picking up debris and hair from your floors. Keeping it clean ensures optimal performance and prolongs the life of your vacuum.
Detaching The Brush Roll
Make sure your vacuum is unplugged. Safety is important. Then, locate the brush roll cover. This is usually at the bottom of your vacuum.
Most vacuum models have a release button or clips to detach the cover. Press the release button or unclip the cover carefully. Once the cover is off, you can access the brush roll.
Removing Hair And Debris
Inspect the brush roll closely. You will likely find tangled hair and debris. Use a pair of scissors to cut through the hair gently. Be careful not to damage the bristles.
After cutting, pull out the hair and debris with your fingers or a small brush. Ensure the brush roll is completely clean before reattaching it.
Reattach the brush roll cover. Secure it firmly to avoid any loose parts. Your vacuum is now ready for use again!
Cleaning The Dustbin
Cleaning the dustbin of your stick vacuum is crucial. It ensures optimal performance and hygiene. Regular maintenance prevents dust build-up and keeps your vacuum working efficiently. Here’s a step-by-step guide to help you with it.
Emptying The Dustbin
First, unplug your vacuum. Ensure safety. Locate the dustbin. It’s usually near the handle or base. Press the release button to detach it.
Next, empty the contents into a trash bin. Shake out any remaining debris. For stubborn dirt, use a soft brush or cloth.
Tip: Empty the dustbin after every use. This practice helps maintain suction power.
Washing The Dustbin
Rinse the dustbin under warm water. Avoid using hot water as it can damage the plastic. Use mild soap if necessary.
Scrub gently with a soft brush. Pay attention to corners and crevices. Rinse thoroughly. Ensure all soap residues are gone.
Drying: Let the dustbin air dry completely before reassembling. Avoid direct sunlight. It can cause the plastic to warp.
Following these steps regularly will extend the life of your vacuum. A clean dustbin ensures efficient cleaning every time.
Reassembling The Vacuum
Reassembling the vacuum is a crucial step in ensuring your stick vacuum performs well. After cleaning, you need to put all parts back together correctly. This ensures the vacuum operates efficiently and lasts longer. Follow these steps to reassemble your vacuum properly.
Reattaching Parts
Begin by identifying all the parts you removed. Make sure each piece is clean and dry. Attach the dustbin to its original place. Secure it firmly to prevent any air leaks. Next, reattach the filters. Ensure they are placed correctly to maintain suction power.
Continue by reattaching the brush roll. Align it properly with the slots. Push it until it clicks into place. Finally, attach the attachments like crevice tools or dusting brushes. Make sure each tool fits snugly into its holder.
Ensuring Proper Fit
Once all parts are reattached, check for a proper fit. Ensure there are no gaps between parts. Gaps can reduce suction power. Examine the dustbin and filters for any misalignment. Adjust them if necessary.
Test the vacuum by turning it on. Listen for any unusual sounds. If you hear any, double-check the assembly. Make sure each part is in its correct position. Proper fit ensures your vacuum works efficiently.
Maintaining Optimal Performance
Keeping your stick vacuum in top shape is crucial. Regular maintenance ensures it performs at its best. Clean your vacuum often to avoid issues. Proper care extends its lifespan. It also improves your cleaning results.
Regular Cleaning Schedule
Set a regular cleaning schedule. Empty the dustbin after each use. This prevents clogs and keeps suction strong. Check the filters monthly. Wash or replace them if needed. Clean the brush roll weekly. Remove hair and debris. Inspect the vacuum for damage. Address any issues promptly.
Storage Tips
Proper storage impacts your vacuum’s performance. Store it in a cool, dry place. Avoid damp areas. Hang it on a wall mount if possible. This keeps it off the floor and out of harm’s way. Wrap the cord neatly. Prevent tangles and damage. Keep attachments organized. Store them in a dedicated spot. This ensures they are easy to find and use.
Troubleshooting Common Issues
Stick vacuums are a handy tool for keeping your home clean. But sometimes, they can run into problems. Knowing how to troubleshoot these issues can save you time and money. Let’s dive into some common problems and how to fix them.
Identifying Problems
The first step in troubleshooting is identifying the problem. Is your vacuum not turning on? Is it losing suction? Is the brush not spinning? Each issue has its own cause and solution.
- Not Turning On: Check the power source. Ensure the battery is charged or the plug is securely connected.
- Losing Suction: Inspect the dirt container. It might be full or clogged.
- Brush Not Spinning: Look for tangled hair or debris in the brush roll.
Simple Fixes
Once you have identified the problem, try these simple fixes.
- Check Power: Ensure the vacuum is plugged in or the battery is charged. Replace the battery if needed.
- Empty Dirt Container: A full container reduces suction. Empty it regularly to maintain performance.
- Clear Brush Roll: Remove hair and debris from the brush. This helps the vacuum pick up dirt more effectively.
- Check Filters: Dirty filters can block airflow. Clean or replace them as recommended by the manufacturer.
Troubleshooting common issues can seem daunting. But with these simple steps, your stick vacuum will be back to its best in no time.

Credit: www.youtube.com
Conclusion
Keeping your stick vacuum clean ensures it works efficiently. Regular maintenance prevents clogs and extends its life. Follow these simple steps to clean your vacuum. Empty the dustbin, check the filters, and clean the brush roll. A well-maintained vacuum picks up more dirt and saves you time. Don’t forget to wipe the exterior for a fresh look. Consistent care keeps your vacuum running smoothly.