How to Change Wahl Beard Trimmer Blades?
To change Wahl beard trimmer blades, carefully detach the old blade and replace it with a new one. Get ready to give your beard a fresh cut with a new set of Wahl beard trimmer blades.
Whether you want to switch to a different style or your old blades are dull, replacing the blades is a straightforward process. By following a few simple steps, you can quickly change the blades and continue grooming with precision and ease.
We will guide you through the exact process of changing Wahl beard trimmer blades, so you can maintain a well-groomed beard effortlessly.
Understanding The Components
Blade
The blade is the most important component of the Wahl beard trimmer. It is responsible for the precise and smooth cutting of your facial hair. Wahl trimmers usually come with stainless steel or carbon steel blades, which are known for their durability and sharpness. These blades are designed to cut through even the thickest of beards with ease.
To change the blade of your Wahl trimmer, you’ll need to remove the housing first. The blade is attached to the housing using screws or a lock mechanism, depending on the model of the trimmer. Once the housing is removed, simply unscrew or unlock the blade and replace it with a new one. Make sure to tighten the screws properly to ensure the blade stays in place during use.
Housing
The housing of the Wahl beard trimmer is the outer casing that protects the internal components, including the blade. It is usually made of high-quality plastic that is both lightweight and durable. The housing is designed to provide a comfortable grip and control during trimming, allowing you to easily maneuver the trimmer around the contours of your face.
To change the blades of your Wahl trimmer, you’ll need to remove the housing first. The housing is typically held together by a few screws or a clipping mechanism. Use a screwdriver or your fingers to unscrew or unclip the housing, revealing the internal components, including the blade. Be careful not to damage the housing while removing it.
Guide Comb
The guide comb is an attachment that allows you to trim your beard to a specific length. It is attached to the housing and helps maintain a consistent cutting length throughout your beard. Wahl trimmers usually come with different guide combs, each with a different cutting length.
To change the blades of your Wahl trimmer, you’ll need to remove the guide comb from the housing. Most guide combs can be easily snapped on and off the trimmer. Simply press down on the comb and slide it off the housing. Replace it with a guide comb of your desired length and snap it back into place.
Power Button
The power button is the control that allows you to turn the trimmer on and off. It is usually located on the front or side of the housing for easy access. The power button may also have additional features, such as adjustable speed settings or a battery level indicator.
To change the blades of your Wahl trimmer, it is not necessary to interact with the power button. However, it is important to ensure that the trimmer is turned off and unplugged before attempting to change the blades. This will help prevent any accidental injuries.
Importance Of Maintaining The Blades
When it comes to grooming your beard, having a well-maintained trimmer is essential. One of the most important aspects of maintaining your Wahl beard trimmer is regularly changing the blades. Many people overlook this crucial step, but it is vital for ensuring optimal performance and preventing irritation and pulling.
Ensuring Optimal Performance
In order to maintain the best performance from your Wahl beard trimmer, it is important to change the blades regularly. Over time, the blades can become dull or damaged, which can result in an ineffective trimming experience. By regularly replacing the blades, you can ensure that your trimmer is consistently delivering the precise and smooth cuts that you desire.
Additionally, regularly changing the blades can also help to extend the overall lifespan of your trimmer. By keeping the blades sharp and in good condition, you can prevent unnecessary wear and tear on the motor and other internal components. This, in turn, can help to prevent any potential malfunctions or breakdowns, saving you both time and money in the long run.
Preventing Irritation and Pulling
Another important reason to maintain your Wahl beard trimmer blades is to prevent irritation and pulling of the hair. Over time, hair and debris can build up between the blades, leading to friction and discomfort during trimming. This can result in irritation, redness, and even ingrown hairs.
By regularly changing the blades, you can ensure that they remain sharp and clean, reducing the risk of irritation. Clean blades also help to prevent pulling or snagging of the hair, providing a smoother and more comfortable trimming experience. Whether you have a sensitive skin or not, keeping your blades clean and sharp is essential for minimizing any potential discomfort.
In conclusion, maintaining your Wahl beard trimmer blades is crucial for ensuring optimal performance and preventing irritation and pulling. By regularly replacing the blades, you can enjoy a trimmer that consistently delivers precise cuts, extends its lifespan, and provides a comfortable trimming experience. So don’t overlook this important aspect of grooming, and keep those blades in top shape.
Step 1: Prepare The Trimmer
Before you begin changing the blades of your Wahl Beard Trimmer, it is important to properly prepare the trimmer for the process. This includes ensuring that the power is off, removing any guide combs, and cleaning the trimmer for optimal performance.
Power Off the Trimmer
To start, make sure the Wahl Beard Trimmer is completely powered off. This will help prevent any accidental injuries during the blade changing process. Disconnect the trimmer from the power source, if applicable, and ensure the switch or button that controls the power is in the “off” position.
Remove Any Guide Combs
Next, check if there are any guide combs attached to the trimmer. Guide combs are the attachments that determine the desired length of your beard. Gently detach the guide combs one by one, taking care not to pull or tug too forcefully to avoid damaging them or the trimmer.
Clean the Trimmer
Before proceeding with blade replacement, it is essential to clean the trimmer. Over time, hair clippings and debris can accumulate, which can affect the trimmer’s performance and blade lifespan. Using a small brush or a soft cloth, carefully remove any hair or particles from the blade area and the overall trimmer body.
By following these steps and properly preparing the Wahl Beard Trimmer, you are now ready to move on to the next phase of changing the blades. Remember, proper preparation leads to a smooth blade replacement process and ensures that your trimmer functions at its best.
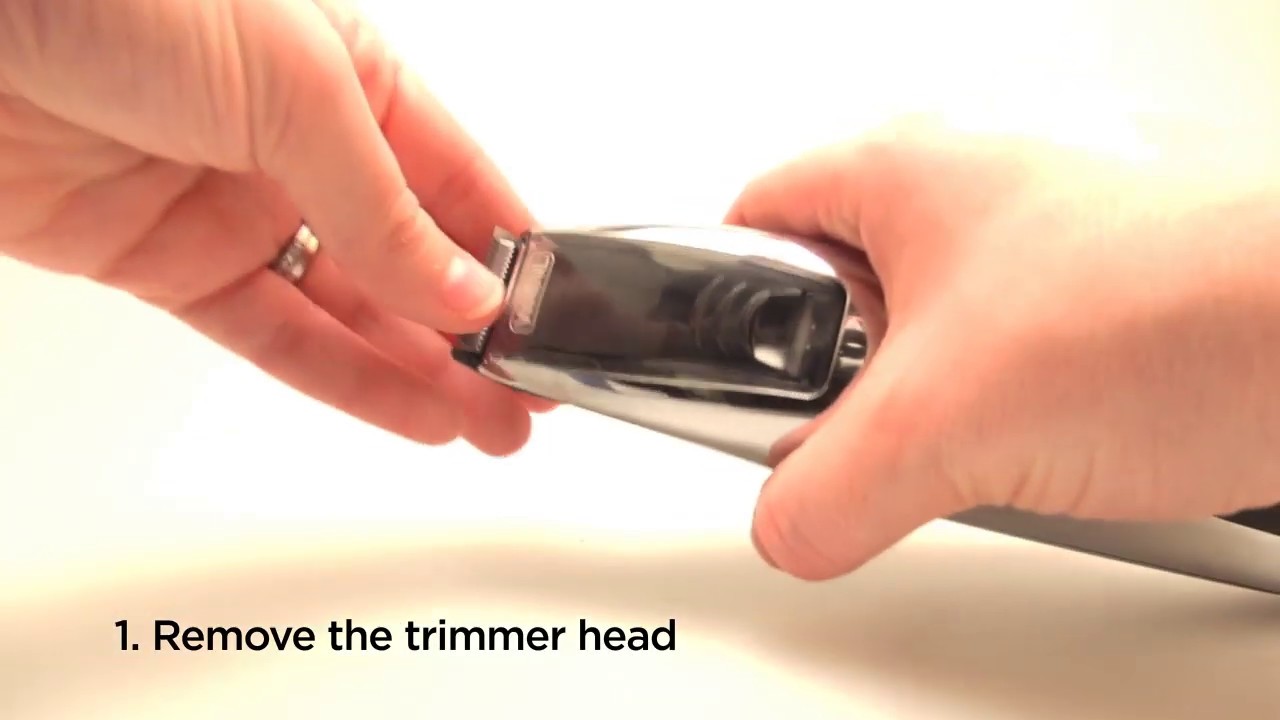
Step 2: Remove The Old Blade
Once you have located the release button, it’s time to remove the old blade from your Wahl beard trimmer. This step is crucial in ensuring that you can easily replace the blade with a new one without any hassle. Follow the simple instructions below to remove the old blade:
Locate the Release Button
Look for the release button on your Wahl beard trimmer. It is usually positioned near the top of the trimmer, close to where the blade is attached. The release button is a small, usually round or rectangular-shaped button that you need to press to unlock and remove the old blade.
Press and Hold the Release Button
Press and hold the release button firmly with your thumb or finger. Make sure you maintain a steady grip on the trimmer while doing this. Holding down the release button will allow you to disengage the old blade from the trimmer, making it easier to remove it.
Slide out the Old Blade
With the release button pressed and held, gently slide the old blade out from its position. Pay attention to any additional tabs or locking mechanisms on your specific Wahl beard trimmer model that may prevent the blade from sliding out. Take care not to force or damage the blade while removing it.
Remember, safety should always be a priority when working with sharp objects. Be cautious while handling the old blade, as it may still be sharp. To ensure a smooth transition to installing the new blade, inspect the blade compartment for any debris or hair that might have accumulated. Clean it using a soft brush or a cloth if necessary.
Now that you have successfully removed the old blade, it’s time to move on to the next step of the process: installing a new blade onto your Wahl beard trimmer. Stay tuned for step 3: Install the New Blade, where we’ll guide you through the process of attaching the replacement blade securely.
Step 3: Install The New Blade
Now that you have successfully removed the old blade, it’s time to install the new one. Follow these simple steps to ensure a smooth and effective installation:
Align the New Blade with the Housing
Begin by aligning the new blade with the housing of your Wahl beard trimmer. Look for the small grooves or notches on both the blade and the housing. These grooves must be perfectly aligned for the blade to fit securely.
Slide the New Blade into Place
Once you have aligned the blade and the housing, carefully slide the new blade into place. Ensure that it fits snugly and smoothly without any resistance. If you encounter any difficulties, double-check the alignment and try again.
Ensure it Clicks and Locks Properly
After sliding the new blade into place, it’s essential to make sure that it clicks and locks properly. This ensures that the blade is securely held in place and eliminates the risk of it becoming loose during operation.
To ensure a proper lock, gently press down on the blade while simultaneously turning it clockwise. You should hear a satisfying click, indicating that the blade has engaged and locked into position.
Now that you have successfully installed the new blade, you can continue enjoying the precise and efficient trimming experience that your Wahl beard trimmer provides. Remember to follow the manufacturer’s instructions and recommendations for blade maintenance and replacement to keep your trimmer in optimal condition.
Step 4: Reassemble The Trimmer
Step 4: Reassemble the Trimmer
Now that you have successfully replaced the blades of your Wahl Beard Trimmer, it’s time to put everything back together. Follow these simple steps to reassemble your trimmer and get it ready for your next grooming session.
Replace the Guide Combs
Start by securely attaching the guide combs back onto the trimmer. Ensure that they are snapped into place and aligned properly. This is crucial for achieving the desired length and precision during your trimming session. Check each comb to make sure they are correctly placed before proceeding to the next step.
Wipe off Excess Oil
During the blade replacement process, you may have applied oil to lubricate the new blades. Before reassembly, take a soft cloth or tissue and gently wipe off any excess oil that may have accumulated on the trimmer. This will prevent any greasy residue from interfering with your trimming experience and keep your trimmer clean and hygienic.
Power On the Trimmer
Now that you have reattached the guide combs and wiped off excess oil, it’s time to power on your Wahl Beard Trimmer and make sure everything is working as it should. Simply press the power button and listen for the familiar hum of the blades. If you hear any abnormal sounds or if the trimmer doesn’t turn on, double-check the previous steps or consult the manual for troubleshooting tips.
By following these simple steps, you can easily reassemble your Wahl Beard Trimmer and get it ready for your next grooming session. Remember to replace the guide combs securely, wipe off any excess oil, and power on the trimmer to ensure everything is functioning properly. With a well-maintained trimmer, you’ll be able to achieve the perfect beard style with ease.
Cleaning The Blades
Keeping your Wahl beard trimmer blades clean is essential for maintaining the performance and longevity of your trimmer. Over time, hair debris can accumulate and affect the trimming efficiency. Therefore, it is important to regularly clean the blades of your Wahl beard trimmer.
Use a Brush to Remove Hair Debris
Before you begin cleaning the blades, make sure the trimmer is turned off and unplugged to ensure safety. Take a small bristle brush or a toothbrush and gently sweep away any hair debris and loose particles from the surface of the blades. This will help prevent clogging and ensure smooth operation during your next trim.
Apply a Few Drops of Blade Oil
After removing the hair debris, it’s time to lubricate the blades. Apply a few drops of Wahl blade oil to the teeth of the blades. This oil is specifically designed to reduce friction and ensure the blades stay sharp and efficient. By lubricating the blades, you can enhance their performance and extend their lifespan.
Ensure that you apply only a small amount of oil, as excess oil can attract more debris and may cause the trimmer to become too slippery, making it difficult to handle. A few drops are generally sufficient to cover the blades evenly.
Wipe Off Excess Oil
After applying the blade oil, take a clean cloth or tissue and gently wipe off any excess oil from the blades. This step is important because leaving excess oil on the blades can lead to a greasy buildup, which may hinder the trimmer’s performance in the long run.
Make sure to wipe off the oil thoroughly, ensuring that the blades are left with a thin and even layer of lubrication. Properly wiping off the excess oil will help prevent any residue from transferring onto your skin during trimming.
Regularly cleaning and maintaining your Wahl beard trimmer blades ensures optimal performance, improves precision, and extends the lifespan of your trimmer. By following these simple steps, you can keep your blades clean and achieve a smooth and effortless trimming experience every time.
Regularly Sharpening The Blades
One of the essential maintenance tasks for maintaining the longevity and efficiency of your Wahl beard trimmer is regularly sharpening the blades. Over time, the blades can become dull due to regular use, resulting in a less precise and comfortable trimming experience. However, by sharpening the blades, you can restore their sharpness and ensure optimal performance for your trimmer. In this article, we will explore two methods: sending the blades to a professional sharpener or using a sharpening stone at home.
Send them to a Professional Sharpener
If you prefer not to sharpen the blades yourself or simply want to ensure a professional job, sending them to a professional sharpener is a great option. Professional sharpeners have the expertise and specialized equipment to sharpen Wahl beard trimmer blades effectively. Here’s how you can go about it:
- Start by researching reputable sharpening services in your area. Look for businesses or individuals with experience in sharpening grooming tools and specific knowledge of Wahl beard trimmers.
- Contact the sharpening service of your choice and inquire about their process. Some services may require you to mail the blades, while others might have a drop-off option.
- Follow the instructions provided by the service for packaging and shipping the blades securely. It’s crucial to ensure that the blades are well-protected to prevent any damage during transit.
- Include your contact information, including your name, address, and phone number, so the sharpener can reach you once the blades are sharpened and ready for pickup or delivery.
- Finally, wait for the blades to be sharpened by the professional. Once they are ready, the sharpener will return them to you, restoring the sharpness and performance of your Wahl beard trimmer.
Use a Sharpening Stone at Home
If you’re comfortable with do-it-yourself tasks or prefer the convenience of sharpening the blades at home, using a sharpening stone is an excellent alternative. Here’s a step-by-step guide to help you through the process:
- Begin by gathering the necessary supplies, including a sharpening stone suitable for your blades, a small brush for cleaning, and honing oil.
- Disconnect the trimmer from the power source and detach the blades from the trimmer body. Refer to the manufacturer’s instructions for guidance.
- Inspect the blades for any visible damage or signs of wear. If there are any cracks or chips, it’s best to replace the blades instead of attempting to sharpen them.
- Apply a small amount of honing oil to the sharpening stone.
- Hold the blade at the correct angle against the stone, ensuring that the entire cutting edge is in contact with the stone’s surface.
- Maintaining a consistent angle, move the blade back and forth across the stone in smooth, controlled motions. Aim for around 10 to 15 strokes per side.
- Periodically check the sharpness by lightly running your finger along the blade’s edge. If it feels noticeably sharper, you’re making progress.
- After sharpening to your satisfaction, clean the blade with a small brush to remove any residual metal filings or honing oil.
- Reattach the blades to the trimmer body, ensuring they are securely fastened.
- Plug the trimmer back in and test its performance to ensure the blades are cutting effectively.
By regularly sharpening the blades of your Wahl beard trimmer, you can maintain precise and comfortable trims. Whether you choose to send them to a professional sharpening service or use a sharpening stone at home, make it a part of your trimmer maintenance routine and enjoy the best possible performance from your Wahl beard trimmer.
Storing The Trimmer
Storing the trimmer is an important step in maintaining the longevity and performance of your Wahl beard trimmer blades. Proper storage not only keeps the trimmer safe from damage but also ensures that the blades remain sharp and ready for use whenever you need them. In this section, we will explore two key aspects of storing your Wahl beard trimmer: keeping it in a dry and safe place, and using a blade guard or cover.
Keep in a Dry and Safe Place
One of the most crucial things to consider when storing your Wahl beard trimmer is to keep it in a dry and safe place. Moisture can cause rust and damage to the blades, leading to dull and ineffective trimming. Therefore, it is important to store the trimmer in a location where it is protected from any water or moisture exposure.
If you have a designated grooming area in your bathroom, make sure to keep the trimmer away from the sink or the shower. Even the steam from hot showers can contribute to moisture build-up. Instead, consider storing it in a cabinet or on a shelf, away from any potential water sources.
Furthermore, it is advisable to avoid storing the trimmer in an area prone to extreme temperatures or direct sunlight. Heat and excessive sunlight can affect the performance and longevity of the trimmer and its blades. Find a cool and shaded spot where it can be safely stored.
Use a Blade Guard or Cover
Using a blade guard or cover is another essential aspect of storing the Wahl beard trimmer. A blade guard or cover not only protects the blades from accidental damage but also prevents them from coming into contact with any dirt, dust, or debris, which can compromise their performance.
Most Wahl trimmers come with a blade guard or cover included in the package. If you have misplaced yours, you can consider purchasing a replacement guard or cover from the manufacturer or authorized retailers.
When storing your trimmer, simply place the blade guard or cover over the blades. This will keep them protected and prevent any accidental contact that could lead to damage. Additionally, a guard or cover also ensures that the trimmer can be safely transported without any risk of the blades coming into contact with other objects or surfaces.
In summary, storing your Wahl beard trimmer in a dry and safe place, and using a blade guard or cover are essential steps to ensuring its longevity and optimal performance. By taking these precautions, you can keep your trimmer in excellent condition, ready for precise and hassle-free trimming whenever you need it.

Credit: www.amazon.com
Blade Not Sliding Out
Ensure the Release Button is Fully Pressed
One common issue with changing the blades on a Wahl beard trimmer is when the blade does not slide out easily. This can be frustrating, but there are a few simple steps you can take to troubleshoot and resolve the issue. The first thing to check is whether the release button is fully pressed. The release button is located on the trimmer body and needs to be engaged in order to remove the blade. Ensure that you are pressing it firmly and holding it down throughout the blade removal process.
Check for Any Obstructions
Sometimes, the blade may get stuck due to obstructions like hair clippings or dirt. Before trying to remove the blade again, it’s essential to check for any obstructions and clean them out. Use a soft brush or a toothbrush to gently remove any debris from the blade area. This will help the blade slide out smoothly. Additionally, make sure to clean the area after removing the blade to prevent future obstructions.
If the blade still does not slide out after ensuring the release button is fully pressed and removing any obstructions, you may need to contact Wahl customer support or take your trimmer to a professional for further assistance. They will have the expertise to diagnose and address any mechanical issues that may be preventing the blade from sliding out. Remember to always follow the manufacturer’s instructions and handle the trimmer with care when attempting to change the blades.
Blade Not Locking Properly
If you are facing the issue of your Wahl beard trimmer blade not locking properly, don’t worry. This can be a common problem with trimmers over time, but it’s something that you can easily fix yourself. By following a few simple steps, you’ll have your trimmer working like new again in no time.
Remove and Reset the Blade
The first thing you should do is remove the blade from your Wahl beard trimmer. To do this, gently remove the blade assembly by sliding it out from the trimmer. You may need to press on the release button or lever, depending on the model of your trimmer.
Once the blade is removed, take a moment to inspect it for any damage or debris. Clean the blade and the surrounding area to ensure there is no dirt or hair stuck in the locking mechanism. This could be causing the blade to not lock properly.
After cleaning the blade and surrounding area, carefully reinsert the blade into the trimmer. Make sure it is aligned properly and slides in smoothly. You should feel a click or snap when the blade locks into place. If it doesn’t lock properly, try removing and reinserting the blade again.
Verify the Alignment and Locking Mechanism
After resetting the blade, it’s important to verify the alignment and locking mechanism. Use your fingers to move the blade back and forth to ensure it moves freely and locks securely. If you notice any resistance or if the blade doesn’t lock into place, you may need to make a slight adjustment.
Check the alignment of the blade with the trimmer body. Make sure there are no gaps or misalignments. If you find any, gently wiggle the blade until it aligns properly. Once aligned, try sliding the blade back into the trimmer and check if it locks securely.
If the blade still doesn’t lock properly, you can refer to the instruction manual that came with your Wahl beard trimmer. It may have specific troubleshooting instructions for this issue. Alternatively, you can contact Wahl customer support for further assistance.
Remember, maintaining your Wahl beard trimmer is important for optimal performance. Regularly cleaning and lubricating the blade can help prevent issues like the blade not locking properly. By following these steps and taking care of your trimmer, you’ll be able to enjoy a consistently clean and precise trim every time.
Blade Falls Out During Use
One common issue that beard trimmer users may experience is the blade falling out during use. This can be frustrating and can disrupt your grooming routine. However, there are a few simple steps you can take to address this problem and get your Wahl beard trimmer back in working order. In this section, we will explore the possible causes of the blade falling out and how to fix them.
Check for Loose or Worn Parts
The first thing you should do if the blade keeps falling out is to check for any loose or worn parts. Over time, the blade and its components can become loose due to regular use. To determine if this is the case, carefully inspect the trimmer and look for any visible signs of wear or looseness. Pay close attention to the blade locking mechanism and the screws that hold it in place.
If you notice any loose screws, use a small screwdriver to tighten them. Be sure to do this gently and avoid over-tightening, as this can cause additional problems. If a screw is missing or damaged, it may need to be replaced. Contact Wahl customer support or refer to the trimmer’s manual to find the appropriate replacement screws.
Replace or Tighten as Needed
If you have checked for loose or worn parts but the blade is still falling out, it may be necessary to replace certain components. The blade itself can sometimes become worn or damaged over time, resulting in a poor fit and frequent dislodging. To replace the blade, follow the manufacturer’s instructions specific to your Wahl beard trimmer model.
Alternatively, the issue may be with the blade locking mechanism. This component is responsible for keeping the blade securely in place during use. If it is loose or worn, the blade may not stay in position. In this case, you may need to replace the locking mechanism or tighten it if possible. Again, consult the trimmer’s manual or contact Wahl customer support for guidance on the specific steps to take.
Remember to always use caution when working with the trimmer blades and components. Avoid forcing anything or using excessive pressure, as this can cause further damage. If you are unsure about any step or lack the necessary tools, it is recommended to seek professional assistance. Keeping your trimmer in good condition will not only prevent the blade from falling out but also ensure optimal performance for your grooming needs.
Frequently Asked Questions Of How To Change Wahl Beard Trimmer Blades
How Do You Change The Attachments On A Wahl Beard Trimmer?
To change the attachments on a Wahl beard trimmer, simply twist off the current attachment and replace it with the desired one. Make sure to securely attach the new attachment to ensure precise trimming.
How Do You Remove The Blade From A Wahl Trimmer?
To remove the blade from a Wahl trimmer, follow these steps: 1. Turn off and unplug the trimmer. 2. Locate the blade release button or lever. 3. Press or slide it to unlock the blade. 4. Carefully pull the blade away from the trimmer.
5. Clean or replace the blade as needed.
Can You Replace Beard Trimmer Blades?
Yes, it is possible to replace beard trimmer blades.
How Do You Put The Blades Back On My Wahl Clippers?
To put the blades back on your Wahl clippers, follow these steps: 1. Align the blades with the clipper body. 2. Slide the blade onto the clipper until it clicks into place. 3. Tighten the screws to secure the blades.
4. Ensure the blades move smoothly without getting stuck. 5. Test the clippers to see if they are working properly.
Conclusion
Changing the blades on your Wahl beard trimmer is a straightforward process that can greatly improve the performance of your grooming tool. By following the steps outlined in this guide, you can ensure that your trimmer continues to deliver precise and clean cuts for a long time to come. Regular maintenance and blade replacement are essential for maintaining the quality of your beard trimmer, so don’t hesitate to give your grooming routine the upgrade it deserves.