How to Deep Clean Breville Toaster Oven: Ultimate Guide
Cleaning your Breville toaster oven may seem daunting. But it is essential for its longevity.
Deep cleaning ensures your oven works efficiently and safely. In this guide, you’ll learn step-by-step how to deep clean your Breville toaster oven. Regular maintenance is crucial for any kitchen appliance. A clean toaster oven prevents food buildup and potential fire hazards.
It also keeps your food tasting fresh and uncontaminated. This post will break down the cleaning process into easy-to-follow steps. Whether you’re a new owner or have had your Breville for years, these tips will help. So grab your cleaning supplies and let’s get started.
Preparation Steps
Before deep cleaning your Breville Toaster Oven, it’s crucial to follow some preparation steps. These steps ensure safety and efficiency. Let’s dive into the essential preparation tasks.
Gather Supplies
First, gather all the necessary supplies. Having everything ready will save time. Here is a list of items you’ll need:
- Soft cloths or microfiber towels
- Dish soap
- Warm water
- Non-abrasive sponge
- Baking soda
- Vinegar
- Toothbrush or small brush
Ensure that the supplies are non-abrasive. This prevents damage to the oven’s surface. Place all items within easy reach.
Unplug And Cool Down
Unplugging the toaster oven is a vital safety step. Never clean a plugged-in appliance. Wait for the oven to cool down completely. Cleaning a hot oven can cause burns.
Once the oven is cool, open the door. Remove any trays or racks inside. Set them aside for separate cleaning. Now your Breville Toaster Oven is ready for the deep cleaning process.
Cleaning The Exterior
Maintaining the exterior of your Breville toaster oven is essential. It keeps the appliance looking new and ensures longevity. Follow these steps to clean the exterior efficiently.
Wipe With Damp Cloth
Start by unplugging the toaster oven. This is crucial for safety. Take a soft cloth and dampen it with water. Make sure the cloth is not too wet. Gently wipe the exterior surfaces of the toaster oven.
Focus on removing dirt and fingerprints. Pay extra attention to the control panel and door handles. These areas tend to accumulate grime quickly. Use smooth, even strokes to avoid scratching the surface.
Remove Stubborn Stains
For stubborn stains, you need a mild cleaning solution. Mix a few drops of dish soap with warm water. Dip a cloth into the soapy water and wring out the excess.
Gently rub the stubborn stains with the damp cloth. Avoid using harsh chemicals or abrasive materials. These can damage the finish of your toaster oven.
If the stains persist, consider using a baking soda paste. Mix baking soda with a small amount of water. Apply the paste to the stains and let it sit for a few minutes. Wipe off the paste with a damp cloth. This method is gentle yet effective.
| Item | Cleaning Method |
|---|---|
| Exterior Surface | Wipe with a damp cloth |
| Control Panel | Wipe gently with a damp cloth |
| Stubborn Stains | Use soapy water or baking soda paste |
Remember, regular cleaning prevents buildup and keeps your toaster oven looking its best. Consistent maintenance is key to a long-lasting appliance.
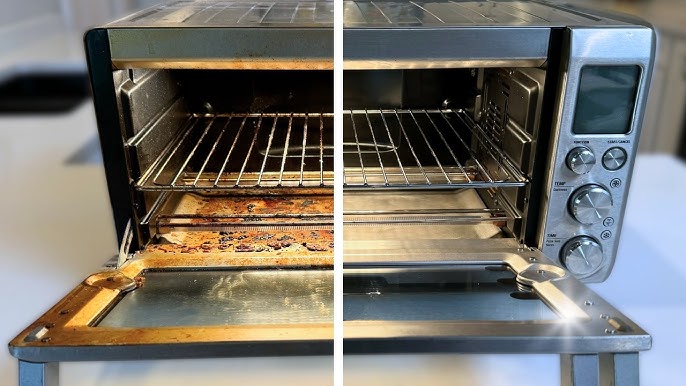
Cleaning The Interior
Cleaning the interior of your Breville toaster oven is essential for optimal performance. Keeping the inside clean prevents residue build-up and ensures even cooking. Let’s dive into the steps needed to maintain a spotless interior.
Remove Crumb Tray
First, unplug the toaster oven. Let it cool completely. The crumb tray is usually located at the bottom. Pull it out gently.
Empty the crumbs into the trash. Use a damp cloth to wipe the tray. If it’s very dirty, soak it in warm soapy water. Rinse and dry thoroughly before placing it back.
Clean Heating Elements
Cleaning the heating elements is crucial. They can accumulate grease and food particles. This affects their efficiency.
- Unplug the toaster oven.
- Use a soft, damp cloth to wipe the elements. Avoid using abrasive materials. They can damage the elements.
- For stubborn spots, use a bit of vinegar on the cloth. Gently rub until the residue is gone.
Ensure the elements are completely dry before using the toaster oven again. This prevents any electrical issues.
| Step | Action |
|---|---|
| 1 | Unplug and cool the oven |
| 2 | Remove and clean the crumb tray |
| 3 | Clean the heating elements |
| 4 | Ensure all parts are dry |
Regular cleaning keeps your Breville toaster oven in top shape. A clean oven also ensures your food tastes great every time.

Credit: www.breville.com
Cleaning Accessories
Cleaning your Breville Toaster Oven requires the right accessories. Proper cleaning tools ensure every part of the oven stays in top condition. This section will guide you through cleaning the different accessories of your Breville Toaster Oven.
Racks And Trays
Remove the racks and trays from the oven. Soak them in warm, soapy water for 10-15 minutes. Use a soft sponge to scrub away food residue. Avoid abrasive materials that can scratch the surface. Rinse thoroughly and dry with a clean towel before placing them back in the oven.
Baking Pans
Take out the baking pans and immerse them in soapy water. Let them sit for a few minutes. Use a non-abrasive scrubber to clean off any baked-on food. Rinse well under running water. Dry completely before returning them to the oven.
Cleaning The Door
Keeping the door of your Breville toaster oven clean ensures clear visibility and efficient cooking. Regular cleaning prevents grease build-up and maintains the oven’s overall appearance. Let’s focus on the key areas: the glass surface and the door seals.
Glass Surface
The glass surface on the door can get dirty quickly. Start by unplugging the oven for safety. Use a damp cloth or sponge with mild detergent. Gently wipe the glass surface. Avoid abrasive cleaners that can scratch the glass. For stubborn stains, use a mixture of baking soda and water. Apply the mixture to the stains and let it sit for 15 minutes. Wipe off with a damp cloth.
Door Seals
The door seals are crucial for maintaining the oven’s heat. They can collect crumbs and grease. Use a soft brush or toothbrush to clean between the seals. Avoid pulling or stretching the seals. This could damage them. Wipe them with a damp cloth and mild detergent. Ensure they are completely dry before closing the door. Regular cleaning keeps the door seals in good condition and your oven working efficiently.

Credit: www.youtube.com
Reassembling The Oven
Reassembling your Breville toaster oven after a deep clean ensures it functions efficiently. This step is crucial to avoid damage and maintain performance. Follow these simple steps to reassemble your oven correctly.
Reinstall Crumb Tray
First, locate the crumb tray at the bottom of the oven. Slide it back into the designated slot. Ensure it sits flat and securely in place. This tray catches any food debris, keeping your oven clean.
Replace Racks And Accessories
Next, insert the racks back into the oven. Align them with the grooves on the sides. Slide them in until they stop. Ensure they are level and stable.
Return any other accessories like the baking pan or pizza stone. Place them in their original positions. Check that all items are correctly positioned before closing the oven door.
Safety Tips
Deep cleaning your Breville toaster oven can be simple and safe. Follow these safety tips to ensure a smooth cleaning process. Keep your appliance in top condition without risking damage or injury.
Avoid Harsh Chemicals
Using harsh chemicals can harm your toaster oven. They can damage the interior and affect your food. Stick to natural cleaners like baking soda and vinegar. These are effective and safe for your appliance.
Avoid using abrasive cleaners. They can scratch the surface and ruin the finish. Keep your toaster oven looking new by using gentle cleaning solutions.
Use Soft Cloths
Using soft cloths is crucial. Hard scrubbing pads can damage the surface. A microfiber cloth is ideal for cleaning. It removes dirt without scratching the finish.
For stubborn stains, dampen the cloth with warm water. Gently rub the stain until it lifts. Avoid using too much water as it can seep into the appliance.
| Do’s | Don’ts |
|---|---|
| Use natural cleaners | Use harsh chemicals |
| Use soft cloths | Use abrasive pads |
| Clean with warm water | Soak the appliance |
Follow these tips to keep your Breville toaster oven clean and safe. Maintaining your appliance extends its life and ensures your food tastes great.
Credit: www.mystylelabel.com
Maintenance Tips
Maintaining your Breville toaster oven in top condition ensures its longevity. Regular upkeep is key to keep it functioning well. Here are some maintenance tips to help you keep your toaster oven clean and efficient.
Regular Wiping
Regular wiping is crucial. After each use, let the toaster oven cool down. Use a damp cloth to wipe the interior and exterior surfaces. Focus on removing crumbs and food particles. This helps prevent buildup and keeps your oven clean.
Deep Cleaning Schedule
Set a deep cleaning schedule for your toaster oven. Perform a thorough cleaning every month. This involves removing the racks and crumb tray. Soak them in warm, soapy water. Scrub gently to remove any stuck-on food.
For the interior, mix baking soda with water to form a paste. Apply it to stubborn stains and let it sit for 15 minutes. Wipe away with a damp cloth. Avoid using harsh chemicals. They can damage the oven’s surfaces.
Don’t forget the glass door. Use a glass cleaner or a vinegar-water solution. Wipe it down with a soft cloth. This keeps the door clear for easy viewing while cooking.
Conclusion
Deep cleaning your Breville toaster oven is simple and rewarding. A clean oven works better and lasts longer. Follow the steps shared to keep it spotless. Regular maintenance prevents stubborn stains and odors.