How to Clean Breville Grind Control Coffee Maker?
To clean the breville grind control coffee maker, remove the brew basket and grinder components, wash them with warm soapy water, and dry before reassembling them. Clean the carafe, water tank, and filter basket regularly, and descale the machine every 3-6 months using a descaling solution.
Are you a proud owner of a breville grind control coffee maker? This innovative appliance provides a complete coffee brewing experience with its built-in grinder and adjustable settings. However, to ensure the longevity and optimal performance of your coffee maker, it’s essential to keep it clean.
Regular cleaning and maintenance not only improve the taste of your coffee but also prevent any clogging or malfunctioning issues. In this guide, we’ll show you how to clean your breville grind control coffee maker effortlessly, ensuring a smooth and enjoyable coffee brewing experience. Keep reading to discover the steps needed to keep your breville grind control coffee maker sparkling clean.
Importance Of Regular Cleaning
Regular cleaning of your breville grind control coffee maker is of utmost importance. It ensures that your coffee tastes optimal and extends the lifespan of the machine. Neglecting regular cleaning can result in a buildup of coffee residue, oils, and mineral deposits, which can affect the flavor of your brewed coffee.
Cleaning your coffee maker also helps prevent clogs in the brewing system, ensuring consistent performance. To clean your breville grind control coffee maker, start by emptying and rinsing the carafe and removing the filter. Then, clean the grind chamber, filter basket, and other removable parts with warm, soapy water.
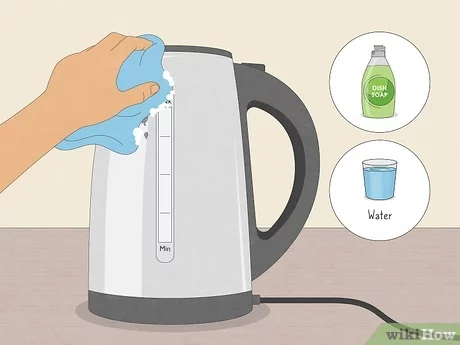
Wipe the exterior of the machine with a damp cloth. It is advised to clean your coffee maker at least once a month. By following these simple cleaning steps, you can enjoy delicious coffee and keep your breville grind control coffee maker in excellent working condition for years to come.
Materials Needed For Cleaning
Cleaning your breville grind control coffee maker is a breeze with the right materials. All you need is white vinegar, mild dish soap, a microfiber cloth, a soft bristle brush, and water. Begin by mixing equal parts white vinegar and water in the water reservoir.
Run a brewing cycle without any coffee grounds to clean the inside of the machine. Next, empty the water reservoir and fill it with clean water. Run a few brewing cycles with just water to rinse away the vinegar residue.
Once you’re done with the reservoir, remove the coffee carafe and filter basket. Wash them with mild dish soap and a soft cloth or brush to remove any coffee residue. Rinse everything thoroughly with water, and your breville grind control coffee maker will be sparkling clean and ready for your next cup of joe.
Step-By-Step Cleaning Process
Maintaining the cleanliness of your breville grind control coffee maker is essential for optimal performance. To clean your coffee maker, follow these simple steps. Begin by disassembling the coffee maker, removing the coffee grounds holder, and taking out all removable parts.
Clean these parts by soaking them in a vinegar solution and giving them a gentle scrub to remove any residue. Rinse and dry the parts thoroughly. Next, clean the coffee grounds holder by removing any remaining grounds and soaking and scrubbing to remove stains.
Rinse and dry the holder completely. Clean the reservoir and carafe by using soapy water to clean the reservoir and then rinsing and drying it properly. Descaling the coffee maker is also necessary, so prepare the descaling solution and run the descaling cycle.
To clean the exterior, wipe the surfaces with a damp cloth and pay attention to the lcd screen and control panel. Finally, reassemble the coffee maker by properly placing the removable parts and inserting the coffee grounds holder.
Maintenance Tips For A Clean Machine
Having a regular cleaning schedule is essential for maintaining your breville grind control coffee maker. Start by using filtered water to prevent mineral buildup. It’s important to wipe spills immediately to prevent stains and keep your machine looking clean. Additionally, decalcify your coffee maker as appropriate to remove any built-up mineral deposits.
Regular maintenance ensures that your coffee machine will continue to function optimally and produce delicious, high-quality coffee. Keep these tips in mind and enjoy the convenience of a clean and well-maintained breville grind control coffee maker.
Troubleshooting Common Cleaning Issues
Does your breville grind control coffee maker have a funky smell even after cleaning? One possible issue could be residue in the coffee grounds holder. To solve this, make sure to clean the holder thoroughly, paying attention to any build-up or clogs.
Another common problem is mineral build-up in the reservoir, which can affect the taste of your coffee. To fix this, you can descale the machine using a mixture of vinegar and water. Follow the manufacturer’s instructions for the correct ratio and procedure.
Regular maintenance can prevent these issues from occurring, so it’s important to clean your coffee maker regularly. By following these troubleshooting tips, you can ensure that your breville grind control coffee maker is clean and ready to make delicious coffee every time.
Frequently Asked Questions On How To Clean Breville Grind Control Coffee Maker
How Do I Clean My Breville Coffee Maker Grind Control?
To clean your breville coffee maker grind control, follow these steps:
1. Turn off the machine and unplug it from the power source.
2. Remove the hopper, grinds container, and water tank from the unit.
3. Wash the hopper, grinds container, and water tank with warm soapy water, rinse well, and dry thoroughly.
4. Use a soft brush to clean the coffee chute, grinder burrs, and any other removable parts.
5. Wipe down the exterior of the machine with a damp cloth. 6. Run a cleaning cycle using a mixture of descaler and water as per the manufacturer’s instructions.
7. After the cleaning cycle, run a couple of rinse cycles with clean water to ensure all traces of the descaler are removed.
8. Reassemble all the parts and plug in the machine. Regular cleaning of your breville coffee maker grind control will help maintain its performance and ensure a delicious cup of coffee every time.
How Do I Descale My Breville Coffee Maker With A Grinder?
To descale your breville coffee maker with a grinder, follow these steps:
1. Ensure the coffee maker is turned off and cool.
2. Remove the water tank and filter, then empty any remaining water.
3. Mix 1 part white vinegar with 1 part water in the water tank.
4. Place an empty container under the coffee spout.
5. Turn on the machine and let the solution run through the machine until empty.
6. Rinse the water tank and refill it with fresh water.
7. Run a cycle of just water to flush out any vinegar residue.
8. Repeat the rinsing cycle until the water runs clear.
9. Clean the filter and reassemble the coffee maker. 10. Enjoy your freshly descaled breville coffee maker with a grinder.
How Do You Clean A Breville Smart Grinder?
To clean a breville smart grinder, here’s what you need to do:
1. Unplug the grinder and remove the hopper and coffee bin.
2. Wash the hopper, lid, and coffee bin with warm, soapy water. Rinse and dry thoroughly.
3. Use a small brush or toothbrush to clean the grinder’s burrs and grind chamber.
4. Wipe the exterior of the grinder with a damp cloth.
5. Reassemble the grinder and plug it back in. Regular cleaning ensures optimal performance and longevity of your breville smart grinder. Remember to follow these steps to maintain your grinder’s functionality and keep your coffee tasting fresh.
Conclusion
Your Breville Grind Control Coffee Maker is a wonderful addition to your kitchen, but it requires proper care to continue delivering the perfect cup of coffee. Following the steps outlined in this guide, you’ll ensure that your coffee maker remains in excellent condition and consistently produces delicious coffee. Regular maintenance enhances the taste of your brew and extends the life of your beloved coffee maker.