How to Fix Razor E100 Electric Scooter: Quick Tips

To fix a Razor E100 Electric Scooter, first check the battery and fuse. Then, inspect the motor and throttle.
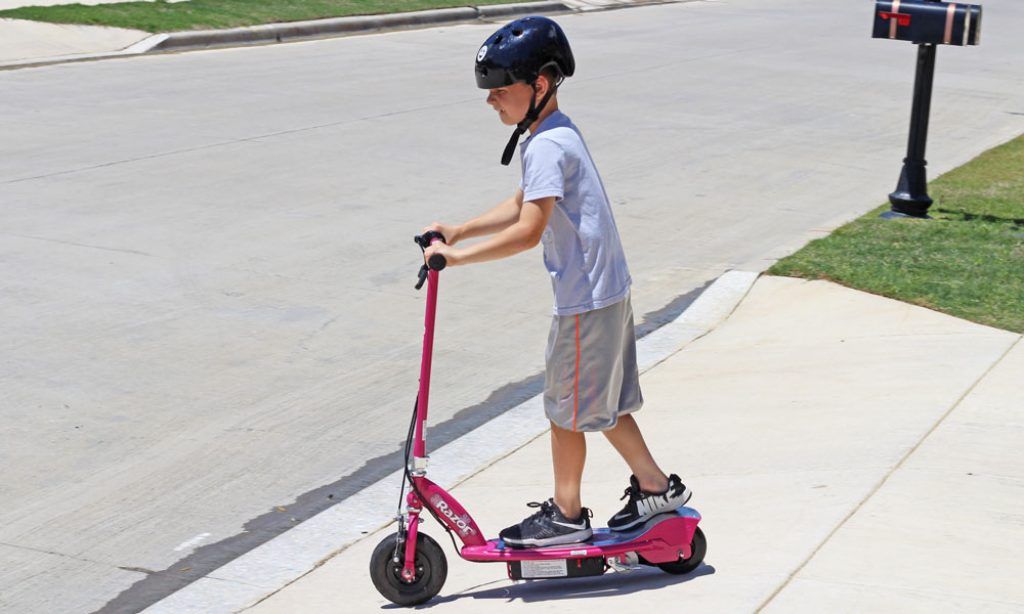
Razor E100 Electric Scooters are popular among kids and teens for their durability and ease of use. Despite their robust build, occasional issues can arise that need addressing. Common problems include battery failure, blown fuses, and motor or throttle malfunctions.
Knowing how to troubleshoot and fix these issues can save time and money. Simple tools and a bit of patience often suffice to restore the scooter to optimal performance. Regular maintenance and timely repairs ensure a longer lifespan for the scooter. This guide will help you diagnose and resolve common problems efficiently.
Introduction To Razor E100 Troubleshooting
The Razor E100 electric scooter often faces a few common issues. One frequent problem is a dead battery. Another issue is the scooter not starting. Sometimes, the brakes may not work properly. Owners also report flat tires. Each of these problems can be fixed with simple steps.
Always turn off the scooter before starting any repairs. Wear gloves to protect your hands. Use safety goggles to protect your eyes. Keep tools organized to avoid accidents. Make sure the scooter is on a stable surface. Disconnect the battery to prevent shocks. Read the manual for specific instructions.
Diagnosing The Problem
Identify common issues by checking the battery, motor, and wiring of your Razor E100 Electric Scooter. Ensure all connections are secure and components function properly.
Identifying Symptoms
Listen for strange noises from the scooter. Check if the scooter won’t turn on. Look at the battery and see if it’s charged. Inspect the wheels to ensure they are not stuck or wobbling. Pay attention to the throttle response.
Tools Required For Diagnosis
| Tool | Purpose |
|---|---|
| Screwdriver | Opening the scooter panels |
| Multimeter | Checking electrical connections |
| Wrench | Tightening loose bolts |
| Battery Tester | Testing battery health |
Battery And Charging Issues
First, make sure the scooter is turned off. Remove the battery cover using a screwdriver. Use a multimeter to check the battery’s voltage. The voltage should be between 24 and 26 volts. If the voltage is below 24 volts, the battery may need replacing. Always wear safety gloves when handling the battery. Avoid touching the battery terminals directly. Reassemble the scooter once testing is complete.
Inspect the charger for any visible damage. Check the plug and wires for wear and tear. Ensure the charger is plugged into a working outlet. A green light on the charger indicates it is functioning. If no light appears, the charger may be faulty. Always keep the charger and battery in a cool, dry place. Avoid using a damaged charger to prevent accidents.

Credit: m.youtube.com
Motor And Chain Maintenance
Regular motor and chain maintenance ensures your Razor E100 electric scooter runs smoothly. Follow simple steps to fix common issues and extend the scooter’s lifespan. Proper lubrication and tension adjustments are essential for optimal performance.
Motor Troubleshooting Steps
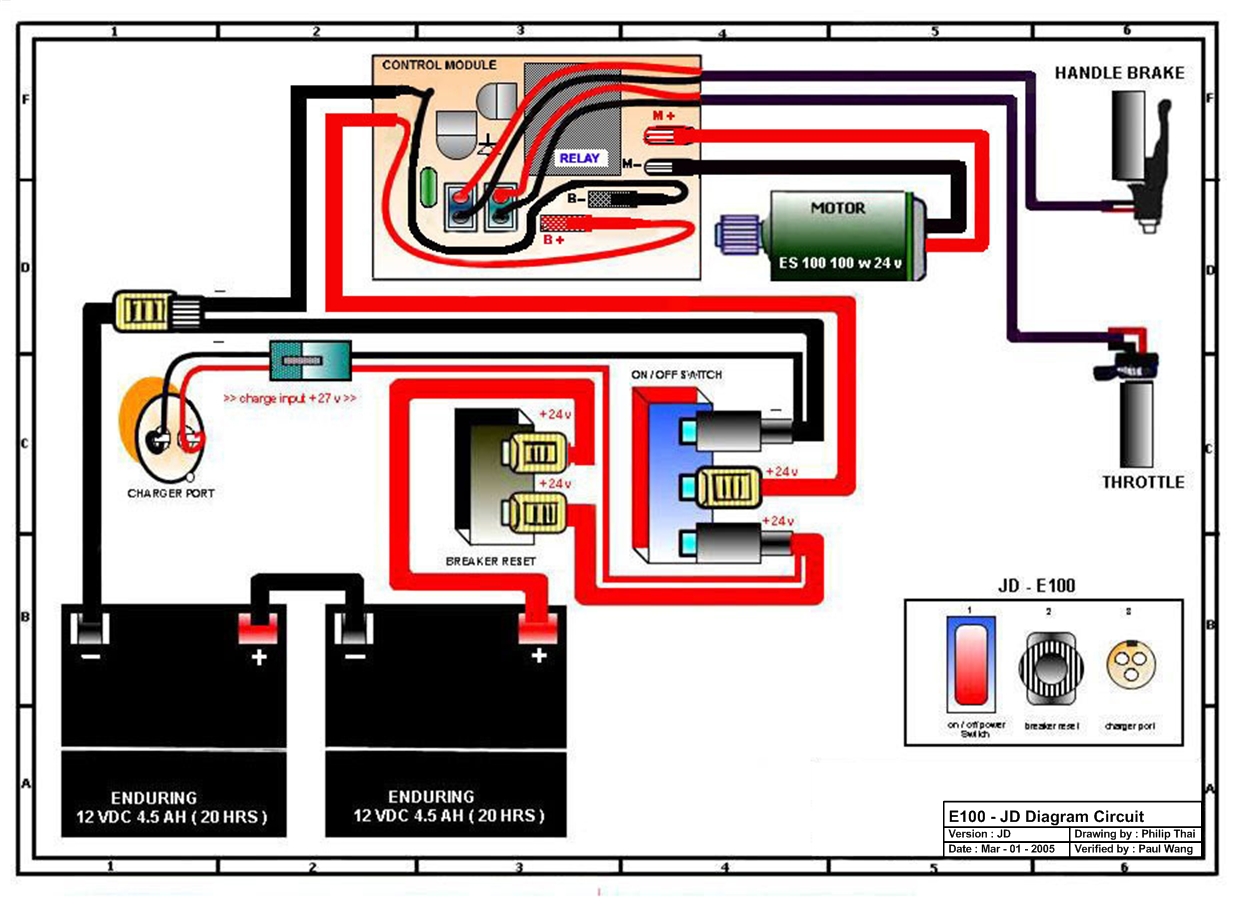
Check the power switch first. Make sure it is turned on. Inspect the fuse next. Replace if it is blown. Look at the battery connections. They should be tight and clean. Test the throttle. It should move smoothly. Examine the motor wires. Ensure they are not loose or damaged. Verify the motor gear. It should turn freely. If problems persist, consult a professional.
Chain Adjustment And Lubrication
Inspect the chain tension. It should not be too tight or too loose. Adjust the chain tension by loosening the rear axle nuts. Move the wheel back to tighten the chain. Move the wheel forward to loosen it. Tighten the axle nuts once adjusted. Apply lubricant to the chain. Use a suitable chain lubricant. Spin the wheel to spread the lubricant evenly. Wipe off any excess lubricant with a cloth.
Tackling Wheel And Tire Complications
Aligning the front wheel is very important. First, make sure the scooter is on a flat surface. Then, loosen the nuts on both sides of the wheel. Check if the wheel is straight. Tighten the nuts once the wheel is aligned. Finally, test the scooter to ensure it rides straight.
Check the tire pressure with a gauge. The correct pressure keeps the scooter safe. Inflate the tire if the pressure is low. Overinflating can cause problems, so be careful. Inspect the tire for any damage. If the tire is worn out, replace it with a new one. Ensure the new tire fits well.
Brake System Adjustments
First, check the brake pads for wear and tear. Replace the pads if they look thin. Next, inspect the brake cable for any frays or damage. Ensure the cable is tight and secure. Look at the brake lever; it should move smoothly. If the lever feels loose, tighten it. Make sure all parts are clean. Dirt can cause problems.
Adjust the brake tension by turning the adjustment screw. This screw is near the brake lever. Turn it clockwise to tighten the brake. Turn it counterclockwise to loosen it. Test the brakes after each adjustment. Ensure the scooter stops quickly. Lubricate the brake cable for smooth performance. Use a small amount of oil. Keep oil away from the brake pads.
Electrical System Checks
Check the throttle to ensure it moves freely. If it sticks, it might be broken. The speed controller can also fail. Test it with a multimeter. Make sure the connections are tight. Replace any broken parts.
Inspect all wires for damage. Look for frayed or burnt wires. Connectors should be tight and clean. Dirty connectors can cause issues. Use a cleaning spray to clean them. Replace damaged wires and connectors.

Credit: www.twowheelingtots.com
Frame And Handlebar Fixes
First, check if the handlebar is straight. If it is not, loosen the clamp bolt. Adjust the handlebar so it aligns with the front wheel. Once aligned, tighten the clamp bolt securely. Ensure it does not move when you ride.
Inspect the scooter for any loose parts. Common areas include the frame and handlebars. Use a wrench to tighten any loose bolts. Make sure all parts are secure and do not wobble. This ensures a safe ride.
Professional Help And Replacement Parts
Expert assistance and high-quality replacement parts ensure your Razor E100 electric scooter gets back on the road quickly. Efficient repairs keep your scooter running smoothly and extend its lifespan.
When To Seek Professional Repairs
Seek professional help if the scooter stops working suddenly. Contact a professional if you hear unusual noises. Take the scooter to a repair shop for battery issues. Visit a technician if the scooter won’t charge. Get expert help if you notice electrical problems. Professional repairs can ensure safety and prolong the scooter’s life.
Finding The Right Replacement Parts
Use genuine parts for best performance. Check the model number to find compatible parts. Order parts from the official Razor website. Look for parts at authorized dealers. Avoid cheap knock-offs to ensure safety. Consult the manual for part specifications. Keep spare parts handy for quick fixes.

Credit: electricscooterparts.com
Maintenance Tips For Longevity
Wipe down your scooter weekly. Use a damp cloth for cleaning. Avoid water near the electrical components. Check for dirt and debris on the wheels. Clean the brake pads gently. Keep the handlebars and grips clean. This prevents slipping and damage. Regular cleaning helps the scooter last longer. Ensure all parts are dry before use.
Inspect the tires regularly. Look for wear and tear. Inflate them to the recommended pressure. Check the brakes and adjust if needed. Lubricate the chain monthly. Tighten any loose screws. Ensure the battery is fully charged. Avoid overcharging the battery. Store the scooter in a dry place. Keep the charger away from moisture. Regular maintenance prevents common issues.
Enjoying A Smooth Ride
Fixing your Razor E100 Electric Scooter ensures a smooth and enjoyable ride. With proper maintenance, you can extend its lifespan and improve performance. Keep your scooter in top shape for a seamless experience every time.
Recap Of Key Maintenance Tips
Always keep your Razor E100 clean and free from dirt. Check and tighten all screws and bolts. Charge the battery regularly to ensure it lasts longer. Inspect the tires for any wear and tear. Replace them if needed. Lubricate the chain to keep it running smoothly.
Encouragement To Ride Safely
Wear a helmet and protective gear every time you ride. Follow all traffic rules and be aware of your surroundings. Keep a safe distance from other vehicles and pedestrians. Avoid riding in bad weather conditions. Regularly maintain your scooter for a safe and enjoyable ride. Stay safe and enjoy the ride!
Conclusion
Fixing a Razor E100 Electric Scooter is simpler than it seems. Follow the steps for troubleshooting and maintenance. Ensure you have the right tools and replacement parts. Regular upkeep can prevent future issues. With this guide, enjoy a smooth and safe ride on your Razor E100.


