Best Way to Clean Air Fryer Grease: Quick and Easy Tips

Cleaning an air fryer can be tricky, especially dealing with grease. It often leaves a sticky mess that’s hard to remove.
Air fryers are fantastic for cooking healthier meals. But, the grease buildup over time can be a pain. Regular cleaning is essential to keep your air fryer in top shape. Proper maintenance ensures it works efficiently and extends its lifespan.
In this post, we’ll explore the best ways to clean air fryer grease. We’ll share simple steps and tips to make the process easier. Whether you’re a seasoned cook or new to air fryers, these cleaning methods will help you keep your appliance spotless.
:max_bytes(150000):strip_icc()/faw-toaster-ovens-air-fryers-test-chefman-3-7qt-turbofry-rkilgore-111-487d903950824b019a89d671ec68e254.jpg)
Credit: www.foodandwine.com
Introduction To Air Fryer Cleaning
Cleaning air fryer grease can be simple and effective. Use a soft sponge and mild detergent. Rinse thoroughly to remove all residue.
Cleaning your air fryer is essential for its longevity. Grease can build up quickly. This affects the taste of your food. It can also create a fire hazard. Regular cleaning ensures your air fryer works efficiently. It also keeps your kitchen safe.
Importance Of Regular Cleaning
Regular cleaning is crucial for your air fryer. Built-up grease can lead to unpleasant smells. It can also affect the appliance’s performance. Cleaning after each use prevents these issues. It also extends the life of your air fryer. A clean air fryer cooks food more evenly. Your meals will taste better.
Common Grease Issues
Grease can cause many problems in your air fryer. It can clog the air vents. This reduces airflow and cooking efficiency. Grease buildup can also lead to smoking. This can set off your smoke alarm. It can even cause a fire. Regular cleaning prevents these problems. It keeps your air fryer in top condition.
Essential Cleaning Supplies
To keep your air fryer in top condition, proper cleaning is key. Having the right cleaning supplies makes the job easier and more effective. This section outlines the essential tools and safe cleaning agents you’ll need. Let’s dive into the details.
Recommended Cleaning Tools
Using the right tools can help you clean your air fryer efficiently. Here are some recommended cleaning tools:
- Soft Sponge: A soft sponge prevents scratches on your air fryer.
- Non-abrasive Scrubber: Use this to remove stubborn grease without damaging the surface.
- Microfiber Cloth: Ideal for wiping and drying your air fryer, leaving no streaks.
- Brush: A small brush helps clean the nooks and crannies.
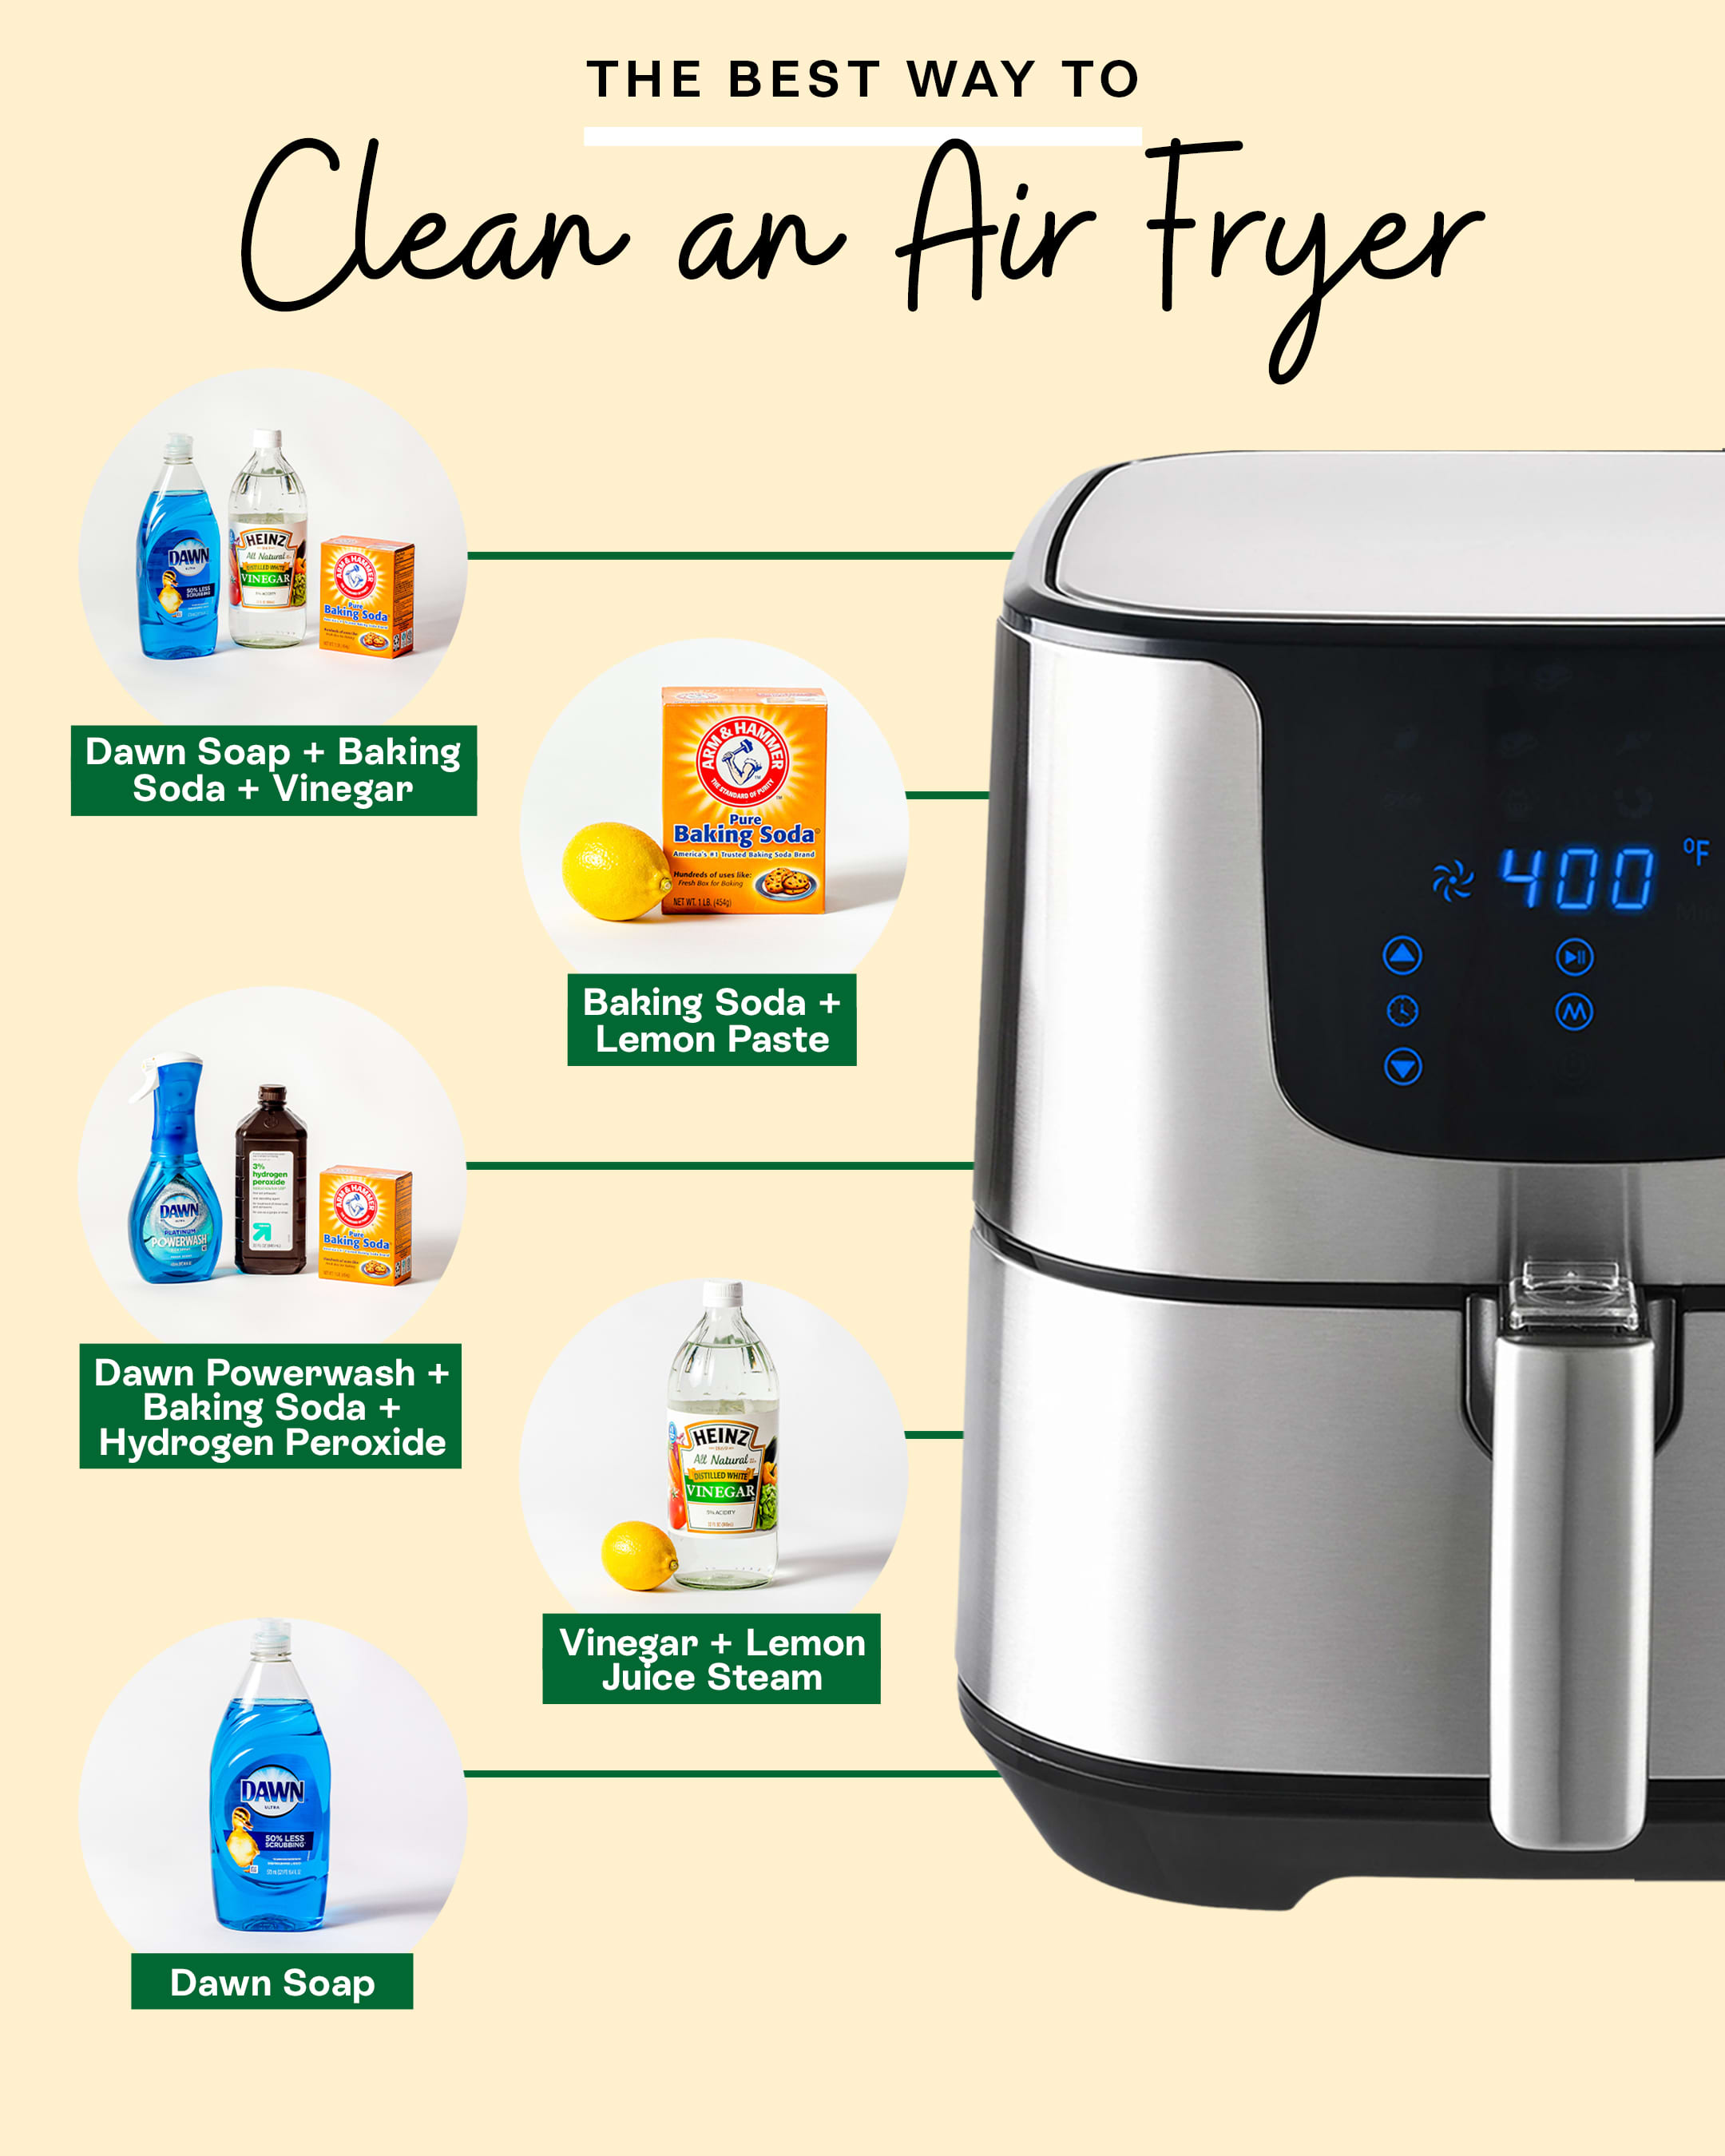
Safe Cleaning Agents
Choosing safe cleaning agents is crucial to maintain your air fryer’s longevity. Here are some safe options:
- Dish Soap: Mild dish soap effectively cuts through grease without harming your air fryer.
- Baking Soda: A natural cleaner that helps tackle tough grease spots.
- White Vinegar: Mix with water to create a powerful cleaning solution.
- Lemon Juice: Natural and effective, lemon juice helps remove grease and leaves a fresh scent.
With these essential cleaning supplies, maintaining your air fryer becomes a breeze. Regular cleaning ensures optimal performance and extends the appliance’s life.
Pre-cleaning Preparation
Cleaning an air fryer can be simple with the right preparation. Proper pre-cleaning steps ensure a thorough clean and extend the life of your appliance. Before diving into the cleaning process, it’s essential to follow a few preparatory steps. These steps help avoid damage and ensure safety.
Unplugging And Cooling Down
First, unplug the air fryer from the electrical outlet. This step is crucial to avoid any electrical hazards. After unplugging, let the air fryer cool down. Grease can be very hot and can cause burns. Waiting for it to cool makes the cleaning process safer and easier.
Disassembling Parts
Once the air fryer is cool, disassemble the removable parts. This usually includes the basket, tray, and any other detachable components. Check the manufacturer’s instructions for guidance. Proper disassembly allows you to clean each part thoroughly. Place the parts on a clean surface, ready for washing.
These simple steps make the cleaning process smooth and effective. Proper preparation ensures safety and a spotless air fryer.
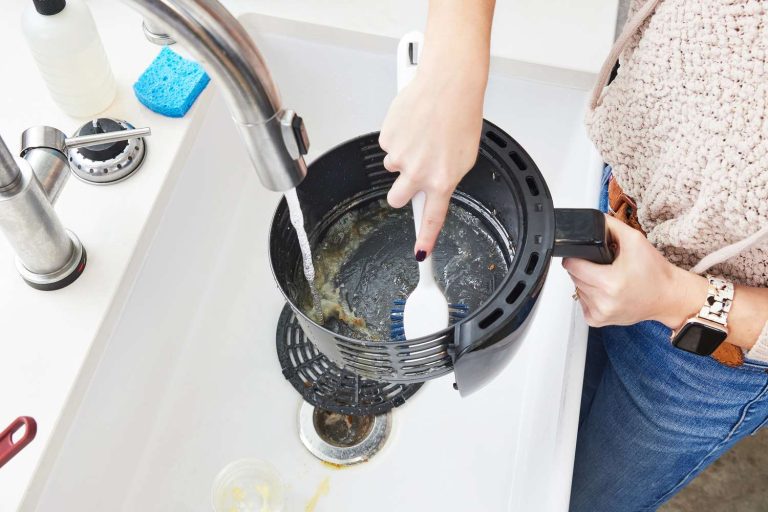
Cleaning The Basket
The air fryer is a fantastic kitchen tool. But cleaning its basket can be a challenge. Grease builds up over time and requires proper cleaning to maintain efficiency and hygiene. Here are some effective methods to clean your air fryer basket.
Soaking Methods
Soaking is a simple and effective way to loosen stubborn grease. Follow these steps:
- Remove the basket from the air fryer.
- Fill your sink with hot water.
- Add a few drops of dish soap.
- Submerge the basket and leave it to soak for 30 minutes.
After soaking, the grease should be easier to remove. If needed, repeat the soaking process.
Scrubbing Techniques
For scrubbing, use the right tools and methods to avoid damage. Start with:
- Soft-bristle brush: Gently scrub the basket using circular motions.
- Non-abrasive sponge: Use a sponge that won’t scratch the surface.
For tougher spots, create a paste using baking soda and water:
Mix 2 parts baking soda with 1 part water.
Apply the paste to greasy areas and scrub gently.
Rinse the basket thoroughly with warm water after scrubbing. Dry it with a clean cloth before reassembling.
Cleaning The Interior
Keeping the interior of your air fryer clean ensures it performs well. It also extends its lifespan. Let’s explore the best ways to clean the interior.
Wiping Down Surfaces
Start by unplugging your air fryer. Allow it to cool down. Use a damp cloth or sponge to wipe down the interior surfaces. This removes loose food particles and light grease.
For better results, use warm, soapy water. Avoid harsh chemicals. They can damage your air fryer. Make sure to dry all surfaces with a clean cloth.
Removing Stubborn Grease
Stubborn grease can be tough. A mixture of baking soda and water helps. Create a paste and apply it to the greasy areas. Let it sit for 10-15 minutes.
Use a soft-bristle brush to scrub the paste off. This removes the grease without scratching the surface. Rinse with a damp cloth.
For very tough grease, use a small amount of vinegar. Vinegar is a natural degreaser. Apply it to the greasy spots and let it sit for a few minutes. Wipe clean with a damp cloth.
Dry all surfaces thoroughly. This prevents rust and keeps your air fryer in good condition.
| Materials Needed | Purpose |
|---|---|
| Damp cloth or sponge | Wipe down surfaces |
| Warm, soapy water | Clean surfaces |
| Baking soda | Remove stubborn grease |
| Vinegar | Degrease tough spots |
| Soft-bristle brush | Scrub gently |
Regular cleaning keeps your air fryer in top shape. Follow these steps for a spotless interior. Enjoy healthier meals with less hassle.
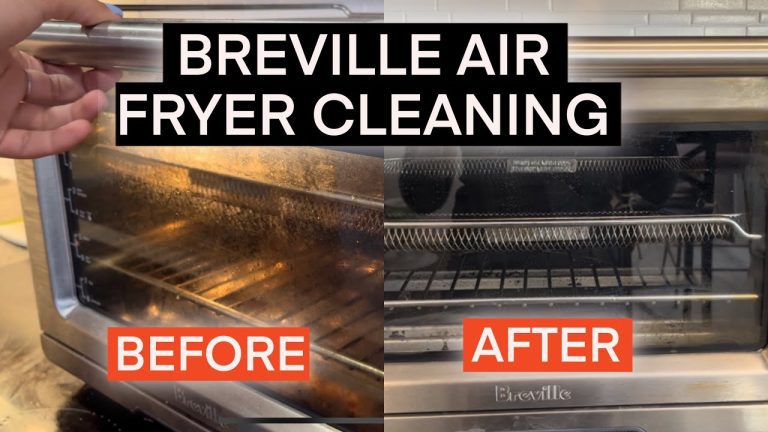
Cleaning The Exterior
Cleaning the exterior of your air fryer is crucial to maintaining its look and functionality. A clean exterior prevents grease buildup, which can affect your cooking. This guide will help you keep the outside of your air fryer spotless.
Surface Wiping Tips
Start by unplugging the air fryer and letting it cool down. Use a soft, damp cloth to wipe the exterior surfaces. Avoid abrasive materials that can scratch.
For stubborn grease spots, mix a small amount of dish soap with water. Apply the soapy water with a cloth and gently scrub the area. Rinse the cloth with clean water and wipe away any soap residue.
If the exterior has any vents, use a small brush to clean them. This helps remove dust and ensures proper airflow.
Handling Control Panel
The control panel is sensitive and needs careful cleaning. Use a slightly damp cloth to wipe it. Do not let water seep into the panel as it can cause damage.
For tough spots, dip a cotton swab in a mild soap solution. Gently clean the buttons and edges of the panel. Dry the control panel with a soft, lint-free cloth.
Remember to avoid using chemical cleaners on the control panel. They can damage the surface and make the buttons sticky.
Drying And Reassembling
Drying and reassembling your air fryer is a crucial step in the cleaning process. This ensures no moisture lingers, which could cause damage. Proper reassembly guarantees your air fryer works safely and effectively.
Proper Drying Methods
After washing the parts, dry them thoroughly. Use a clean, dry towel to wipe each piece. Make sure no water spots are left.
You can also air-dry the parts. Lay them out on a drying rack. Ensure they are in a well-ventilated area.
For small crevices, a cotton swab can help. It reaches tight spots that a towel might miss. This ensures every part is dry.
Reassembling The Air Fryer
Once all parts are dry, begin reassembling. Start with the basket. Place it back in the main unit.
Next, reattach any removable trays or racks. Ensure they fit snugly. Check for any wobbles or loose parts.
Finally, plug in your air fryer. Run it empty for a few minutes. This helps evaporate any remaining moisture.
By following these steps, your air fryer will stay clean and function well.

Credit: www.thekitchn.com
Maintenance Tips
Maintaining your air fryer ensures it works efficiently and lasts longer. Grease buildup can affect its performance. Let’s explore some practical tips to keep your air fryer clean and in top shape.
Regular Cleaning Schedule
A regular cleaning schedule is essential for keeping your air fryer free from grease. Follow these simple steps after each use:
- Unplug the air fryer and let it cool.
- Remove the basket and pan.
- Wash them with warm, soapy water. A soft sponge works best.
- Wipe the inside with a damp cloth. Avoid abrasive cleaners.
- Dry all parts thoroughly before reassembling.
Adhering to this schedule prevents food residue from hardening.
Preventing Grease Buildup
Preventing grease buildup not only keeps your air fryer clean but also ensures better cooking results. Here are some tips:
- Use parchment paper liners or aluminum foil to catch drips.
- Trim excess fat from meats. Less fat means less grease.
- Cook at recommended temperatures to avoid smoke and grease splatters.
- Wipe down the exterior regularly. Grease can accumulate on the outside too.
- Consider using a degreasing spray for tough spots. Ensure it’s safe for your appliance.
Following these tips will help maintain your air fryer’s performance and hygiene.
Troubleshooting Common Issues
Cleaning air fryer grease can be tricky. Sometimes, grease sticks stubbornly. Other times, odors linger. Let’s dive into solutions for these common issues.
Dealing With Persistent Grease
Stubborn grease can be a nuisance. Follow these steps to tackle it:
- Unplug the air fryer and let it cool.
- Remove the basket and pan.
- Soak them in hot, soapy water for 15 minutes.
- Use a soft sponge to scrub away the grease.
- Rinse well with warm water.
If grease remains, make a paste of baking soda and water. Apply it to the greasy areas. Let it sit for 10 minutes, then scrub gently. Rinse thoroughly.
Addressing Odor Problems
Bad odors can spoil your cooking experience. Try these tips to remove them:
- Clean the air fryer basket and pan after each use.
- Wipe the inside of the air fryer with a damp cloth.
- Place a bowl of vinegar inside the air fryer. Let it sit overnight.
For persistent odors, run the air fryer empty at 350°F for 10 minutes. This will help burn off any remaining food particles.
Keeping your air fryer clean ensures it works well and smells fresh. Regular maintenance is key.
Credit: www.thekitchn.com
Conclusion
Cleaning air fryer grease can seem challenging but is manageable. Start with basic tools: warm water, dish soap, and a soft cloth. Regular cleaning prevents buildup and extends your air fryer’s life. Remember to clean after every use. Consistent care keeps your appliance in top shape.
Enjoy healthier meals without the hassle of tough grease. Keep these tips in mind for an easy cleaning routine.