How to Clean a Beard Trimmer?
To clean a beard trimmer, first remove the detachable parts and brush away any hair or debris. Then, use a small brush to clean the blades and rinse them under running water before reassembling the trimmer.
Maintaining a clean and well-functioning beard trimmer is crucial for achieving the perfect trim. Over time, hair and product buildup can clog the blades, leading to inefficient cutting and potential skin irritation. Regular cleaning and maintenance not only improve performance but also prolong the trimmer’s lifespan.
You will learn how to easily clean a beard trimmer to ensure optimal functioning and a hygienic grooming experience. With just a few simple steps, you’ll be able to keep your trimmer in top shape and enjoy a well-groomed beard every time.
Why Regular Cleaning Is Essential For A Beard Trimmer
Importance of cleanliness for optimal performance
If you’re a bearded gentleman, you know just how important it is to keep your beard looking neat and stylish. A well-groomed beard not only enhances your appearance but also boosts your confidence. One essential tool for maintaining a tidy beard is a beard trimmer. However, many men overlook an important aspect of beard trimmer maintenance – regular cleaning.
Cleaning your beard trimmer is crucial for achieving optimal performance and longevity. Over time, hair clippings, dirt, and oils can accumulate in the trimmer’s blades and cause clogs. This buildup can not only hinder the trimmer’s cutting ability but also reduce its overall effectiveness. Therefore, to ensure your beard trimmer performs at its best, it is essential to adhere to a regular cleaning routine.
How neglecting cleaning can affect the trimming experience
Neglecting to clean your beard trimmer can have various negative effects on your trimming experience. Here are a few reasons why regular cleaning is essential:
- Reduced trimming precision: When hair clippings and debris accumulate in the trimmer’s blades, they can hinder the cutting process. This can result in uneven trimming and an overall untidy appearance. Regular cleaning ensures that the blades remain sharp and free from any obstructions, allowing for precise and even trims.
- Inefficient performance: A clogged beard trimmer may struggle to cut through thick or dense facial hair effectively. This can lead to tugging or pulling sensations, making the trimming experience uncomfortable and frustrating. By regularly cleaning your trimmer, you can maintain its efficiency and enjoy a smooth and effortless trimming process.
- Unhygienic conditions: Without proper cleaning, a beard trimmer can become a breeding ground for bacteria and fungi. These microorganisms thrive in warm and moist environments, which can be created by the accumulation of hair clippings and oils. By cleaning your trimmer regularly, you can prevent the growth of harmful germs and keep your facial hair grooming hygienic.
By understanding the importance of cleanliness and the negative implications of neglecting cleaning, you can ensure that your beard trimmer continues to provide optimal performance. In the next sections, we will explore the step-by-step process of cleaning a beard trimmer, as well as some useful tips for maintenance and storage.

Credit: m.youtube.com
Tools And Materials You’Ll Need
Soft Brush or Toothbrush
To begin with, you’ll need a soft brush or toothbrush. This tool is perfect for removing any hair clippings, oil, or debris that may have accumulated in the blades or the body of the trimmer. The soft bristles of the brush will effectively dislodge any particles without damaging the delicate parts of the trimmer.
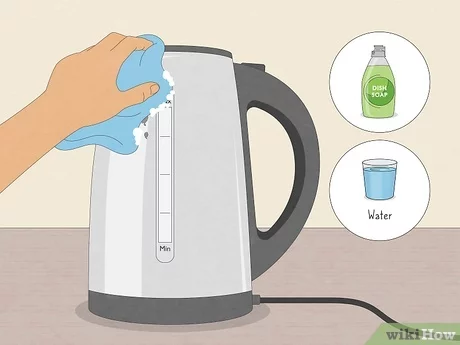
Mild Liquid Soap or Specialized Cleaner
A mild liquid soap or a specialized cleaner is essential for cleaning the blades of your beard trimmer. The soap or cleaner will break down any residue, grease, or stubborn buildup, ensuring that the blades stay sharp and perform optimally. Be sure to choose a product that is specifically designed for use on trimmers to avoid any potential damage to the device.
Cotton Swabs
Cotton swabs are another essential tool for cleaning your beard trimmer. They are perfect for reaching small, hard-to-reach areas, such as in between the blades or around the buttons. Dipping the cotton swab in the cleaning solution will help to effectively remove any remaining residue or dirt, leaving your trimmer squeaky clean.
Small Screwdriver (if applicable)
If your beard trimmer has removable blades or parts, it may require a small screwdriver for disassembly and cleaning. This tool allows you to access hard-to-reach areas and ensures a thorough cleaning process. However, not all trimmers have removable parts, so be sure to consult the manufacturer’s instructions or check the trimmer’s design to determine if a small screwdriver is necessary.
Step 1: Remove Excess Hair
Before diving into the process of deep cleaning your trusty beard trimmer, it is essential to start by removing any excess hair that may have accumulated. One of the easiest and most efficient ways to do this is by using a soft brush or toothbrush.
Using the soft brush or toothbrush to remove loose hair
Grab a soft brush or toothbrush specifically designated for your beard trimmer cleaning needs. This step requires a gentle touch as you brush away any loose hair that may be clinging onto the blades or the trimmer’s body. Carefully brush through the blades, making sure to reach all the nooks and crannies.
Importance of removing hair buildup for optimal functionality
Regularly removing hair buildup from your beard trimmer is crucial for maintaining its optimal functionality. When excess hair gets stuck in the blades or clogs the motor, it can hinder the trimmer’s performance. This buildup can also lead to uneven trimming results, skin irritation, and a shorter lifespan for your trimmer.
By diligently removing excess hair after each use, you can prevent these issues and ensure that your beard trimmer continues to deliver a precise, smooth, and comfortable trimming experience.
Now that we have taken care of removing the loose hair, let’s move on to the next step in the beard trimmer cleaning process.
Step 2: Disassemble The Trimmer
Once you have gathered all the necessary cleaning supplies, it’s time to disassemble your beard trimmer for a thorough cleaning. By removing the detachable parts, you can easily access all the nooks and crannies where dirt, hair, and oil might have accumulated. This step is crucial for maintaining the performance and longevity of your trimmer.
Safely detach detachable parts
Before disassembling your trimmer, make sure it is turned off and unplugged. This ensures your safety and prevents any accidental startup during the cleaning process. Check your trimmer’s manual for specific instructions on how to safely detach the parts, as the process may vary depending on the model and brand.
Typically, detachable parts include the blade assembly, guide combs, and any other attachments that can be removed. Carefully follow the steps provided in the manual to avoid damaging your trimmer, as some parts may require a specific method or tool to detach.
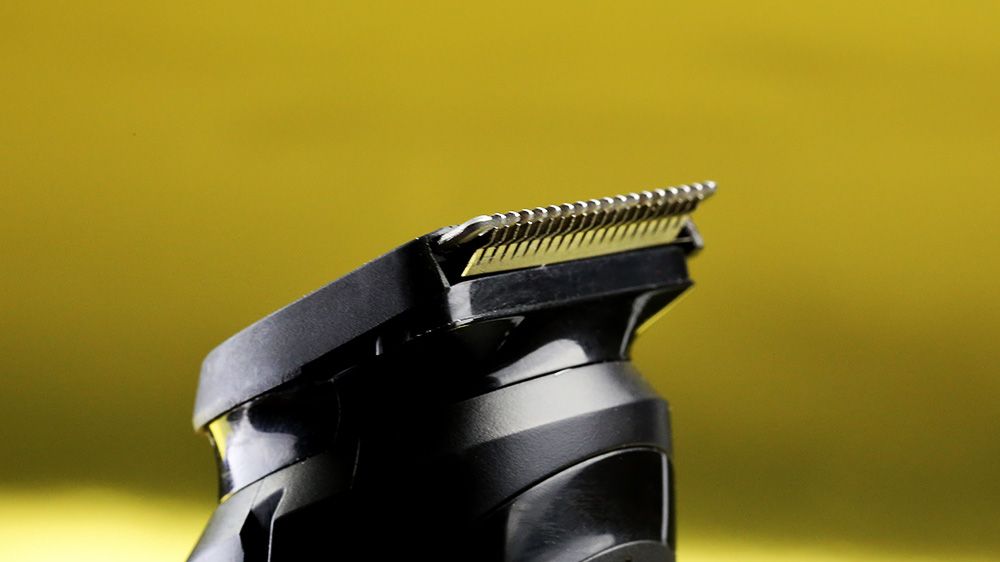
Cleaning the Blades and Attachments
Once you have successfully disassembled the trimmer, focus on cleaning the blades and attachments. These components are especially prone to buildup from hair, oil, and product residue, which can affect the trimmer’s performance and hygiene.
To clean the blades, you can either use soap and water or a specialized cleaner designed for trimmers. Both methods are effective in removing debris and sanitizing the blades. If you opt for soap and water, ensure that you use a mild soap and lukewarm water.
Here is a simple step-by-step process to clean the blades:
- Take the blade assembly and hold it under running water to remove any loose hair or debris.
- Apply a few drops of soap on the blade and gently scrub it using a toothbrush or a dedicated cleaning brush. Make sure to cover all areas, including the gaps between the blades.
- Rinse the blade thoroughly to wash away the soap residue.
- Dry the blades completely using a soft cloth or allow them to air dry before reassembling.
For specialized cleaners, follow the instructions provided on the product packaging for the best results.
Removing and Cleaning the Guide Combs
Guide combs are essential for achieving uniform beard lengths and styles. Similar to the blades, they need regular cleaning to remove built-up hair and product residue. Let’s explore how to clean them:
Detach guide combs carefully
To remove the guide combs, gently pull them away from the trimmer body. Be cautious while detaching them to avoid accidentally bending or breaking the combs. Check the trimmer manual to ensure you are detaching them correctly, as some models may have specific instructions.
Clean guide combs with soap and water
Once you have detached the guide combs, wash them with soap and water to remove any hair or residue. Using a mild soap and lukewarm water, gently scrub the combs with a soft brush to dislodge any debris. Rinse them thoroughly and pat them dry with a towel or allow them to air dry completely before reattaching.
Regularly cleaning and maintaining your beard trimmer, including its blades and attachments, is essential for optimal performance and durability. By following these steps to disassemble and properly clean your trimmer, you can ensure a hygienic trimming experience and extend the lifespan of your favorite grooming tool.
Step 3: Cleaning The Housing Unit
After you have thoroughly cleaned the blades and comb of your beard trimmer, it is time to focus on cleaning the housing unit. The housing unit is the exterior part of the trimmer that holds all the internal components together. Keeping this part clean is crucial to ensure the longevity and optimal performance of your device. In this step, we will discuss how to properly clean the housing unit of your beard trimmer.
Subheading: Wiping Down the Exterior
Using a cotton swab or a soft cloth, you can effectively clean the exterior of the housing unit. This is an important step as it helps eliminate any dirt, debris, or product buildup that might accumulate over time. When wiping down the exterior, pay special attention to crevices and hard-to-reach areas, as these places are more prone to collect dust and grime. Follow these simple steps to properly wipe down the exterior:
- Dampen a cloth or cotton swab slightly with warm water. Avoid using excessive moisture to prevent any damage to the trimmer.
- Gently wipe the entire surface of the housing unit, applying light pressure. Ensure that you cover all areas, including the front, back, and sides of the trimmer.
- For hard-to-reach areas and crevices, gently insert the cotton swab and maneuver it delicately to remove any dirt that might have accumulated. Take your time and be thorough in cleaning these areas.
- After wiping down the entire exterior, use a dry cloth or tissue to remove any remaining moisture. This will prevent any water damage and ensure the trimmer is completely dry before further use.
By regularly wiping down the exterior of the housing unit, you can maintain a clean and hygienic beard trimmer. This not only helps to prevent any bacterial growth but also ensures that your trimmer stays in optimal working condition. With just a few minutes of cleaning, you can extend the lifespan of your trimmer and enjoy a consistently neat and well-groomed beard.
Step 4: Drying And Reassembling The Trimmer
Now that you have thoroughly cleaned the individual parts of your beard trimmer, it’s time to move on to the final steps – drying them and reassembling the trimmer. Follow these simple instructions to ensure your trimmer is ready for use again.
Drying the Parts
After cleaning the trimmer, it’s crucial to let all the parts dry completely before reassembling. This will help prevent any moisture from causing damage to the electrical components or leading to the growth of mold or bacteria. Here’s how you can dry the parts effectively:
- Using a clean towel, gently pat dry each component to remove any excess water.
- Place the parts in a well-ventilated area or near a fan to allow them to air dry naturally.
- Avoid using a hairdryer or any other heat source, as it may warp or damage the plastic parts.
- Ensure that each part is thoroughly dry before moving on to the reassembly process. This may take a couple of hours, depending on the conditions.
Reassembling the Trimmer
Now that the parts are completely dry, it’s time to safely put them back together to restore your beard trimmer to its full functionality. Follow these steps to ensure a proper reassembly:
- Step 1: Begin by identifying the correct placement of each part. Refer to the user manual if you are unsure.
- Step 2: Start with the blade and align it properly with the motor unit. Ensure that it securely fits into place.
- Step 3: Next, attach the comb guide or any other additional attachments if applicable. Make sure they are firmly attached and aligned with the blade.
- Step 4: Carefully insert the cleaned and dry battery, if your trimmer is battery-operated. Check the polarity to ensure proper installation.
- Step 5: Once all the parts are in their correct positions, gently push them together until you hear a click or feel them securely lock into place.
- Step 6: Give the trimmer a quick test by turning it on and off to ensure that it is working properly and all the parts are functioning as intended.
By following these steps, you have successfully cleaned, dried, and reassembled your beard trimmer, leaving it ready for your next grooming session. Regular cleaning and maintenance will not only keep your trimmer in optimal condition but also ensure a hygienic and pleasant grooming experience every time.
Step 5: Regular Maintenance Tips
Regular maintenance is essential to keep your beard trimmer in top condition and ensure it performs optimally every time you use it. Following a few simple steps for regular maintenance can help extend the lifespan of your trimmer and keep your beard looking neat and well-groomed.
Subheading: Oiling the Blades (if applicable)
One of the most important aspects of regular maintenance for a beard trimmer is oiling the blades. Blade oil helps to lubricate the blades and reduce friction, which can prevent wear and tear, as well as prolong the life of the trimmer.
To oil the blades, follow these steps:
- Ensure the trimmer is turned off and unplugged.
- Apply a few drops of blade oil to the blades.
- Distribute the oil evenly across the blades by turning the trimmer on for a few seconds.
- Wipe off any excess oil with a clean cloth or tissue.
Subheading: Storing the Beard Trimmer
Proper storage of your beard trimmer is crucial to prevent damage and maintain its performance. Here are a few tips to help you store your trimmer correctly:
- Always store your trimmer in a clean and dry place.
- Use the protective cap or cover provided with the trimmer to keep dust and debris away from the blades.
- Avoid storing the trimmer in a humid or excessively hot environment, as this can cause damage to the motor and other components.
Subheading: Frequency of Cleaning
Knowing how often to clean your beard trimmer is crucial for maintaining its performance and hygiene. The frequency of cleaning depends on how frequently you use the trimmer and the thickness of your beard. Here are some general guidelines:
- Clean the trimmer after each use to remove any hair or debris that may have accumulated.
- For regular use, deep clean the trimmer once a week to get rid of any buildup or residue.
- If you have a particularly thick beard or use the trimmer extensively, you may need to clean it more frequently, such as every few days.
Following these guidelines will help ensure that your beard trimmer stays in great shape and continues to provide you with precise and effortless grooming.
Frequently Asked Questions Of How To Clean A Beard Trimmer
What Can I Use To Clean My Beard Trimmer?
To clean your beard trimmer, simply remove the detachable parts and rinse them with warm water. Use a brush or cotton swab to remove any hair or debris. Avoid immersing the entire trimmer in water. Regular cleaning will maintain its performance and prolong its lifespan.
How Do You Clean And Disinfect A Trimmer?
To clean and disinfect a trimmer, follow these steps:
1. Detach the blades and rinse them under running water.
2. Use a soft brush to remove any hair or debris.
3. Soak the blades in a mixture of warm water and mild soap for a few minutes.
4. Rinse the blades again and dry them thoroughly before reattaching.
5. To disinfect, wipe the trimmer with a cloth soaked in rubbing alcohol.
How Do You Clean Beard Trimmer Blades?
To clean beard trimmer blades, follow these steps:
1. Turn off the trimmer and unplug it.
2. Remove the trimming head or blade assembly.
3. Use a brush or toothbrush to remove hair and debris from the blades.
4. Rinse the blades under running water or use a cleaning solution.
5. Dry the blades thoroughly before reassembling and storing the trimmer.
How Do You Clean A Trimmer At Home?
To clean a trimmer at home, follow these steps:
1. Remove any hair or debris from the blades with a brush.
2. Use a cloth or cotton swab dipped in rubbing alcohol to sanitize the blades.
3. Wipe down the trimmer body with a damp cloth.
4. Let the trimmer air dry before storing it.
5. Repeat this cleaning process regularly to maintain the trimmer’s performance.
Conclusion
Maintaining a clean beard trimmer is essential for achieving a precise and hygienic grooming experience. Regular cleaning not only extends the lifespan of your trimmer but also ensures a safe and effective trimming session. To keep your beard trimmer in top-notch condition, following the manufacturer’s instructions and using the right cleaning tools is important. Maintaining a consistent cleaning routine is also crucial. Doing so ensures that your trimmer continues to help you achieve that perfectly groomed beard every time.